Academy 1/35 M151A2 'Mutt'
| KIT #: | 1324 |
| PRICE: | $5.00 in a bag |
| DECALS: | Several options |
| REVIEWER: | Scott Van Aken |
| NOTES: |
| HISTORY |
The Truck, Utility, l/4-Ton, 4x4, M151 (M151 ) was the successor to the Korean War M38 and M38A1 jeep Light Utility Vehicles. Commonly referred to as a "jeep" or "quarter-ton", it was produced from 1959 through 1982 and served in the Vietnam War. The M151 had a monocoque design making it roomier than previous jeep designs, and incorporated an independent suspension with coil springs. It has since been replaced by the larger AM General HMMWV in most utility roles in frontline use. With some M151A2-units still in U.S. military service in 1999, the M151-series achieved a longer run of service than that of the WW2 MB/GPW, M38 and M38A1 series combined.
 First put into service in Vietnam, the M151 played an active part in
American military operations well into the 1980s, when it was phased out in
favor of the Humvee. Despite its official replacement, the M151 had some
distinct advantages over its much larger and heavier successor, like being small
enough to fit inside a CH-53 heavy transport helicopter. This flexibility was
one of the reasons the U.S. Marine Corps deployed M151 FAV (Fast Attack Vehicle)
variants through 1999, in places like Kosovo. It currently serves in U.S.
special forces units as a FAV.
First put into service in Vietnam, the M151 played an active part in
American military operations well into the 1980s, when it was phased out in
favor of the Humvee. Despite its official replacement, the M151 had some
distinct advantages over its much larger and heavier successor, like being small
enough to fit inside a CH-53 heavy transport helicopter. This flexibility was
one of the reasons the U.S. Marine Corps deployed M151 FAV (Fast Attack Vehicle)
variants through 1999, in places like Kosovo. It currently serves in U.S.
special forces units as a FAV.
Various models of the M-151 have seen successful military service in 15 different NATO countries and M151s were sold to many countries. Currently, the M151 is used by over 100 countries worldwide.
The M151A2 (1970) fielded a significantly revised rear suspension that greatly improved safety in fast cornering. The M151 now had Semi-trailing arm suspension instead of the more dangerous swing arm suspension of the earlier version. Many smaller upgrades including improved turn signals. The A2 can be identified by the large combination turn signal/blackout lights on the front fenders, which also had been modified to mount the larger lights, as opposed to earlier A1's that had flat front fenders.
| THE KIT |
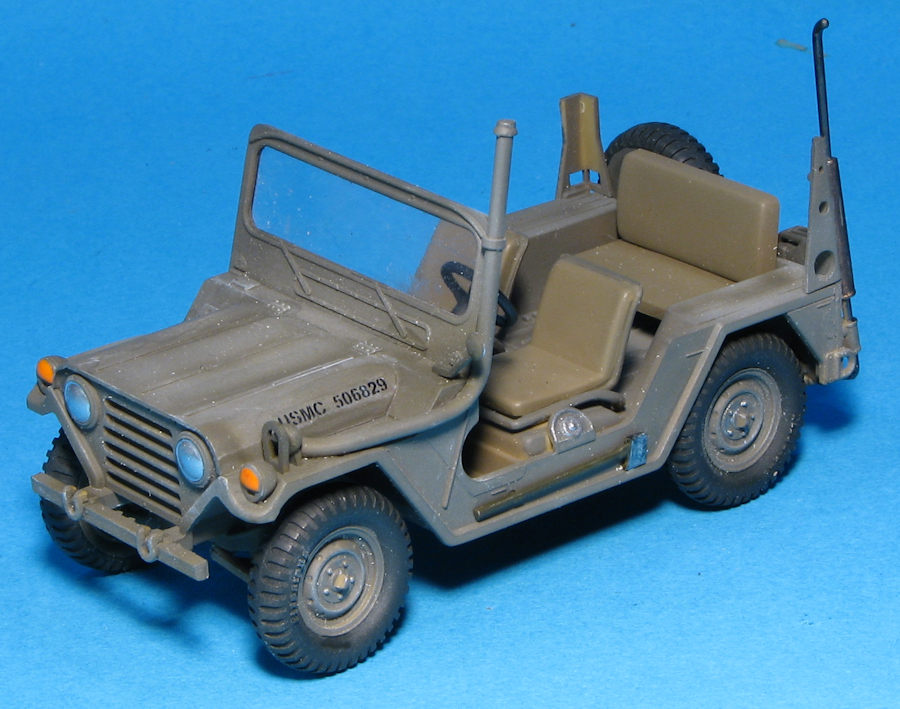
Academy's kit is really rather basic as these things go. There are three tan sprues, one of which is for the mortar, three standing figures and a few bits and pieces. The body is a single piece and like the real vehicle, all of the suspension pieces attach to the body itself. There are some ejector pin marks on the underside to deal with, but many will be hidden from all but the most invasive lights. There is no engine, this kit being a curbside. The parts also have some rather major mold seams that will need to be cleaned up.
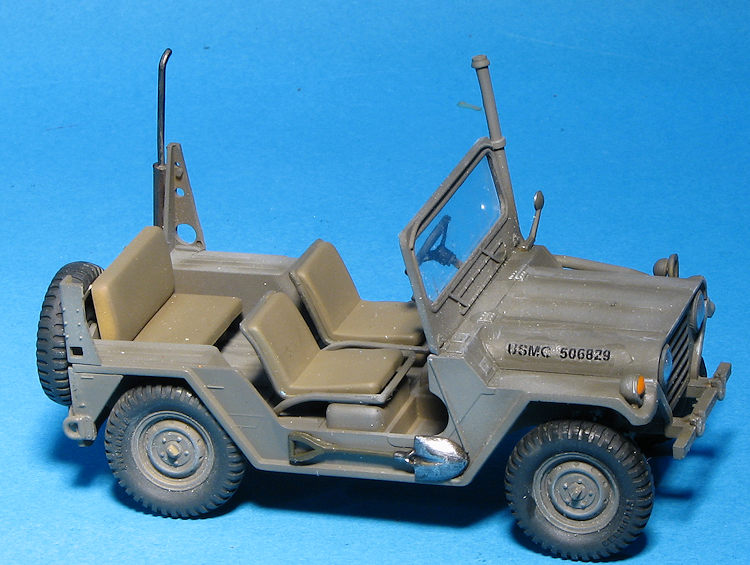
 The interior is equally basid with just a pair of seats in the front .
One can build the kit with the windscreen down, but it will require some
cutting. There are no clear bits but a piece of pre cut acetate is provided for
the windscreen. Wheels have separate inner sections that hold a piece that
should allow the wheels to roll if that is what is desired.
The interior is equally basid with just a pair of seats in the front .
One can build the kit with the windscreen down, but it will require some
cutting. There are no clear bits but a piece of pre cut acetate is provided for
the windscreen. Wheels have separate inner sections that hold a piece that
should allow the wheels to roll if that is what is desired.
A driver is provided and there is a post mounted machine gun (M-60?) that fits behind the driver. If you don't want this feature, you'll need to fill in the hole for it. There is also a fording kit with a tall exhaust if that is desired. Other bits that can fit in the back is a radio set on one of the fenders and a rear seat. A cable breaker can be installed on the front bumper as well.
The instructions are fairly well done but no color information is supplied at all during the build. There are generic colors called out for the box art vehicle. Decals cover several boxings and the instructions have you use the box art for placement. Frankly, this is a case of hunting up images on the 'net and using those for your vehicle. It seems that the majority of serials are for USMC versions.
| CONSTRUCTION |
I have had this kit for well over ten years, its initial purchase lost in the fog of time. Many times I have pulled the bag out of the box of bagged kits with intentions of building it, but it simply went back into the box. This time I started removing bits from the sprue so its construction was underway.
The first step is to open some holes. This is for the intake and exhaust pipes. Also note that the kit has quite a few ejector pins, some of which will be visible when the kit is finished so it is up to the builder to decide whether he wants to deal with these.
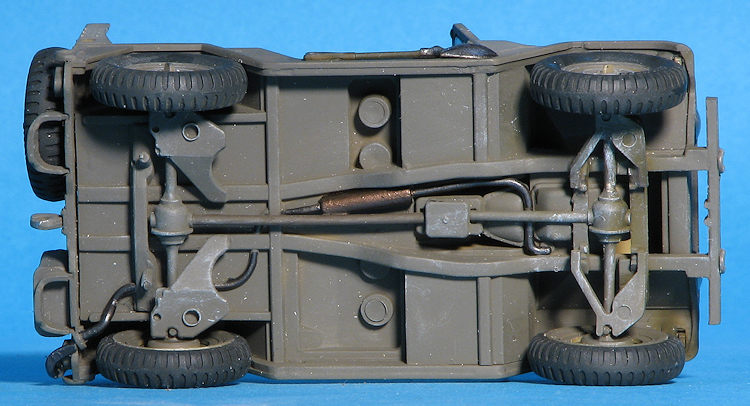
 Assembly itself is pretty standard stuff. I started by
attaching all the various under chassis bits, including the exhaust. Now if one
is really a stickler, one may want to prepaint all these parts prior to
assembly, but I did not. Where one does havce to pay attention is regarding the
proper fit of the pieces that will attach to the wheels. When I put the wheels
on this one towards the end of the build, one front wheel was well off the
ground, requiring me to break free some bits to get a proper sit.
Assembly itself is pretty standard stuff. I started by
attaching all the various under chassis bits, including the exhaust. Now if one
is really a stickler, one may want to prepaint all these parts prior to
assembly, but I did not. Where one does havce to pay attention is regarding the
proper fit of the pieces that will attach to the wheels. When I put the wheels
on this one towards the end of the build, one front wheel was well off the
ground, requiring me to break free some bits to get a proper sit.
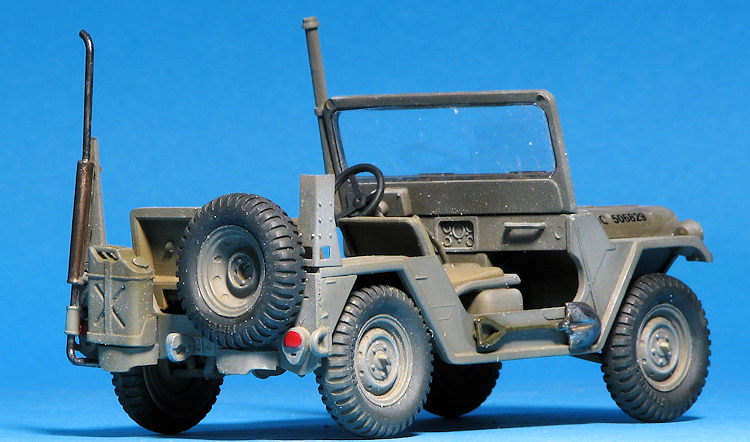
With the chassis pieces in place save for the wheels, I turned my attention to the rest of the vehicle. There are several options as you have read in the kit description and I decided to go with the 'wading' gear of a long carb intake piece and the exhaust. This required some holes to be drilled out, though fit was quite good. I did manage to break the end of the exhaust several times, however. There are a pair of rear supports one has to attach. One is to hold a command radio antenna and the other a brace for the extended exhaust. I did not install the command radio in this as it did not make sense to have it and the deep wading system on the same vehicle, so that brace has nothing on it.
It was then a matter of slowly attaching the other pieces. I also did not choose to mount the pylon mounted machine gun, so there is a hole in the floor as that was pre-drilled. I didn't pick the option of having the windscreen folded down either. I did like the way the wheels were designed as it made it easy to paint the tires and I found it easy to mask the wheels on the other side with kabuki tape.
| COLORS AND MARKINGS |
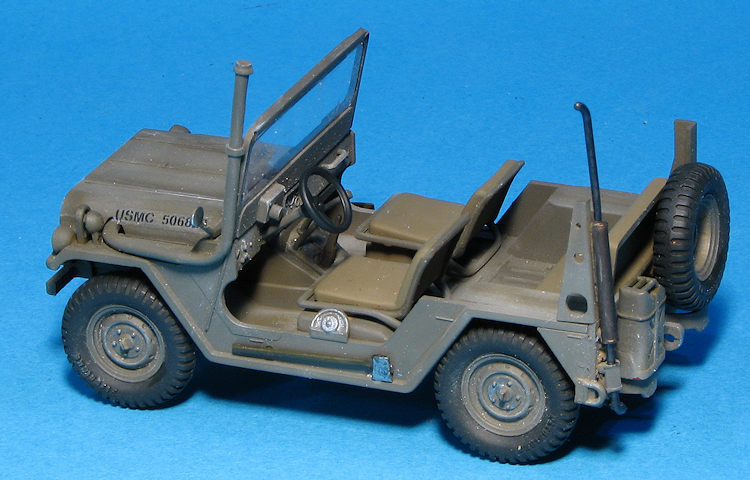 When it came to paint, I chose the overall olive drab
scheme. I used several shades of this and the result seems pleasing enough. The
seats were painted khaki, which offers enough difference in color over the OD to
be noticed. I also did some dry brushing, though I'm not sure it was all that
effective. I used a bottle of Testors silver paint that has a 15 cent price on
the lid for the head lights, red from the Gunze line and orange from the Tamiya
line.
When it came to paint, I chose the overall olive drab
scheme. I used several shades of this and the result seems pleasing enough. The
seats were painted khaki, which offers enough difference in color over the OD to
be noticed. I also did some dry brushing, though I'm not sure it was all that
effective. I used a bottle of Testors silver paint that has a 15 cent price on
the lid for the head lights, red from the Gunze line and orange from the Tamiya
line.
The last item was the windscreen. This is a piece of acetate that needs to be cut out. I mounted it using clear paint as I doubt if any glues would hold it. I also found the decals to me pretty horrid. I only used a pair of serial numbers for the hood, but they took forever to come clear of the backing and then they had no stick. I tried the 'puddle of Future' trick and the decals stick, but they silvered pretty badly as well.
| CONCLUSIONS |
So there you have it. It isn't a bad kit, just not a good one. Were I to do another of these, I would put my efforts into something like the Tamiya kit. There, one can be assured of a flash-free kit with decals that would probably work a lot better.
| REFERENCES |
 https://en.wikipedia.org/wiki/M151_Truck,_Utility,_1/4-Ton,_4%C3%974
13 January 2017
Copyright ModelingMadness.Com. All rights reserved.
Thanks to me for the review kit.
If you would like your product reviewed fairly and fairly quickly, please contact the editor or see other details in the Note to Contributors.
Back to the Main Page Back to the Review Index Page Back to the Previews Index Page