 Glencoe 1/144(?) Mars Liner
Glencoe 1/144(?) Mars Liner
Kit Number: 05914
Price: $10.00
Media: Injected Plastic
Decals: One version for a FASTWAY Express rocket
Reviewer: Scott Van Aken
Date of Review: 20 September 1997
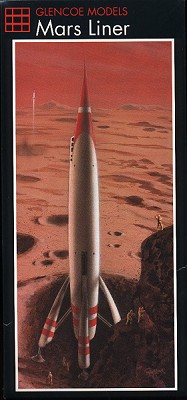
Glencoe Models has done many of us a great service by re-releasing some very old and fun kits. I have bought a number of them as I am sure you have as well. This particular jewel is a Mars Rocketliner. I have been told that this was originally a Strombecker kit and as many of you know, was part of the Tomorrowland exhibit at Disneyland for many years.
You get 23 pieces of white plastic and a clear sprue for a myriad of windows . You also get a nice sheet of decals by Vitachrome. As this is a very old mold, I was not surprised by the large number or sink marks and injector marks on nearly every piece of white plastic. All the pieces has large mold lines to clean up. I would be willing to bet that I spent at minimum a third of the build time cleaning parts and puttying.
First part is the cockpit window. It doesn't fit at all well, even after cleaning up the frame into which it fits. It is something you just have to deal with and accept the best. Next the blanking plates for the landing gear need to be placed in each of the fuselage thirds. Now it appears to be possible to build this kit 'in flight', but it will require you to do some modifications as the kit is not designed for this option. After the plates are installed, it is time to install the myriad cabin windows. I left them off completely as they would be a chore to mask and with this kind of kit, what's the point of the extra work. It looks just fine when finished.
Once you have decided what to do about installing the windows, it is time to join together the fuselage. It is a three piece affair and easy to assemble. I glued them together and used tape to hold them until dry. Then the nose cone was glued on. Once that was done, it was time to apply the first of several applications of putty. There are a lot of sink marks on each piece that correspond with the pins and sockets used to align the parts. This is true of all parts. While that was drying, the three landing legs were assembled, puttied and sanded. Once these assemblies are to your liking, it is time to attach the landing legs to the fuselage. Each is attached at the top end and by a dual strut. This strut fits well into the leg, but no to the attachment points on the fuselage as these points are too small. What I did was glue them anyway and then sand off the parts that protruded. The landing pads as well as the rocket exhaust are basically snap fits and require no gluing.
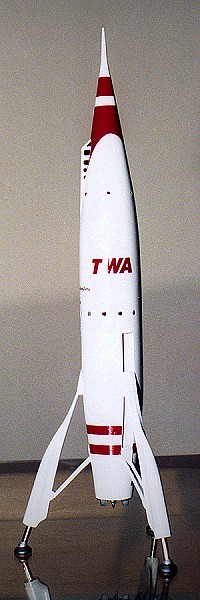
Final job is painting and decal application. This was primered and painted white overall, including the cockpit canopy. When that was dry, I then started to apply decals. To my horror, the first decal I tried (the large, red, nose flash) started to come apart in the water. I salvaged as much as possible and put it on the kit. The rest of the sheet was recoated and I was able to use much of it. I have asked Glencoe for a new sheet so I hope to get it by the time the photo is taken (My request was ignored). Since the original kit was a TWA rocket and TWA did not license this kit, Glencoe labeled the carrier as FASTWAY. I simply cut away the FAS and Y to get TWA. It was complete with three names and the other red stripes of TWA of the 50's. A word of warning on the decal placement guide. The decals numbered 2 and 3 are reverse of what they should be. #3 is curved and will conform to the fuselage. #2 is straight and won't. I found this out after applying two of the #2 decals to the fuselage and then wondering why they don't fit. As a result, I have no red stripes on the landing legs unless Glencoe comes through with a new sheet. The red is also a bit transparent and any overlapping of decals is distinctly darker.
After decal application, I painted the cockpit windows black and the landing pads metallic with chrome struts using Bare Metal foil. What I thought would be a four day project was really a three week journey into the past with this futuristic kit. I had problems, but nothing an intermediate builder could not overcome. I like the subject and have two more in the pile. This next time, I think I'll use a set of airliner decals. What do you think; Delta, PanAm or maybe JAL or Air India?
As a very late note (2010), the revived Glencoe has reissued this kit, however, at a considerably higher retail price.
Copyright ModelingMadness.com. All rights reserved.
Back to Reviews Page 2018