| KIT #: | 9001 |
| PRICE: | $24.95 MSRP |
| DECALS: | Martians don't do decals |
| REVIEWER: | Scott Van Aken |
| NOTES: | New mold, semi-snap kit |
| HISTORY |
 owner about being quiet and staying seated, once the movie started, we were then raptly glued to the screen while the tales of horror and imagination unfolded before us. Later generations would have to get their fix from the TV, but many of us saw these movies on the big screen.
 Some of these were actually very well done and some of the best included the magic of George Pal, who was able to provide superb special effects that were the pinnacle of the day. One of the best movies on which he worked was War of the Worlds. Though only loosely based on the H.G. Wells original, still had all of the proper plot settings including the initial surprise at the Martian's initial appearance, the cold devastation created by these creatures and the miraculous saving of the world. This was carried over into the more recent 2005 film with more accuracy to the book, but in the mind of many, not quite as cool as the 1953 version.
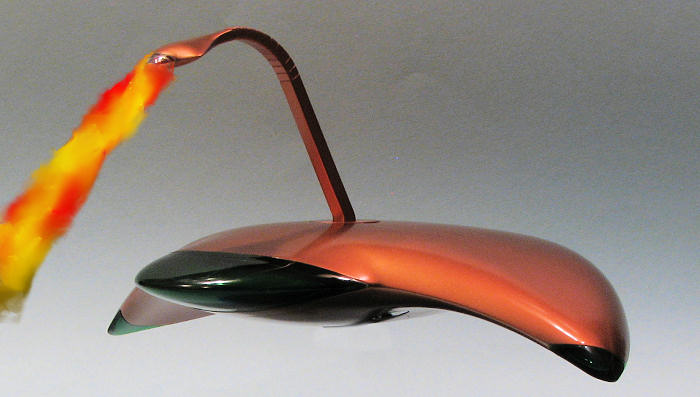
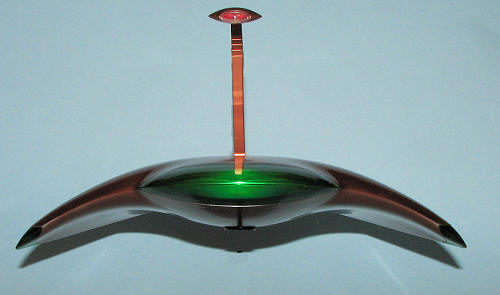
WIthout a doubt the star of the show were the Martian war machines. These were kept aloft by mysterious energy beams and used a heat ray that obliterated everything in its path. These bright copper colored machines had large green transparent areas on the front and side with the cobra-like heat shield raised above its glimmering fuselage. Without a doubt, one of the neatest sci-fi craft to have ever been developed.
| THE KIT |
Prior to the release of this kit, the only way you could build a Martian war machine was either scratchbuilding it or purchasing one of the many and very expensive resin kits. Well, the cheap amongst us can now breathe a sigh of relief as Pegasus Hobbies has produced a very nice 1/48 kit of this machine.
 We expect simplicity and easy construction from Pegasus Hobbies and we get it with this kit. Less than 20 parts for this one. Seven for the heat ray and eight for the body of the vehicle plus a couple for the display stand. This would be what I'd consider a week end build for the most part. The superbly molded parts are in either a cream plastic or clear. For the latter, most are in a clear green and one is a clear red. This kit is begging for a lighting kit. It comes in a large box with the fuselage sections already together so it will fit. Getting the two halves apart was a bit of a challenge so you know the fit will be good. No interior, no decals and really, the instructions for most of us will be an afterthought. The transparent bits are all keyed so it will take a lot of effort to screw it6 up. The sturdy base has a bottom section that is a portion of the Atlantic Ocean and will be the most difficult part of the kit to paint.
Instructions are almost not needed, but we have them anyway. Generic painting information is provided for the base, but none for the main model. The cobra head ray gun is designed to swivel and a screw is provided to keep it in place. This is really very much a near snap kit, but the dedicated modeler will put in the effort needed to smooth out the rough spots.
| CONSTRUCTION |
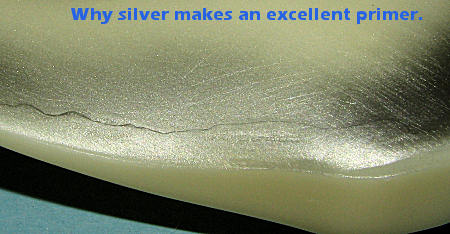
 Construction on this one is very simple and much of the time will be spent filling gaps. I first glued the upper and lower fuselage sections together, filling the seams around the lower edge with super glue. In fact, I did that a couple of times, spraying metallic silver on the seam area each time to highlight what I'd missed in the previous sanding. I find that this method is a sure-fire way to be sure nothing is missed. It took several applications over several days to get this completely done, and while I could have probably done a bit more, three times is about all I'll do when it comes to filler and sanding.
The other part of the kit is the ray gun. It looks like one could build up the main body of the gun, then build the 'head' and simply slide one into the other when both are done. Not the case at all so be forewarned. The seam on the 'neck' is particularly difficult to handle as there are all those flex joint lines that need to be rescribed. Thanks to a somewhat poor fit of the side insert to the 'neck', I eventually sanded away almost all of the joint lines on that side. Fortunately, they are short, straight lines so easy to rescribe.
Once these pieces are fully done, it is time for painting.
| COLORS & MARKINGS |
 No markings so I'll carry on to the painting part. To me, this looks like it should be copper in color. I chose a color from Vallejo that looked pretty good. Hoping that it would stick well to bare plastic, I sprayed it on using my Aztek A 480 airbrush. The wide pattern nozzle was a real help and the color went on well, though it was a bit on the matte side. It dries to the touch in just minutes though I let it set a few hours before picking it up and polishing the surface with a soft cloth. I'd recommend an undercoat for this paint as quite a bit came off on the cloth. It did show a few areas I missed so the parts returned to the workbench for a bit more filler.
Back to painting, once I had the coat in place and gave it wipe with a soft cloth, I used Testors Metalizer Sealer to keep the paint in place. This has the benefit of drying quickly and is quite resistant to damage. To be sure, I used some Testors automotive clear coat to put on a thicker layer and provide some additional shine, though I left the 'neck' and gun pretty matte.
The base was painted with Tamiya blue acrylic and then the other colors were applied from the Vallejo line with a brush. I'm sure the artists amongst us would do a better job, but it does fulfill the purpose and looks quite nice.
| FINAL CONSTRUCTION |
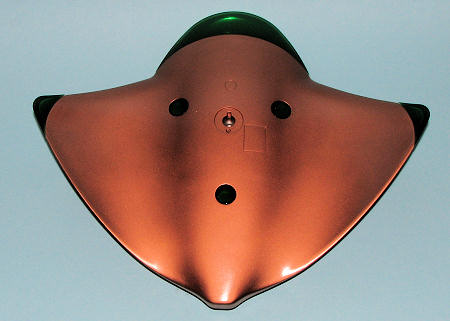 Once the parts had been painted, it was pretty much a snap the rest of the way. I had thought about putting in some Bare Metal Foil Chrome behind the green parts, but the plastic is somewhat opaque and little that is back in there will be seen. Be sure to match the parts with the various openings. These will only look good being installed in one direction. Pay particular attention to the ray gun lenses. There is a small additional opening on one side and there are corresponding small tabs that will fit into that opening. If the part isn't flush, it is installed wrong. Ask me how I know!
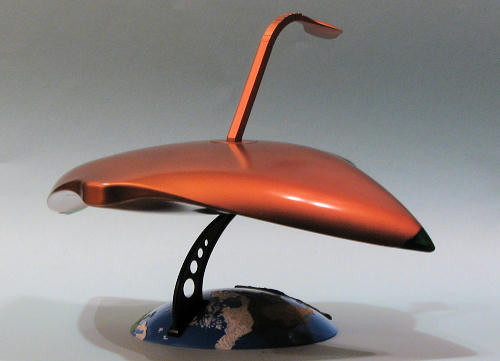
The last thing to do was to screw in the ray base, stick the ray gun section into it (glue it if you wish) and plunk it on the stand. While the stand is a tight fit into the base, the bit that fits into the craft is looser so you 'may' want to glue it in place. Of course, this will seriously inhibit its play value. Mine was able to chase down alien giant felines with great success; the ray gun doing it job to rid the planet of these pests.
| CONCLUSIONS |
 This was a fun build. The fit is quite good, though the gaps in the fuselage halves are also quite large. I would have to say that 90% of the time building this was in filling and sanding the fuselage seams and painting. Those who just want to grab a tube of glue and a rattle can could probably have this done in a day. As such, it is a great kit for a youngster and for those of us who require a bit more finish to our toys, it can be done in less than a week, as you have seen.
March 2009
For this one, you can send your praises to me for the wisdom of buying this one; they will be gratefully accepted.
If you would like your product reviewed fairly and fairly quickly, please contact the editor or see other details in the Note to Contributors.