| KIT #: | WLS074 |
| PRICE: | 250 yen when new (about 75 cents in 1974) |
| DECALS: | None |
| REVIEWER: | Scott Van Aken |
| NOTES: | Waterline. Part of a double kit |
| HISTORY |
The
I-15 was
a Japanese B1 type submarine. She was completed at Kure Navy Yard on September
30, 1940, whereupon she entered into service with the Imperial Japanese Navy.
Her first and only commanding officer was Commander Nobuo Ishikawa. I-15 operated
off the north coast of Oahu during the raid on Pearl Harbor. Her second wartime
patrol, in May and June 1942, took her to the Aleutians, where she conducted
reconnaissance of several islands. I-15 's
third and final patrol took place from August to November 1942, when she
operated i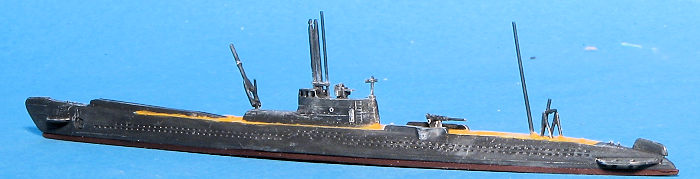 n the Solomon Islands in the South Pacific, supporting the Japanese
efforts to hold Guadalcanal. One source (Morison) suggests that I-15 hit
the battleship USS North
Carolina with
a torpedo on September 15, 1942, but more recent authorities (Hackett & Kingsepp)
maintain that the torpedo came from another submarine operating in the area, I-19.
On November 10, 1942, a U.S. ex-destroyer (modified to a fast minesweeper), USS Southard (DMS-10)
sank I-15 in
Cape Rechereche, San Cristobal, with all hands lost. Commander Ishikawa was
promoted to the rank of Captain posthumously. On December 14, 1942, more than
one month after I-15 sunk, the USS Wahoo (SS-238) sank an unknown submarine
which it misidentified as the I-15. Other records state the I-15 was
sunk off San Cristobol on 2 November 1942 by destroyer USS McCalla.
The I-15 carried a small Yokuska E14Y 'Glen' reconnaissance floatplane.
n the Solomon Islands in the South Pacific, supporting the Japanese
efforts to hold Guadalcanal. One source (Morison) suggests that I-15 hit
the battleship USS North
Carolina with
a torpedo on September 15, 1942, but more recent authorities (Hackett & Kingsepp)
maintain that the torpedo came from another submarine operating in the area, I-19.
On November 10, 1942, a U.S. ex-destroyer (modified to a fast minesweeper), USS Southard (DMS-10)
sank I-15 in
Cape Rechereche, San Cristobal, with all hands lost. Commander Ishikawa was
promoted to the rank of Captain posthumously. On December 14, 1942, more than
one month after I-15 sunk, the USS Wahoo (SS-238) sank an unknown submarine
which it misidentified as the I-15. Other records state the I-15 was
sunk off San Cristobol on 2 November 1942 by destroyer USS McCalla.
The I-15 carried a small Yokuska E14Y 'Glen' reconnaissance floatplane.
| THE KIT |
 Submarine kits are generally pretty low on parts and when you are dealing
with 1/700, that is very much the case. Most of the skinny bits are far too
thick for the scale, but since this kit was released in the early 1970s
prior to the widespread use of photo etch, it is to be expected. When I
bought my first copy of this kit in 1974, it included some weights to attach
to the waterline hull, but those were not included in this particular kit.
Submarine kits are generally pretty low on parts and when you are dealing
with 1/700, that is very much the case. Most of the skinny bits are far too
thick for the scale, but since this kit was released in the early 1970s
prior to the widespread use of photo etch, it is to be expected. When I
bought my first copy of this kit in 1974, it included some weights to attach
to the waterline hull, but those were not included in this particular kit.
The kit does have some issues with flash and thanks to the relatively hard plastic, it takes an especially sharp knife to scrape away most of these bits. There is a Glen floatplane included, but it has a huge sink area in the fuselage that will not be simple to fill without removing what little detail there is on the aircraft.
Instructions are in Japanese and though the parts bags were sealed (along with the small tube of cement), no decals are provided. I seem to recall from my initial purchase of this kit that there were markings for the conning tower and the airplane, but I could be misremembering. Construction steps are quite simple so once the flash is cleaned up, the kit should be a quick build. Painting information is on the back of the box.
| CONSTRUCTION |
First step was to clean up the bits as best as possible while they were still
on the sprue. I then glued the conning tower halves together along with the
mounting plate for the various antennas. I had to squeeze the halves together
while they were drying to prevent gaps between the sides and the mounting plate.
O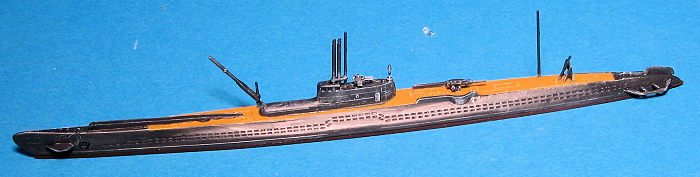 nce dry and
sanded down, it had to be squeezed again when mounting on the deck as one side
was a little bit higher than the other. In hindsight this was a step that should
have waited until the deck was painted.
nce dry and
sanded down, it had to be squeezed again when mounting on the deck as one side
was a little bit higher than the other. In hindsight this was a step that should
have waited until the deck was painted.
The rest of the build pretty much consisted of attaching things to the deck. None of this was as quick as one would think as the parts all needed thinned down as much as possible. There were also several mounting holes that had to be made larger so the pieces would fit properly. Particularly fussy was the A frame assembly at the back of the boat. The airplane also took a bit of work. There were no mounting holes for the floats on the underside. While probably too far apart, I had to carefully drill some, being cautious not to drill through the wing. The floats also had to be affixed with super glue as they were very wobbly after the standard cement had dried.
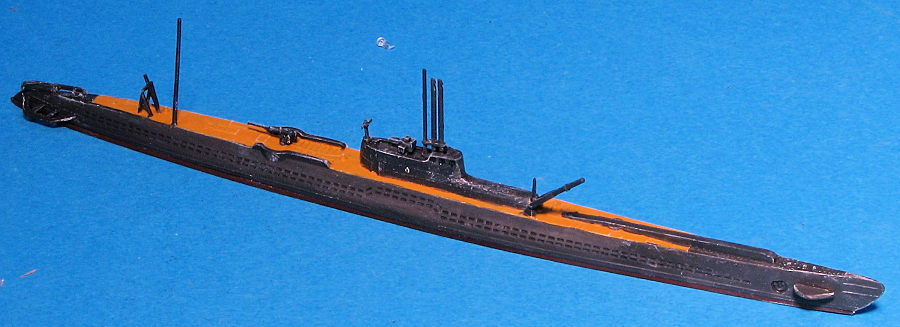
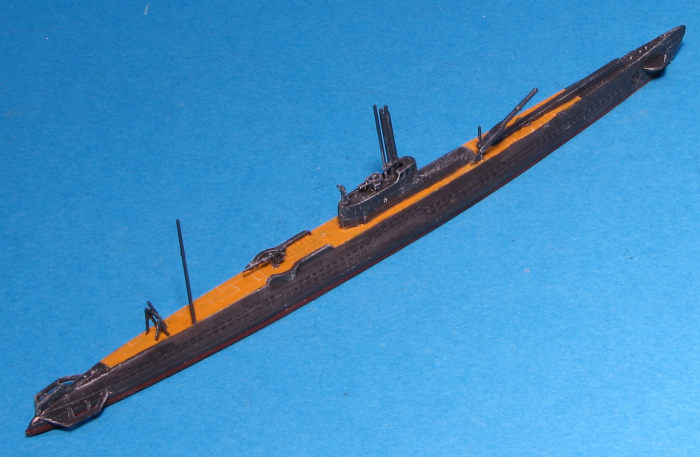
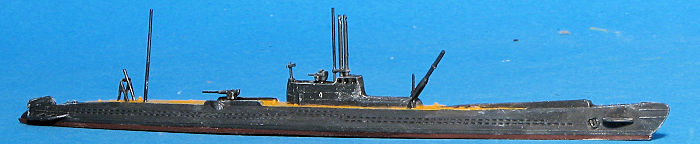 All the
painting was done with a brush. I used Vallejo wood for the deck and Tamiya
German grey for the rest of the boat. The waterline piece was painted with
Tamiya hull red. The Vallejo took multiple coats and there was a LOT of back and
forth as I cannot brush paint a straight line. I painted the aircraft with some
acrylics I already had mixed up. It turns out I wasted my time as the floats are
so far apart it doesn't fit on the boat at all well so I left it off. I dry
brushed the boat with white and considered it done, especially because there are
no decals.
All the
painting was done with a brush. I used Vallejo wood for the deck and Tamiya
German grey for the rest of the boat. The waterline piece was painted with
Tamiya hull red. The Vallejo took multiple coats and there was a LOT of back and
forth as I cannot brush paint a straight line. I painted the aircraft with some
acrylics I already had mixed up. It turns out I wasted my time as the floats are
so far apart it doesn't fit on the boat at all well so I left it off. I dry
brushed the boat with white and considered it done, especially because there are
no decals.
| CONCLUSIONS |
For those of us who normally model aircraft, submarines are often as close to floaty things as we get. They are generally pretty simple to build and though in 1/700 the bits are sort of small, with patience and an Optivisor, a fairly nice model can be built. Real ship modelers would have undoubtedly replaced a lot of parts with metal ones and used p.e. for railings, but for me, it makes for a nice change.
| REFERENCES |
http://en.wikipedia.org/wiki/Japanese_submarine_I-15_%281939%29
4 August 2017
Copyright ModelingMadness.com. All rights reserved.
If you would like your product reviewed fairly and fairly quickly, please
contact
the editor or see other details in the
Note to
Contributors.
Back to the Main Page
Back to the Review
Index Page
Back to the Previews Index Page