HobbyBoss 1/350 German Type 212 Submarine
| KIT #: | 83527 |
| PRICE: | $14.99 SRP |
| DECALS: | Several options |
| REVIEWER: | Scott Van Aken |
| NOTES: | New tool kit |
The German Type 212 class, also Italian Todaro class, is a highly advanced design of non-nuclear submarine (U-boat) developed by Howaldtswerke-Deutsche Werft AG (HDW) and Fincantieri S.p.a. for the German and Italian Navy. It features diesel propulsion 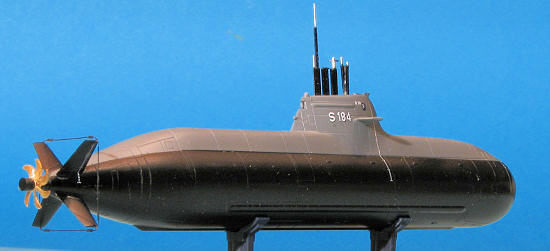 and an additional air-independent propulsion (AIP) system using Siemens proton exchange membrane (PEM) hydrogen fuel cells. The submarine can operate at high speed on diesel power or switch to the AIP system for silent slow cruising, staying submerged for up to three weeks without surfacing and with no exhaust heat. The system is also said to be vibration-free, extremely quiet and virtually undetectable.
Type 212 is the first of the only two fuel cell propulsion system equipped submarines ready for series production by 2007, the other being the Project 677 Lada class submarine designed by Russian Rubin Design Bureau.
Currently, there are four German and two Italian Type 212 boats in service.
This new submarine kit from Hobby Boss is, as are just about all modern submarines, a pretty simple kit. The basic hull is divided top and bottom with the top section containing the conning tower. The rear section has a couple of options. One is for either a six  or seven blade propeller. The other is to have that propeller done in photo etch.
Speaking of photo etch, this medium is used for not only the optional props, but also for the fin bracing and splash shield atop the conning tower and a pair of cleats used to tie up the boat. The upper conning tower has two possible options. One is all closed up as it would be running under water. The other is to have all the periscopes and antennas up.
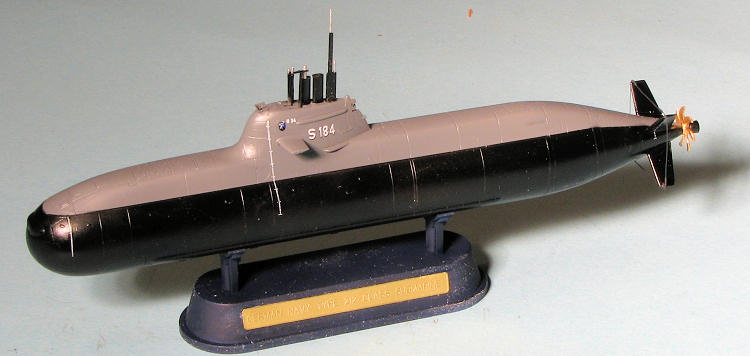
The boat is to be painted with a dark grey upper and black lower surface. Markings are provided to do any one of the four German boats now in service. The white lettering is very difficult to see against the background of the decal sheet so take care when cutting them free.
I anticipated this being a relatively quick build and was not disappointed. First order of business was to cement the two hull halves together. This left me with the usual small ridge on both sides as I seem to be completely unable to glue cylinder halves 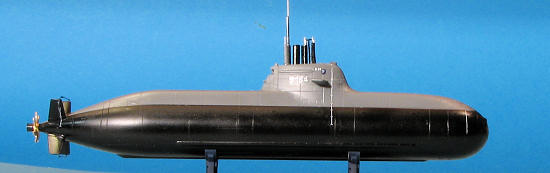 together without getting this. Fortunately, it was minor and after the usual round with a sanding stick, I was able to get it clean. Then the tail fins were cemented. These are pretty much a butt join, though there is a raised area into which they fit (assuming that one's sanding has not removed them.
The lost panel lines were replaced and the first of two major decisions was to be made. This would be the upper portion of the conning tower. I was not so pressed for time that I took the easy way out and so attached the one that would have all the masts sticking up. I also attached the dive planes at this time.
Next, the base was glued together and used to hold the kit while it was being built. This was a good time to paint the hull so I took it to the paint shop.
The instructions call for the upper section to be RLM 75 and the rest of it in black. This included the various masts. I sprayed both colors using Model Master enamels for the RLM 75 and Tamiya Semi-Gloss Black for the rest. The upper surface was sprayed first and then completely masked to prevent issues with overspray. The base was painted FS15044 Insignia Blue.
With the paint dry, the rest of the pieces were attached. I chose the seven blade propeller as an image of the boat out of water showed that was used. I used two pieces of the photo etch fret. First was the splash shield at the front of the conning tower. The other was the brace for the fins. Both were a bit tricky to get into place, but eventually they were coaxed into place and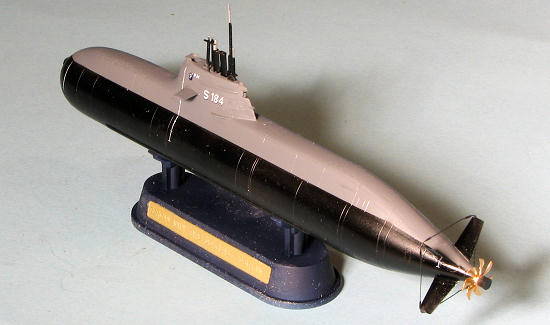 painted.
The various masts are rather crowded, but fit fairly well. There is a small piece that fit in a notch on the back of the sail that is quite tiny.
I chose to do S-184 and interpolating from the markings diagram, got the proper insignia in place. A chart would have been useful. The plimsoll lines were the last decals to be applied and all were hit with some Mr. Mark Softer, which seemed to work just fine.
I am not sure if one would call this sub 'cute', but it is pretty small for 1/350 scale, measuring about 170mm or 6.5 inches in length. Looking at images, I cannot imagine being cooped up inside for a trans-Atlantic run, but apparently it is not that bad as these boats have made long voyages to visit various ports-of-call. I decided not to flatten the paints or use a clear coat. The boats in the photos I saw were all in near pristine condition so apparently they are painted in something that retards rust. In fact, the US submarines I have seen close-up have also been devoid of exterior corrosion. In all, it is a neat modern submarine and perfect for those who do not have a lot of display space.
http://en.wikipedia.org/wiki/Type_212_submarine
April 2012
Thanks to Squadron Products for the preview kit. Get yours today at your local shop.
If you would like your product reviewed fairly and fairly quickly, please contact the editor or see other details in the Note toContributors.
Back to the Main Page
Back to the Reviews Index Page