Mirage Hobby 1/400 U-1064 U-Boat
|
KIT # |
40415 |
|
PRICE: |
$8.98 SRP |
|
DECALS: |
Flags and hull numbers |
|
REVIEWER: |
|
|
NOTES: |
Full Hull |
|
BACKGROUND |
For information on this kit and a brief history, please read the preview.
|
CONSTRUCTION |
As surprising as it may seem to many of you, I went in accordance with the instructions on this one (at least for the start). I do very few ship/boat models so felt it to be wiser to do it this way. There are also a lot of 'extra' parts given with this kit as obviously the molds are made to do a variety of similar sub-types (pun intended).
First thing is the base; a simple construct consisting of a flat base and two small upright bits to hold the sub. These small upright parts have large ejector pin holes that will have to be filled or sanded off. I chose the second method.
 Next there are a number of small subassemblies. First are the
twin A-A guns. These are incredibly fiddly and were a real pain to get glued as
they consist of an upper gun and a very small mount. The instructions are rather
vague about just how they fit. The guns also have large ejector pin holes on
them. I left them alone for fear of damaging the guns.
Next there are a number of small subassemblies. First are the
twin A-A guns. These are incredibly fiddly and were a real pain to get glued as
they consist of an upper gun and a very small mount. The instructions are rather
vague about just how they fit. The guns also have large ejector pin holes on
them. I left them alone for fear of damaging the guns.
We then move on to the bridge structure. This consists of two halves and two small deck sections. Make sure you use the appropriate deck sections for this version. The last small assembly was the larger A-A gun and shield. No problems in this area. It is at this juncture that I decided not to use the very nice photo etched set that Squadron supplied. While it would undoubtedly enhance the model, my track record with etched bits is not good. Rather than make a mess of things, I went with straight from the box on this one.
Now to the rest of the boat. The upper deck section is trapped between the two hull halves. I had to be very careful to properly place this section to keep it from settling too low. It wasn't difficult, but if not dealt with can result in a 'washboard' upper deck. The instructions suggest gluing the hull to the stand at this point. While it would ease construction, it wouldn't ease painting so I skipped that part.
The next sequence is the addition of all the lower hull stuff like props, rudders and dive planes. One has to be very careful when doing these areas as some of the parts are a bit fragile. I found that fit was less than perfect with some of these bits. To be specific: the shaft braces are fiddly to align, the shafts are too big for the area on the hull where they attach, the aft dive planes are a bit too large for their mounting areas and the whole prop/rudder area is quite fiddly to build. I did it in small stages, gluing each pair of parts and letting them fully dry before advancing to the next bits. One thing that really helped is that there are alignment diagrams of this area to assist. Moving to the front, the anchor was glued on and then the forward dive planes. These were also too long for the attachment points and had to be tweaked to get a fair fit.
 Now that the lower section is done, time to move topside. This
basically means gluing the bridge structure to the hull and then attaching all
the bits. Unlike the lower hull, this was rather trouble-free. After gluing the
twin AA guns, it seemed to me that these items were pretty large and could be
oversize. There are a pair of braced pipes (exhaust?) near the stern that were a
bit fiddly. The snorkel is another story. The instructions show a brace on this
piece, but do not show how it really fits on the hull. I did manage to find some
snorkel pictures on the web, but they looked nothing like what the kit provides.
I eventually did away with the brace and simply glued the snorkel in place.
There is no way to glue it in the 'down' position without doing some surgery to
the kit deck. Finally, I added a flag staff to the back of the upper bridge
deck. It isn't shown in the construction steps, but is in the painting and decal
guide.
Now that the lower section is done, time to move topside. This
basically means gluing the bridge structure to the hull and then attaching all
the bits. Unlike the lower hull, this was rather trouble-free. After gluing the
twin AA guns, it seemed to me that these items were pretty large and could be
oversize. There are a pair of braced pipes (exhaust?) near the stern that were a
bit fiddly. The snorkel is another story. The instructions show a brace on this
piece, but do not show how it really fits on the hull. I did manage to find some
snorkel pictures on the web, but they looked nothing like what the kit provides.
I eventually did away with the brace and simply glued the snorkel in place.
There is no way to glue it in the 'down' position without doing some surgery to
the kit deck. Finally, I added a flag staff to the back of the upper bridge
deck. It isn't shown in the construction steps, but is in the painting and decal
guide.
|
PAINT & DECALS |
Well, this part is a bit vague when it comes to colors. Your choice is Dark Green uppers and Red Brown lower section for the Russian sub and Dark Grey for the German. Even getting this info was a bit of a detective job. I'm not sure what the lower color is supposed to be for the German boat, but I do know that there is a black waterline. I'm also not exactly sure just where the decals go (other than the flag which isn't shown). I think that more intuitive painting and decal guides would be most helpful.
 Anyway, I do have an old reference book on the Kriegsmarine done
by Squadron that I used to get an idea of how to paint this beastie. It seems
that a lot of subs had some rather unique colors and camouflage schemes. It also
seems that a two grey scheme would be most likely. With that in mind, I gathered
two different shades, one lighter than the other.
Anyway, I do have an old reference book on the Kriegsmarine done
by Squadron that I used to get an idea of how to paint this beastie. It seems
that a lot of subs had some rather unique colors and camouflage schemes. It also
seems that a two grey scheme would be most likely. With that in mind, I gathered
two different shades, one lighter than the other.
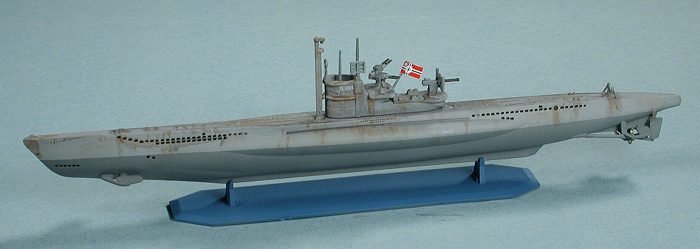
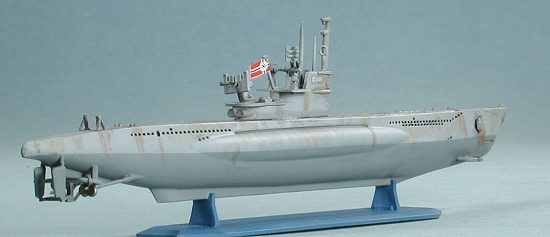
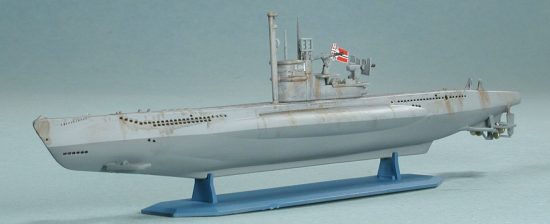
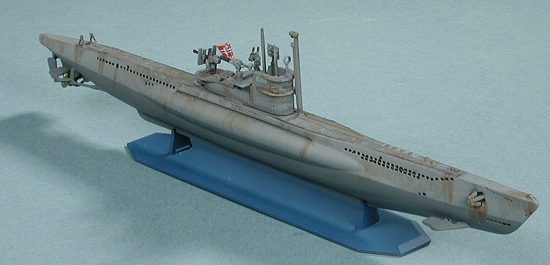
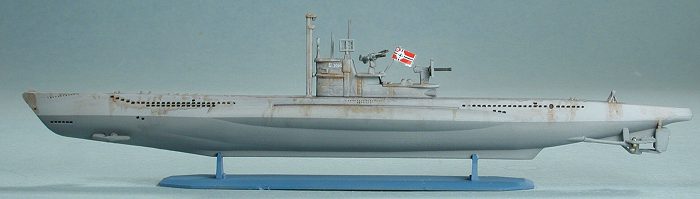
The upper hull was painted with the lighter of the two colors. I used some Aeromaster Italian underside grey for this purpose. When it had dried, I masked above the waterline and painted the lower hull with Aeromaster US neutral grey. Both colors are from the acrylic range. The base was painted with Polly S #23 USAAC blue just to offer some contrast. Then the props were painted brass and the gun barrels gunmetal. Then the holes on the side of the ship were filled in with a drafting pen. The decals, such as they were, were applied. I put the ship numbers on the conning tower and wrapped the flag around the flagpole.
The last thing I did was to break out the Rustall and give it a shot. I'm not really good at this on ships and fear that the end result isn't as good as it should be. Probably not enough rust and probably a bit too broadly put on, but it is the first time I've tried to rust a ship. I know that most of these U-boats were not very pristine. I'm sure some of you will offer suggestions on how to do the next one, and those would be appreciated. Final step was to glue it to the base and it was done.
|
CONCLUSIONS |
All in all this is a really neat kit. Large it is not as I doubt if it is over 7 inches (20cm) long. Despite a few vague parts in the instructions and perhaps the oversized bits, the overall construction was trouble-free. No filler was used at any time and painting is pretty easy to do. This is a kit I can recommend to even a relative tyro. More experienced builders will want to add the etched set.
July 2002
Copyright ModelingMadness.com. All rights reserved.
If you would like your product reviewed fairly and fairly quickly, please contact the editor or see other details in the Note to Contributors.
Back to Reviews Page 2018