 Kit Number: 8101
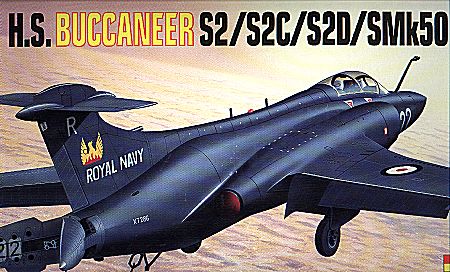
Airfix 1/48 Buccaneer S2/S2C/S2D/S50
Kit Number: 8101
Price: $30.00
Decals: S2--800NAS, S2C/D--809NAS, S50--24Sq SAAF
Date of Review:
Reviewer: Scott Van Aken
The Buccaneer has, within the last few years, been retired from service with both the RAF and SAAF, the only users of the aircraft. It was initially designed as a low level ship killer for the Royal Navy. When the RN retired the Ark Royal back in the 70s, it lost its last ship from which it could launch non-stol/vtol aircraft like the Phantom and the Buccaneer. Thus the RAF gained a number of new aircraft and crews. While in RN service, the only action that Buccaneers saw was the opportunity to sink several oil tankers that had run aground. With the SAAF, they not only performed that function, but probably saw action against the Angolans and other spots where South Africa was involved in local conflicts. With the RAF, the Bucc finally saw action during the Gulf war in 1991, when it was used as a guide aircraft for ALARM attacks by Tornados.
 It was with great anticipation that I opened the large box from Airfix. I
have always liked the brutishness of the Buccaneer and have done a few in
1/72. This was a chance to do one in a much larger scale. The
details looked quite good, if not a bit oversize and the decal sheet is very
comprehensive, covering a majority of the bottom of the box. The
instruction booklet is excellent giving well-detailed drawings and color
call-outs. The downside of the instructions is that all colors are
by Humbrol reference, and not always are the actual colors given. It
was not until near the end of the instructions that I found out that the
interior was to be painted light grey. If you have an Airfix catalogue,
you can get the colors from that as there is a listing in the back.
It was with great anticipation that I opened the large box from Airfix. I
have always liked the brutishness of the Buccaneer and have done a few in
1/72. This was a chance to do one in a much larger scale. The
details looked quite good, if not a bit oversize and the decal sheet is very
comprehensive, covering a majority of the bottom of the box. The
instruction booklet is excellent giving well-detailed drawings and color
call-outs. The downside of the instructions is that all colors are
by Humbrol reference, and not always are the actual colors given. It
was not until near the end of the instructions that I found out that the
interior was to be painted light grey. If you have an Airfix catalogue,
you can get the colors from that as there is a listing in the back.
The light grey plastic has a rather rough texture, but it disappeared under the first coat of paint. Closer inspection of the parts showed me that I was in for some work. Almost every part had either a prominent mold mark (or several), sink marks, flash, or misaligned molds. I even had a few pieces that were short shot. A rather discouraging beginning that meant several more hours of preparation work. My fuselage halves were also badly warped. Test fitting of some parts showed that many of the alignment pins were causing a poor fit so they were removed. Conversations with other builders showed that many of these problems are common to all kits so you need to beware of these before starting.
Areas of particular problem were the fuselage, bomb bay, intakes and the exhaust area. This last one is a real poser on how to properly get a decent fit. I never did figure it out and as a result, that area is poorly done. The fuselage and bomb bay can be dealt with by gluing in sections and when each is dry (overnight) going on to the next. The rest of the areas can be fixed with filler, sanding and rescribing panel lines. The kit does need nose weight to keep it on all three wheels.
Detail is a bit soft, but unless you have a bad case of AMS, you will be satisfied with the result. The instruments are all provided on decals and these are not a very good fit with the panels, so you'll need to make some cuts and other adjustments to get them to fit. Also be very careful removing parts from the trees. Airfix plastic is rather soft and can be easily torn and gouged. I used a razor saw for most parts removal. As for accessories, you can have the wings folded, the speedbrake in the open position, and there are a variety of underwing stores; including bombs, rocket pods and two varieties of long range fuel tank. I decided to equip my Bucc with bombs so did not build up the pods or tanks. I also built the wings folded and the brake open. This helps save a bit of shelf space and looks different.
Other areas to be careful in are the speed brake, which takes careful construction, and the main wheels. The brakes should be on the outside of the aircraft, not inside as the kit has them. It is a simple matter to swap the main mounts, but be advised that this will give them a toed in appearance -- it's your choice.
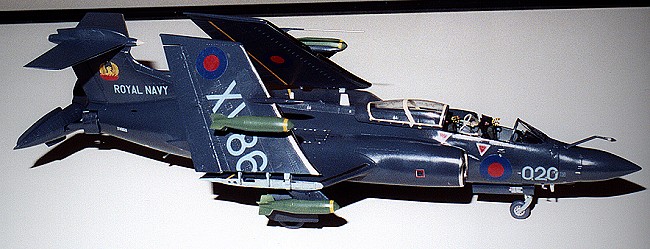
Now on to finishing. I chose an S2D from 809NAS (with the firebird emblem) in overall extra dark sea grey. I used Gunze paints thinned with Future floor wax to give me a gloss finish. It worked very well indeed. All the areas to be painted aluminum were covered with Bare Metal foil, the intakes being a real challenge. The kit decals worked quite well although they are a bit thick and flat, and mine were slightly off register. They are also not very sharp. The small yellow decals disappeared completely when put on the dark background. There are a myriad of small decals and decaling took the better part of a week. When that was done, the kit was overcoated with Future and the rest of the small parts (antennas, windscreen wiper) were installed. The wings were attached with white glue. I am hoping for a decent set of wing folds for this kit. The ones provided are rather crude and covered with mold marks. The white glue will allow me to remove them and replace them with better folds when available.
Overall and despite the problems, I would recommend this kit to those of intermediate building experience who need to excercise those modelling skills.. The extra work required is well within the scope of the more advanced builder, while the glitches would just frustrate those with less experience and fewer skills. I do like the kit and the final result looks very good. I would build another and next time, it will be an RAF version.
27 October 1997
Copyright ModelingMadness.com. All rights reserved.
Back to Reviews Page
2020