Dragon 1/144 J-20 Stealth Fighter
| KIT #: | 4625 |
| PRICE: | $12.00 SRP |
| DECALS: | One option |
| REVIEWER: | Scott Van Aken |
| NOTES: | New tool kit |
| HISTORY |
 The Chengdu J-20 (Jian-20; simplified Chinese: 歼-二十; traditional Chinese: 殲-二十; pinyin: Jiān èr shí; literally "Annihilator-Twenty") is a fifth generation stealth, twin-engine fighter aircraft prototype developed by Chengdu Aircraft Industry Group for the Chinese People's Liberation Army Air Force. In late 2010, the J-20 underwent high speed taxiing tests. The J-20 made its first flight on 11 January 2011. General He Weirong, Deputy Commander of the People's Liberation Army Air Force said in November 2009 that he expected the J-20 to be operational in 2017–2019.
There is a ton more information at the reference link, so check it out when you can.
| THE KIT |
 The kit comes on four sprues of which one is for the canopy. One other has the full upper fuselage half that includes the complete wings. A third holds the nose section as well as the lower fuselage. Test fitting the upper and lower fuselage shows a very good fit. The overall molding of the parts is really quite well done and appropriate for this scale.
Typical of this scale, there isn't much of a cockpit, just a tub in which a generic looking seat is placed. Actually, it looks like an overstuffed armchair so apparently Chinese pilots like to fly in comfort. The only other real detail is in the nicely done landing gear. No weapons are provided and the weapons bay is molded closed.
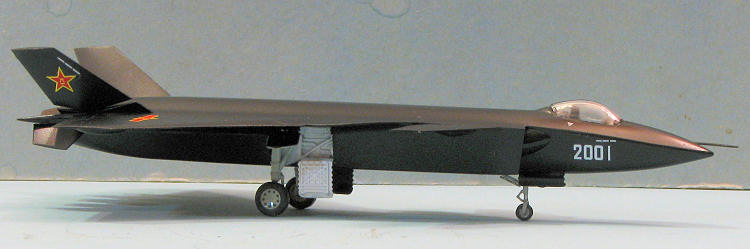
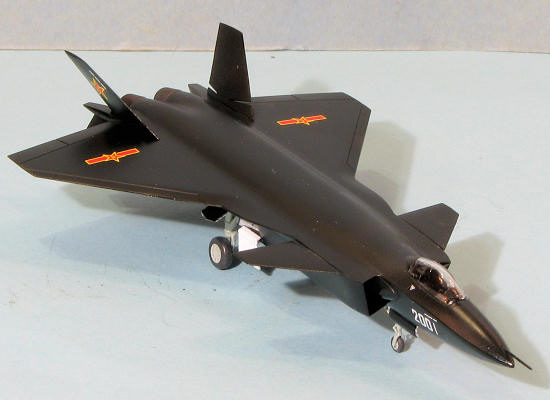
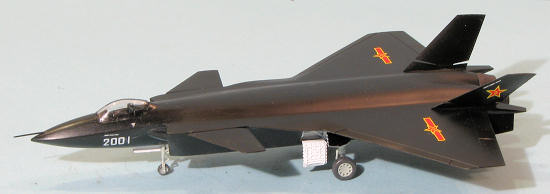
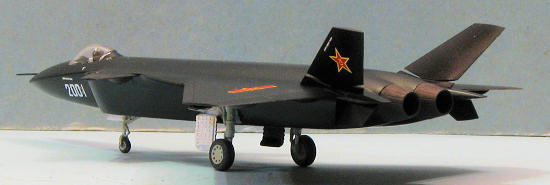
Instructions are on the back of the box and no nose weight is indicated. Painting information is on the side panel. It shows an overall matte black aircraft with off white wheel wells and struts. One assumes the inside of the gear doors are this same shade. Though two planes have been built as far as we know, there are markings for just the first prototype. The small decal sheet provides these markings. While I doubt if this will be exported any time soon, it would make for an excellent whiffer in something like Pakistan AF markings.
| CONSTRUCTION |
 I went into this build expecting it to be pretty quick. Not a lot of parts and test fitting showed good fit. Only have to deal with fuselage seams from the look of things.
First off, study the instructions, few as they are. You need to install the forward nose section to the upper before installing the aft. You also need to ensure that the intake bumps are installed sweeping up at the front and with the rake matching the rest of the nose section in the back. The instructions seem to show them on the wrong sides. I also installed a bit of weight just to be sure there would be no issues with tail sitting. None is recommended but you never know.
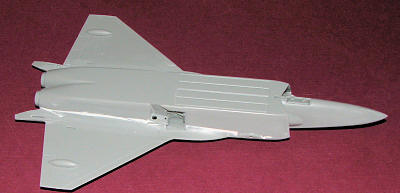 Then the upper and lower main fuselage was cemented together. This contains the major seam on the kit and I filled it using Tamiya white putty (because the grey stuff isn't available in the US at this time). I also glued in the pilot seat and the outer control actuators. The drawing intimates that there is some sort of engraved hinge line on these bits, but there isn't. They are a uniform shape so it matters not how you glue it in.
Once the filler was dry it was sanded down. I then started attaching other airframe bits like the other actuator housings, the canards, and the tail planes. Then it was time for paint.
| COLORS & MARKINGS |
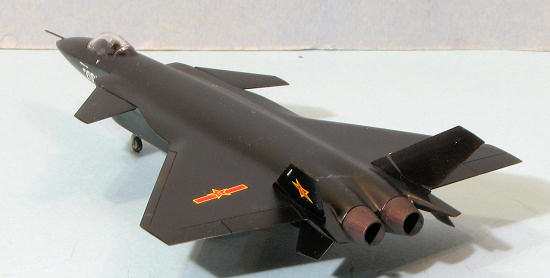
Painting this one is super simple. Black. I sprayed Tamiya X-18 on the airframe and the outside of the gear doors. Inner doors were painted Citadel white as were the gear wells. The landing gear legs and the wheels were painted ADC Grey. Exhaust cones were painted Alclad II Exhaust.
| FINAL CONSTRUCTION |
 With the bits painted, there really wasn't much more to do but attach stuff. The exhaust cones were glued in place as was the pitot tube (which broke removing it from the sprue). The canopy is an interesting construct that is designed to slip down into the cockpit opening rather than be glued atop it. Since there are no frames to paint this seems like a great idea. Getting it in was another thing, however. Try as I might, the fit was so tight that I couldn't get it in place. I tried sanding down the lower section to see if that would help. Nope. Finally, I put glue on the lower part of it and that seemed to help a bit. More glue got it to slide down and also caused some cement to get in between the windscreen area and the instrument panel.
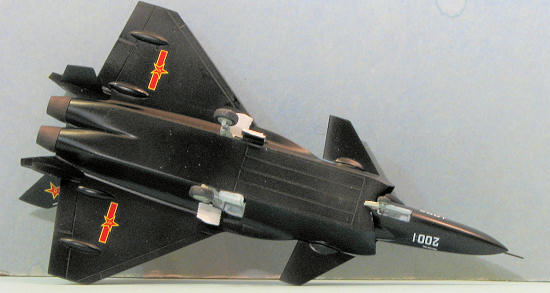 Now to the landing gear. All of the gear attachment holes were opened up more than molded to let the gear legs fit and this was glued in place. I next attached the gear doors. The nose gear door has tabs so no problem. The forward main gear doors are butt fit and though there are supposed to be rectangular openings for the rear doors, they aren't there. I used my motor tool and a tiny bit to carve away room for the tabs on the rear doors to fit. Axles in the rear are a bit long so some sanding was done before gluing on the main wheels. The nose wheel is supposed to fit between the forks on the nose gear. This took a bit of work to get the wheel in place and I recommend caution to keep from snapping off the fork.
Lastly, I applied decals directly to the semi-gloss black paint with no problems at all. The ejection triangles are not shown on the decal guide, but I placed them just below the cockpit. I thought about spraying everything with a matte clear, but decided that the semi-gloss didn't look all that bad so left it as such. Probably not correct for a RAM coated plane, but there it is.
| CONCLUSIONS |
Aside from what was mentioned, the fit is really very good. It is a kit that those in a hurry can finish in a weekend. With the gear up option, one doesn't even need to fuss with the landing gear. Its low price and ease of assembly makes this a kit I can easily recommend to everyone. On top of that, it is a neat looking aircraft.
| REFERENCES |
http://en.wikipedia.org/wiki/J-20_Black_Eagle
August 2011
Thanks to www.dragonmodelsusa.com for the preview kit. Get yours today at your local retailer.
If you would like your product reviewed fairly and fairly quickly, please contact the editor or see other details in the