 Kit Number: ????
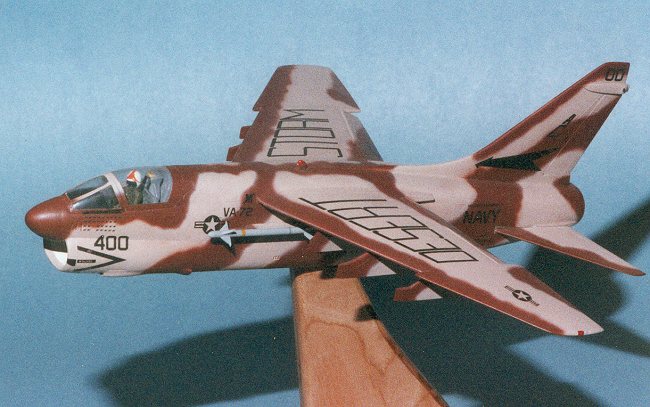
AMT/ESCI 1/48 A-7E Corsair II
Kit Number: ????
Price: $6.00
Media: Injected Plastic
Decals : Two versions: both USN in Gull Grey and White; VA-83 and VA-113
Date of Review: 29 March, 1996
Comments: AMT has been known to box other manufacturers kits under its own brand and often they choose a pretty decent kit. One only has to build their 1/72 F-104G or F-100F to know the truth to that statement. Other times AMT has picked some real turkeys and this ESCI kit of the A-7E fits into that category.
I had picked up this kit not really knowing what I was buying. When I opened the box, it was readily apparent that I had the ESCI kit. I then thumbed through my trusty Scale Aircraft Modelling issues to look for a review. I was not encouraged. The review lambasted the kit pretty badly. They even said the Aurora-based Monogram kit was a better engineered kit! Looking at the parts with their crude finish and detailing as well and test fitting a few bits, I was reluctant to agree. In fact, I found little of any positive value about the kit as most of the parts were for an A-7D and not the Navy version I wanted.
 After languishing in the box for several years, I started on a binge of stand
models. I haven't been much of a fan of stand models, but found myself with
a number of kits that were perfect for that medium. These kits were mostly
older Revell and Airfix kits that had a pretty good outline, but were sorely
lacking in decent detail. I acquired a nice set of decals from Superscale
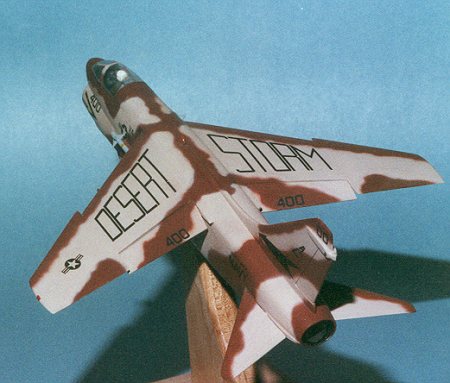
that had the desert camouflaged A-7E from VA-72 with 'Desert Storm' boldly
emblazoned along the upper wing surfaces. Then it was time to start the build.
After languishing in the box for several years, I started on a binge of stand
models. I haven't been much of a fan of stand models, but found myself with
a number of kits that were perfect for that medium. These kits were mostly
older Revell and Airfix kits that had a pretty good outline, but were sorely
lacking in decent detail. I acquired a nice set of decals from Superscale
that had the desert camouflaged A-7E from VA-72 with 'Desert Storm' boldly
emblazoned along the upper wing surfaces. Then it was time to start the build.
I trashed the landing gear and glued the doors shut. Then I puttied around the huge gaps caused by the doors being too small. I then cobbled together the interior without expending a lot of time and cemented the forward fuselage halves together (this kit has the fuselage in four sections: two fore and two aft). The aft section was glued and the D bits removed from the tail and replaced by E RHAWS antennas. The entire fuselage was then cemented together and puttied to death to fill the gaps and smooth out the poorly fitting front and rear sections. Putty was also added to the intake and sanded down as best as could be done.
The 'folding' wing tips were cemented to the rest of the wing and I discovered the tips were thicker than the rest of the wing. Grabbing the biggest file I had, i mercilessly filed the tips down to the same level as the rest of the wing. This done, various grades of sandpaper were taken to smooth things out. I did most of the work on the underside so it was not that easily seen. One nice thing about this kit is that the flaps are separate from the rest of the wing. After gluing and puttying the wings to the fuselage, I was able to position the flaps in a down position for a little added interest. Since this was to be an in-flight kit, I found a suitable 1/48 Navy pilot in my people box, painted him up and stuck him in the cockpit. The canopy was then attached and masked.
 The kit was then primered, more holes and bumps smoothed out and the plane
ready for paint. I mixed the colors called for in the kit instructions as
best as possible using my FS 595 fan deck and photographs I have of the aircraft.
Once that was done, the lighter tan was applied and after fully dry, the
darker shade sprayed on. When that was dry the entire aircraft was
sprayed with my favorite clear coat, Future floor wax, and left to dry. A
couple areas got Bare Metal foil, and other details were painted. Finally
the decals were applied and after completely dry, a flat coat was put on.
The kit was then primered, more holes and bumps smoothed out and the plane
ready for paint. I mixed the colors called for in the kit instructions as
best as possible using my FS 595 fan deck and photographs I have of the aircraft.
Once that was done, the lighter tan was applied and after fully dry, the
darker shade sprayed on. When that was dry the entire aircraft was
sprayed with my favorite clear coat, Future floor wax, and left to dry. A
couple areas got Bare Metal foil, and other details were painted. Finally
the decals were applied and after completely dry, a flat coat was put on.
While the kit did come with a weapons load, the weapons sucked big time, so were tossed in the trash. This left me with empty pylons. Unfortunately the kit did not come with drop tanks either, but as soon as I decide what version A-6E to build, there is a good chance the unused tanks will find their way on the A-7. I did scrounge a set of 'winders from the spares box so the Corsair II is not completely unarmed.
After drilling a small hole in the center of gravity of the kit, I attached the kit via a short length of wire to a cherry base that I made. The finished kit is a bit rough, but looks better on a stand than it does in the wastebasket. Building a stand kit is the best that some of these kits can hope for. They are also relatively easy to build and if you make a nice one, you can give it to someone who will really cherish it.