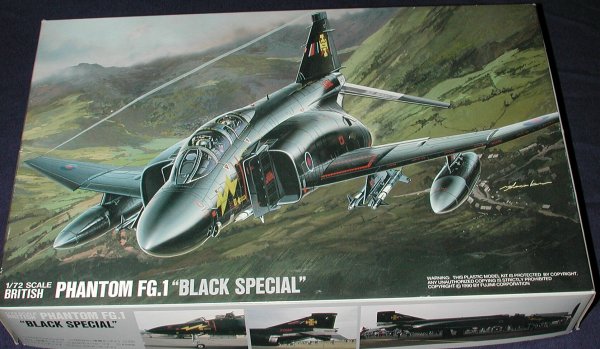
Fujimi 1/72 Phantom FG.1 'Black Special'
| KIT # | 1056 |
| PRICE: | $4.00 - not the MSRP!! |
| DECALS: | In this case, none |
| REVIEWER: | |
| NOTES: | Swap meet special |
| HISTORY |
With all due respect to our British cousins, they have had a series of governments since WWII that have steadily eroded away the huge lead in aerospace that was held at the end of the war. Through a series of political blunders, such as the 1956 White Paper that was sure that manned aircraft would be obsolete and started to take apart the RAF, British aviation was in less than sterling shape when the 60's arrived. By then it was obvious that manned aircraft were here to stay, however, there had been precious little aviation development and things were not looking good.
One bright spot was the development of the Hawker P.1154. It was hoped that this one airframe would be able to meet the needs of all services and keep down costs. Sort of like the F-111. It soon became apparent that the single type would not meet all requirements and the P.1154(RN) targeted for 1968 deliveries would not be able to meet that deadline. Casting about for an interim replacement, the Admiralty looked for an immediate replacement. Fortunately, there already was a fighter being built that was able to meet the needs of several services and that was the F-4 Phantom.
 With the Admiralty possibly pulling out of the P.1154 project and making the aircraft too expensive per unit for the RAF, the RAF also started looking at the Phantom as a possible alternative. The RN ordered the Phantom as the F-4K in 1964. It was based on the F-4J, but had to have some British equipment in it and that meant reheat equipped Spey engines. The Spey had never been used in this type of aircraft before, nor had it ever had an afterburner so there were some engine development problems. Though most were cured, the throttle response was jerky, something that Naval aviators do not like when coming in for a carrier landing. Eventually upgraded engines cured this rather irritating glitch.
Back at the airframe, the Spey was a larger and more powerful engine, but adapting it to the F-4 fuselage meant that it needed to widen that fuselage, destroying some of the area rule, and increasing the size of the intakes, which increased drag. So what you had was the most powerful and slowest of the Phantom family. It accelerated quicker and was fast at low altitude, but in terms of top speed was limited to Mach 1.8 vice the F-4Js Mach 2.1. It also was much more fuel efficient than the J-79 and did not leave the usual smoke trail of the US Phantom power plant.
 Returning to politics, in 1965, a defense white paper resulted in a drastic reduction of forces (again), that wiped out the new British CVA and the P.1154. Though this effectively wiped out the need for Naval Phantoms, it opened the door for the RAF to get them as a Hunter replacement. However, there was a need for a new strike aircraft for the current carriers so the RN F-4K order was reduced from 150 to 48 aircraft and they served until the end of the long deck carriers in 1978. Only one fleet squadron, 892 Sq, operated the F-4K, though 700P and 767 Squadrons, both training units, also operated the type. At that time, all F-4K's (now called Phantom FG.1s) were turned over to the RAF and served in two squadrons; 43Sq and 111Sq as well as a few with 64 Sq (the training unit) and various specialty units from time to time. The RAF F-4M, was later designated Phantom FGR.1. Interestingly the F-4K was to be called FGA.1 but the A for attack was dropped to disguise the plane's nuclear capability! The last British FG.1 and FGR.2s were withdrawn from service in 1991. Most were scrapped under the Arms Reduction Treaty with the Soviets.
| THE KIT |
Though now more than a decade old, the Fujimi Brit Phantoms are still the best on the market. They learned from the mistakes of the earlier Phantom kits and did this one right from the start. Earlier US F-4s were rather lacking in cockpit and wheel well detail. This one has made up for both of those. Now I don't recall exactly what came in a regular kit. This particular one was purchased at a swap meet minus decals and instructions. Many parts were loose in the box. It did come with rubber wheels (which I tossed as they were badly distorted), two canopy options (one in segments for open and a full closed version), and a full load of under wing stores and weapons. The kit back seat also supplies full consoles, again, not correct for this type, but blanking plates are added to help to give a simulation of no consoles. It works fairly well. Detail is super with raised detailing for the consoles and the instrument panels. I'm supposed to have decals to fit over them but with no decal sheet supplied, I'll have to wing it. You also get auxiliary inlet doors for the upper rear fuselage that can be posed open, but unless the engine was running, these were generally, but not always, closed.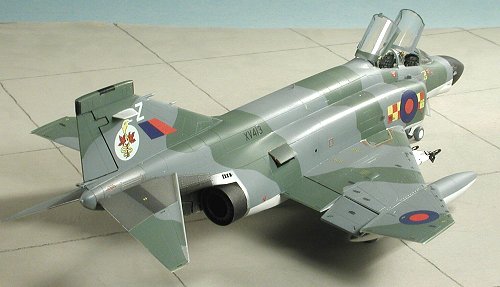 It also comes with all the parts to make either a late FG.1 or FGR.2. The late part is the tip of the tail where there is an RWR antenna. The external difference between the two types is on the FG.1 you have slotted stabilators for carrier landings, and you have catapult strop attachments under the wings. On the inside, things are pretty much the same between the two variants. One minor glitch is that the cockpit for this kit seems very much like a USAF version. You see, the Brit F-4 is basically a heavily modified F-4J. Navy F-4s do not have flight controls in the back seat. This kit provides them. It is true that they could easily be installed and in many cases, a unit would have one plane so equipped to use as a trainer, but it was not the norm.
| CONSTRUCTION |
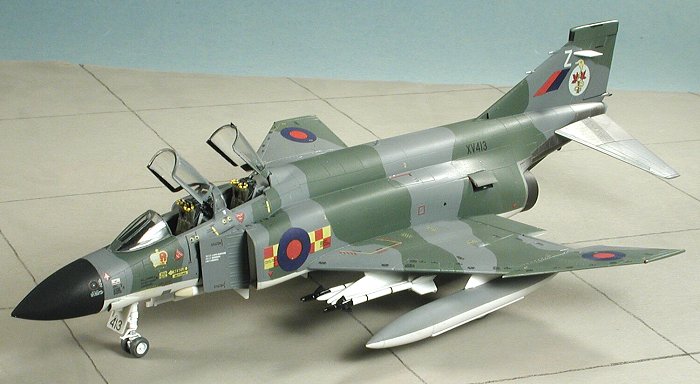
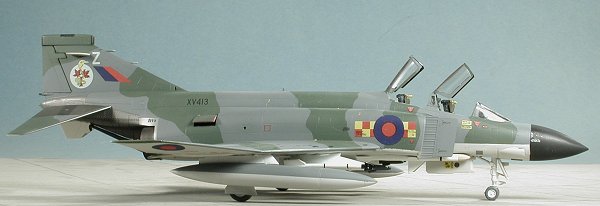
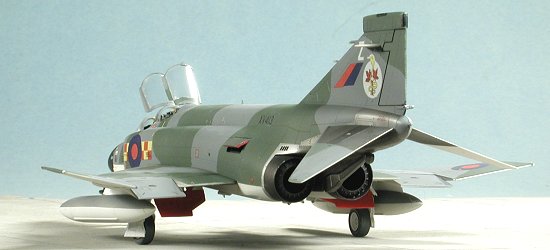
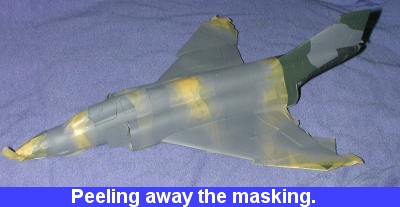
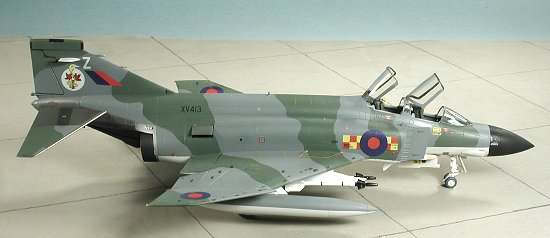
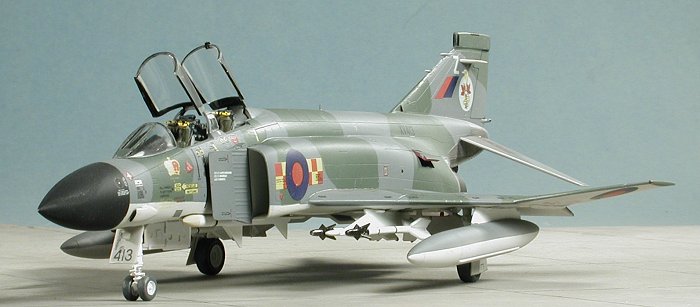
Diving right in to the kit, the first thing I did was to put in the little plugs for the FG.1 in the lower wing and open the holes for the drop tanks and missile pylons. I then assembled the drop tanks and the centerline gun that is provided. It really isn't that great a gun, but makes for something a bit different. The major parts of the interior were glued together and then painted dark gull grey along with the inner fuselage walls. Detail on the instrument panel and consoles was picked out in black and a few colors then drybrushed with a lighter grey to bring out detail. I then glued the interior to the fuselage section and then glued the wings. Fit is really quite good, though I had some filler needed for all the join areas. This is not a kit problem, but mine. About this time, I decided that I really wanted to do an FGR.2. Having already put the catapult attachment plugs in, it meant that I had to fill those areas. It also means that I'll be using the non-slatted tail planes as that is really one of the biggest visual differences between the two versions. With the wings attached, the intakes were glued together and then glued in place. They were painted white prior to assembly and the back part painted flat black. None of the Fujimi kits gives any kind of engine compressor faces nor do they offer full intake trunking. Not really that big a problem for most of us, but some want this option. I'm not sure if Seamless Suckers offers anything for the 1/72 kit or not. Perhaps a reader will know. Now usually the intakes are the poorest fitting part of a Phantom, at least for me. This was no exception, though the amount of filler needed to smooth things out was a lot less than on previous kits. Perhaps I'm starting to get the hang of it after 50 some F-4 models! At this time, I installed the canopy pieces and masked them. The flaps were pressed into the slots in the wing and the first round of painting was started. CAMOUFLAGE This was to be an older scheme from 1977 with the green/dark grey uppers and light grey under. First thing I did was to spray the nose a gloss black. When it was dry and masked, I did the underside color, Light Aircraft Grey. I used Xtracolor because I had some and I like the paint. While that was drying, I painted a lot of white parts such as the landing gear, inner door panels and pylons. The lower edges were masked and the upper surface painted Dark Green, again with Xtracolor paint. The upper surfaces wrap around slightly on the leading edges of the wing so much of the lower wing was masked to prevent any overspray. Then a ton of masking tape was used and the green areas were masked in preparation for the next color, Dark Sea Grey. I didn't have any Xtracolor for this so used some Testors Model Master enamel instead. During this time, the missiles were all painted white and the tips of them painted black for the Sidewinders and buff for the Sparrows. I also masked off the drop tank pylons (they are part of the tank construct) and sprayed the bottom of the tanks Light Aircraft Grey. I also sprayed the inside of the speed brakes red. The afterburners had been assembled and these were painted Burnt Iron using Testors Metallizer. BACK FOR MORE CONSTRUCTION As is normal for me, at this stage, the landing gear was glued in place. This is as much to allow the plane to stand on its own while the decals are applied as for any other reason. The gear wells had been painted white prior to this. Some say Light Aircraft Grey, but I'm not so sure. These planes were made in St. Louis so would have had the same wheel well colors as any other F-4 that came from that production line; and that color is white. DECALS I used Modeldecal sheet #64 for this aircraft and chose the only green/grey Phantom on it. This was a 92 Squadron plane from the Jubilee of 1977. As it typical of modern aircraft, it has a zillion small decals to apply. You know, it is this plethora of data decals as well as all the fuss one has to do with things under wings that is probably the reason I don't do that many modern aircraft. Applying the decals took nearly a week to do because there are so many of them. Modeldecals are not the thinnest in the world, but they do stick very well and don't require any setting solution. Just pat them down with a clean rag and they are there for life! Once all the decals were on, I recoated the plane with gloss clear, followed by a coat of matte clear. FINAL BITS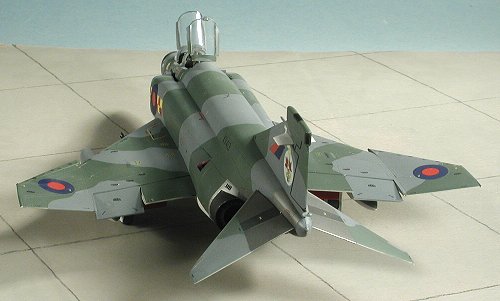 I assembled the seats and after painting them, set them aside until later. They are rather nicely done, but if you want even better detail, a set of Aeroclub metal ones or some resin replacement from any one of a number of sources should be sought. BTW, the aircraft does not need any nose weight as the wheelbase of the plane is sufficiently long to forego that requirement.
 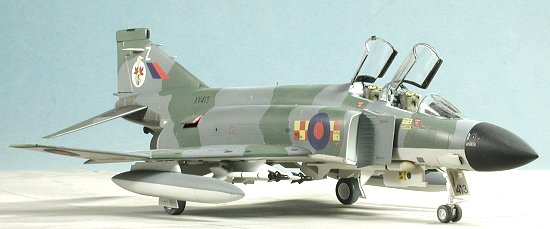 During all this time, I also glued together the wing tanks. I had decided not to use any centerline tank or gun pod on this kit, but just Sidewinders and Sparrows. Unlike the earlier releases of the British Phantom, the newer ones include separate flaps and speed brakes. It also has the actuating rods for the upper fuselage air inlets, a nice addition. Frankly the separate flaps are a bit too thick and really don't add that much to the kit, in my opinion.
 Next, I masked off the Dark Sea Grey around the aft end of the airframe and on the tail planes. Then I used several shades of Alclad II to get the proper metallic look to this area that I wanted. Among the colors used was jet exhaust, magnesium, aluminum, and steel. Once that was done, I painted the area under the upper inlet doors black. Then I spent a few days going back and fixing several of the painting glitches that is pretty well standard with this kind of a paint scheme. Taking off all that masking took but a fraction of the time it did to apply it. With all that finally done, I returned to the work bench to add on some more bits prior to tackling the decals.
 I also glued in place the speed brakes and the aux inlet doors at this time. It seems to me that the speed brakes are way too open and should probably only be about half that distance. Trimming the actuating piston may take care of that, though it may also mess things up. This kit has a choice of both plastic and rubber tires. The rubber tires go on plastic rims and eases the painting chore. It also assures that there will not be any problems getting 'tire paint' onto the rims. However, they just didn't look that good to me so I went with the plastic ones. The stabilators were just pressed into place once the tabs were slightly sanded down. They are too thick to fit in to the slots in the tail. You may want to test fit those parts at an early stage to make sure there are not fit problems later. Then the main gear doors and any little actuating arms were glue in place the kit was taken for an overall coat of clear gloss acrylic in preparation for decals
 With modern aircraft there are more final bits than most planes. In this case it consisted of installing the nose gear doors (BTW, the forward nose door is NOT correct for a British Phantom; mostly because the lights are in the wrong place), the drop tanks, assembling and painting the missile rails and missiles, then gluing them in place. About this time, I noticed that something wasn't quite right. It was the fin mounted blade antennas. I had forgotten to open the hole for them way back at the initial construction phases. Well the plane needs them so I had no choice but to cut them and carefully glue them to the fin. That's what I get for not paying attention. Then there is the touch-up painting that invariably needs done. I then removed the canopy masks, installed the kit bang seats and glued the canopies in the open position. Finally, I hurried to the photo area to take pictures before I broke something!
| CONCLUSIONS |
Building this kit was just as enjoyable as the previous Fujimi Brit Phantoms. The later boxings are a bit more detailed with the actuating arms for the aux inlet doors, the speed brakes and separate flaps, but it seems to me that for most of us, it just adds to the 'fiddlyness' of the kit. Regardless, it is a fine kit and one that I will undoubtedly build again in the future.
As an additional note, I'm sometimes asked what the difference is between an F-4M and Phantom FGR.2. Nothing, really. F-4M was the original manufacturer's designation and once the Brits got a hold of it, it had to have a name (the British seem to hate designations) so Phantom it was. The FGR part stands for Fighter, Ground attack, Reconnaissance.
| REFERENCES |
Warpaint #31, The F-4K and F-4M Phantom, Steve Hazell, 2000
Aeroguide #13, McDonnell Phantom FG Mk1/FGR Mk2, 1986
Review kit courtesy of my kit collection.
September, 2002
Copyright ModelingMadness.com. All rights reserved. No reproduction without express permission.
If you would like your product reviewed fairly and fairly quickly, please contact the editor or see other details in the Note to Contributors.
Back to Reviews Page 2021