Heller/Airfix 1/72 Puma
| KIT #: | 71241 |
| PRICE: | Won it in a raffle |
| DECALS: | One Option (UN) |
| REVIEWER: | Scott Van Aken |
| NOTES: | This is an Airfix Mold |
| HISTORY |
The Puma was first designed to meet a
French army requirement for a medium lift helicopter capable of operating
in all weather conditions. The first of two Sud SA-330 prototypes flew for
the first time on April 15 1965, with the first production aircraft flying
in 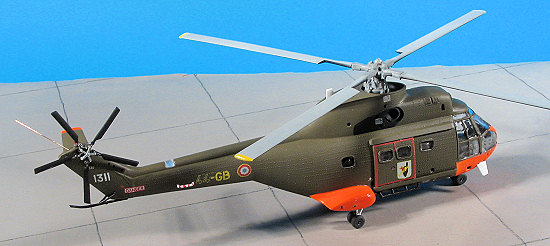 September 1968. In January 1970 Sud was merged into Aerospatiale. A 1967
decision by Britain's Royal Air Force to order the Puma as its new tactical
helicopter transport resulted in substantial Westland participation in the
helicopter's design and construction.
September 1968. In January 1970 Sud was merged into Aerospatiale. A 1967
decision by Britain's Royal Air Force to order the Puma as its new tactical
helicopter transport resulted in substantial Westland participation in the
helicopter's design and construction.
Initially designed for military use, the aircraft has subsequently seen a great deal of use in the civil market where there has been a need for a modern medium lift helicopter. Often times these aircraft have been replacing Wessex or even more ancient Whirlwind helicopters. The SA.330 and later SA.332 Super Puma have also been assembled or built under license in several other countries and continues in widespread service today.
| THE KIT |
It is a simple fact of business that companies come, companies go, companies merge and others get bought out. Humbrol owns both Airfix and Heller. It is for this reason that you will often find Airfix kits in Heller boxes or Heller kits in Airfix boxes (generally with the words 'NEW' on the outside to trap the unwary). Where both companies make the same model (as in the Mirage 2000C or Jaguar), they generally pick the better of the two to market. In this case, only Airfix did the Puma so that is what is in the box.
 This particular boxing was to
include paint, brush, glue and the kit. Allegedly, the little tyke's mum
can buy this one deal and not have to worry about getting the right stuff
for junior to finish the kit. Basically, that was to be Humbrol 56, 85,
102 and a large container of white, which I'm guessing at is 130. However, my
kit had no paint, brushes, glue or instructions.
This particular boxing was to
include paint, brush, glue and the kit. Allegedly, the little tyke's mum
can buy this one deal and not have to worry about getting the right stuff
for junior to finish the kit. Basically, that was to be Humbrol 56, 85,
102 and a large container of white, which I'm guessing at is 130. However, my
kit had no paint, brushes, glue or instructions.
The kit itself is molded in a tan plastic and is of the 'raised panel lines and rivets' variety. I decided to keep everything in its bags so as not to lose parts that had come adrift. From what I could see through the bag, there is little flash, no sink areas of consequence and the usual ejector pin marks on the inside and backs of some parts. Most will be invisible when the kit is finished. Transparencies are thick and the ones for the cabin windows are quite distorted as well with the usual sink areas. All helo modelers want to know if both the collective and cyclic are included and I'm glad to say that they are.
As I said, no instructions, however, Airfix offers an instructions service on its web page and I was able to download a set, though It would have been nice had they been a bit larger as these old eyes have trouble reading fine print. Since mum doesn't want her boy to be a killer (preferring him to be a gentlemanly soccer fan instead), the markings are for a UN operated aircraft. This also has the benefit of having the model painted in one color, in this case white. Markings are well done and quite matte.
| CONSTRUCTION |
With this one, I began with the cockpit and cabin. I
first glued on all the lower seat framework. Makes for a stronger attachment.
The floor I painted a dark grey along with the inside fuselage walls. There is a
two piece entranceway that was painted matte black along with the lower seat
framework. Both the front and rear seats were painted a brownish color with
black framework. This took several days as I had to paint a bit, let it dry and
then paint more. In hindsight, I could have easily attached them to the
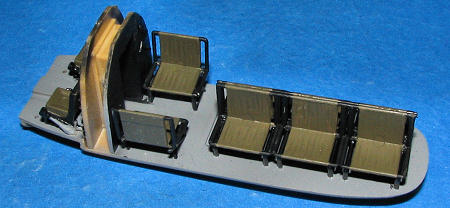 framework
and then painted them, but may well have missed much of the underside and back
stuff. This latter area could be considered 'painting for God' as I'm not sure
how much of that will be seen. The seats all had ejector pin marks in them that
will be visible with the doors open.
framework
and then painted them, but may well have missed much of the underside and back
stuff. This latter area could be considered 'painting for God' as I'm not sure
how much of that will be seen. The seats all had ejector pin marks in them that
will be visible with the doors open.
Meanwhile, I glued together the engine exhaust bits and added the cabin windows to the inside of the fuselage. I also glued the nose gear well pieces and attached them to the bottom of the cockpit section. The various controls were also added to the cockpit and that set aside to dry for a day (or so).
 On the
outside, I added the lower door track and glued on the center lower transparency
to one fuselage half. Then my attention turned to the rotor head. I assembled
the lower section and found that I was missing the rotor shaft. This led me to
scrounge for a replacement, which I found in a small box of K&S tubing bits that
I bought 25 years ago for $2.95 and still find useful. It required me to drill
out the holes in the upper and lower mounts, but not a problem and this way, I
don't have to attach all the bits until the very end. Makes overall painting
much easier.
On the
outside, I added the lower door track and glued on the center lower transparency
to one fuselage half. Then my attention turned to the rotor head. I assembled
the lower section and found that I was missing the rotor shaft. This led me to
scrounge for a replacement, which I found in a small box of K&S tubing bits that
I bought 25 years ago for $2.95 and still find useful. It required me to drill
out the holes in the upper and lower mounts, but not a problem and this way, I
don't have to attach all the bits until the very end. Makes overall painting
much easier.
The rest of the cockpit bits were assembled and
painted. The Modeldecal sheet I'm using provides an instrument and console decal
so those were attached. The two 'engines' were glued together and painted with
Burnt Iron. These were then glued onto their mounting posts along with the rotor
gearbox which, like the surrounding area, had been painted dark grey. The floor,
engine area and
![]() the
rear bulkhead were cemented in place and the fuselage halves glued together. I
also installed the tail rotor shaft and nose gear before clamping the
halves together. Then there followed several s
the
rear bulkhead were cemented in place and the fuselage halves glued together. I
also installed the tail rotor shaft and nose gear before clamping the
halves together. Then there followed several s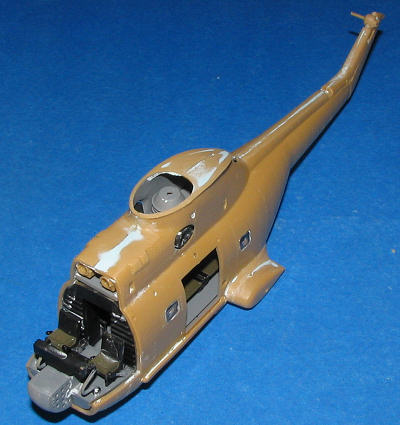 essions
of filler and filing. The underside had the unfortunate trend of being somewhat
caved in, especially around the centerline openings so needed a lot of work. The
upper section wasn't devoid of poor fit either.
essions
of filler and filing. The underside had the unfortunate trend of being somewhat
caved in, especially around the centerline openings so needed a lot of work. The
upper section wasn't devoid of poor fit either.
I also glued together the sponsons, trapping the main gear between the sections. Unlike the nose gear, I didn't glue the main gear in so that I could retract them into the sponson when it came time to fill and sand the seam. Then these were attached to the main airframe and fit quite well. The lower door tracks were also attached at this time.
 Moving
to the front, the transparencies and cockpit roof section were glued on. Since I
was doing an early Puma without the sand filters, I used the rather plain
section. The other bits are for the filter equipped planes. Getting all these
pieces to fit properly was quite a chore. I had trimmed and test fit all the
bits several times prior to adding cement, but in the end, I wished I'd had a
third hand. When all was finally in place, I sighed as I saw that the clear bits
were a bit small for the opening. The usual filler was used on the roof section
and I took this ti
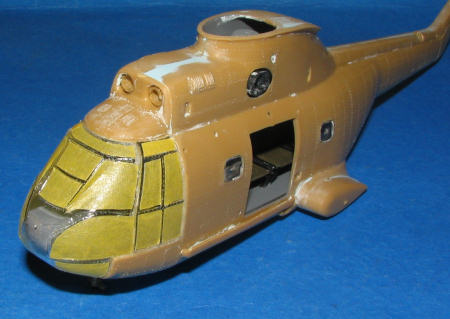
Moving
to the front, the transparencies and cockpit roof section were glued on. Since I
was doing an early Puma without the sand filters, I used the rather plain
section. The other bits are for the filter equipped planes. Getting all these
pieces to fit properly was quite a chore. I had trimmed and test fit all the
bits several times prior to adding cement, but in the end, I wished I'd had a
third hand. When all was finally in place, I sighed as I saw that the clear bits
were a bit small for the opening. The usual filler was used on the roof section
and I took this ti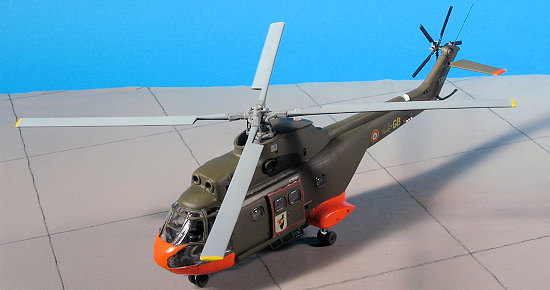 me to start masking. This was as much to get it out of the way
as anything.
me to start masking. This was as much to get it out of the way
as anything.
I then had to come up with something for the intakes as they really looked bad as they were. Several possibilities sped through my mind when I realized that perhaps some small ferrules might help. I found a box of assorted eyelets at a craft store and picked two that seemed to fit. Then I drilled out the engine fronts for these eyelets to fit into. The eyelets were superglued into place and while they look a tad odd, they are certainly better than what I had before.
The next step was to install the side doors. These fit without any trauma and are actually somewhat loose as they move rather freely on the track. I glued on the step, masked off the rest of the clear bits and started looking for paint.
| COLORS AND MARKINGS |
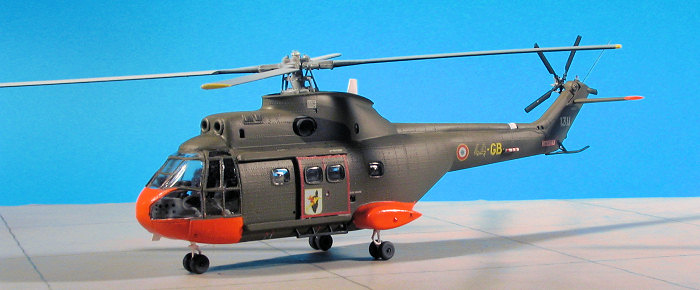
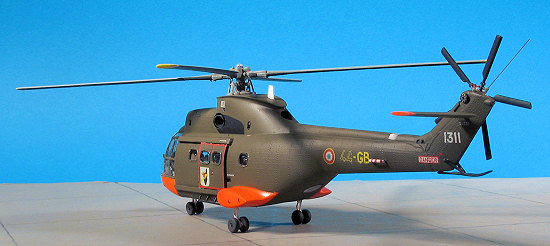
Recommendations from readers led me to choose Humbrol
155 as the overall color. It is a more green shade than US olive drab and looks
pretty much like what some of my photos of these planes wear. But first, I had
to prep it for the da-glo. I painted the nose and sponsons and tip of the
horizontal stabilizer with white. Then, using Humbrol gloss Blaze, sprayed on
several light coats until I got what I was seeking. This stuff is difficult at
best to use and I'm not sure I got what I was really after in terms of coat. For
one 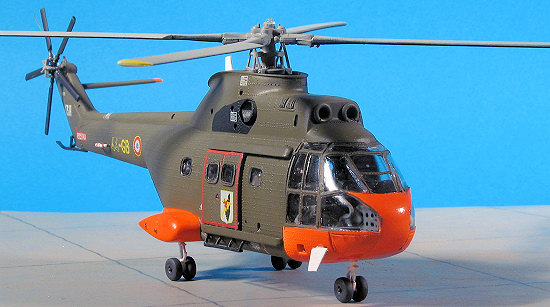 thing, I got a number of odd spots in the paint that seem to be unmixed
base. It shouldn't show up on the pictures but you can see it in person. That
dried quite quickly and was masked. Then the overall Humbrol 155 was applied. I
had actually tried US OD at first, but it was too brown for my liking.
thing, I got a number of odd spots in the paint that seem to be unmixed
base. It shouldn't show up on the pictures but you can see it in person. That
dried quite quickly and was masked. Then the overall Humbrol 155 was applied. I
had actually tried US OD at first, but it was too brown for my liking.
Once the main paint was on, I attached a few bits I'd forgotten, such as various antennas and the tail bumper. The rotor hub and blades were also painted at this time. The hub getting a light grey and the blades being painted grey on the top and black on the bottom with yellow tips. I'd also prepped the tail rotor for colored tips, but it seems these stayed black. Rather odd, if you ask me. I also masked off and painted the exhaust area with matte black.
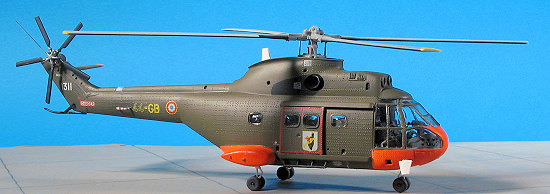
I then overcoated the kit with a clear gloss in preparation for decals. I wanted to do an early French aircraft from a Modeldecal sheet. This sheet offered three different aircraft options and I chose the one based in Corsica with the large badge on the door. These decals are by no means new and I wasn't too sure just how well they'd stick. This was not helped by all the rivets. However with the assistance of several applications of Solvaset, I got them all in place. Took a few days.
| FINAL BITS |
This left a few bits to do. One was the attachment of
some final antennas and the clear upper rear fuselage light. The latter was held
in with white glue to prevent fogging. I then turned my attention to the main
rotor. This has several small parts that go
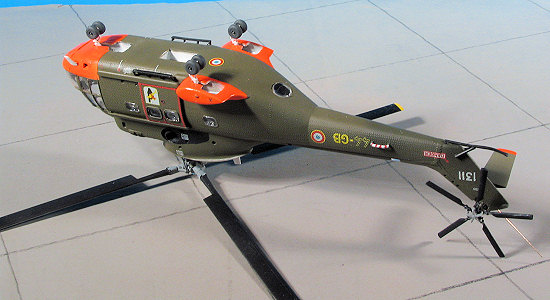 between the hub and lower section. I
ran into a problem with these as two were broken and one other was short shot. I
decided to replace these with small lengths of plastic rod and did so without
any real trauma after I drilled out the attachment holes a bit. Then the rotor
assembly was glued in place. I also attached the tail rotor after trimming the
shaft a bit as it was quite long.
between the hub and lower section. I
ran into a problem with these as two were broken and one other was short shot. I
decided to replace these with small lengths of plastic rod and did so without
any real trauma after I drilled out the attachment holes a bit. Then the rotor
assembly was glued in place. I also attached the tail rotor after trimming the
shaft a bit as it was quite long.
Try as I might, I couldn't get proper looking wheels as I can paint a circle worth a darn and my attempts at using a circle template were not successful. I just left them all the same color and glued them on. Prior to this I painted the oleos a bright silver.
This was all given a coat of matte clear to hold in the decals. A bit of final painting in terms of the rear boom antennas, the clear lights were glued in and I used a bit of wire for the long boom tip antenna. The masking was then removed from the transparencies. Last bits were to attach the main rotor and that was it.
| CONCLUSIONS |
This turned out to be less easy than I'd originally thought. It built more like a good short run kit than a mainstream injection molded version. How far we have come. It also goes to show that I was better builder when I was a kid than I thought as I built the heck out of Airfix kits when I was young!
Thanks to me and my ability to find a cheap kit.
November 2006
#1440 in a series
Copyright ModelingMadness.com. All rights reserved. No Reproduction in part or in whole without express permission from the editor.
If you would like your product reviewed fairly and fairly quickly, please contact the editor or see other details in the Note to Contributors.