OzMods 1/144 Bae Hawk T.1
| KIT #: | 14411 |
| PRICE: | $12.95 MSRP from OzMods |
| DECALS: | Two options |
| REVIEWER: | Scott Van Aken |
| NOTES: | Short run kit with vacuformed canopy |
| HISTORY |
The T.1 ("Trainer Mark 1") was the original version of the Hawk used by the RAF, deliveries commencing in November 1976. The UK ordered 176 T.1s.
 From 1983 to 1986, some Hawks were equipped as the short-range interceptor aircraft for point defence. 88 T.1s were modified to carry two AIM-9L Sidewinderair-to-air missiles in addition to the centerline gun pod carrying a single 30 mm ADEN cannon. These aircraft were designated T.1A. In the event of war, they would have worked in collaboration with Tornado F.3 aircraft, which would use their Foxhunter search radars to vector the radar-less Hawks against enemy targets. Such missions would have been flown by instructor pilots. Conversions were completed in 1986. With the fall of the Soviet Union and the end of the Cold War, RAF Hawks are no longer tasked with this role.
Eighty Hawk TMk1/1A aircraft have been upgraded under the Fuselage Replacement Programme (FRP), which involves the replacement of the aft centre and rear fuselage sections, using new build sections derived from the Mk. 60.
| THE KIT |
It has been several years since OzMods has sent in a review kit and I was quite pleased to find their latest, the Bae Hawk T.1 in the mails.
Molded in a dark reddish brown plastic, the detailing on this one is nicely engraved panel lines that are appropriate for this scale. I was pleased to notice that the lines were consistent and did not fade in and out as I've seen in kits in the past. The surface is quite shiny and free from blemishes. Sprue attachment points are large and in some cases, invade into the part itself requiring careful removal. The plastic a a bit brittle as I noted that both intakes had come free from the sprue. Fortunately their shape is such that you won't get them confused. There is a tad bit of additional plastic on the edges of all parts as one would expect from 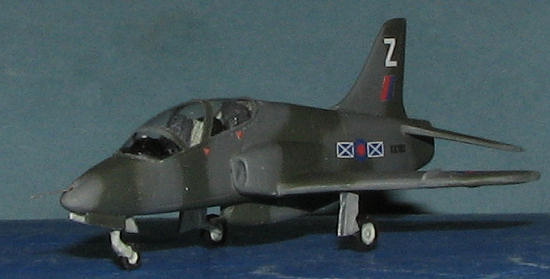 short run kits like this. The kit comes with a rather full interior that consists of seats and instrument panels and a rear combing. The control sticks are molded on the floor. One of mine had broken free during shipment, but replacing it isn't a problem.
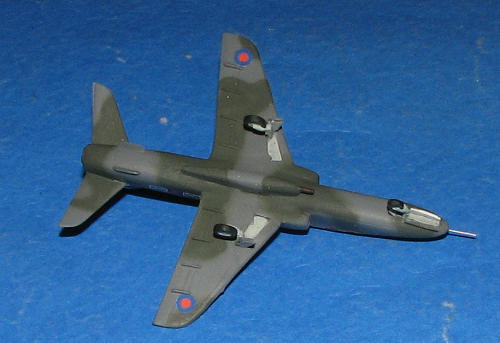
The bang seats are a tad generic, but in this scale they will look just fine. The inner wheel wells have no 'floor', but I should also mention that the inner gear doors were normally up and OzMods could have simply molded them as such if they'd have chosen. As it is, you'll have to separate the various doors to do wheels down or make new ones out of card as the kit ones are a bit thick for scale. Landing gear have the wheels molded in place and look to be well done. Drop tanks with molded on pylons are provided. No finlets on the tanks so you may wish to manufacture those from card if you so desire. A set of outer pylons and a gun pod are also provided. Weapons are not included and if you wish them, a separate weapons set is available. Most Hawks in the strict training role would not use them. A pair of clear vacuformed canopies is provided, which is good as one of mine was crunched during shipment and even after straightening it out, it still has a visible crease.
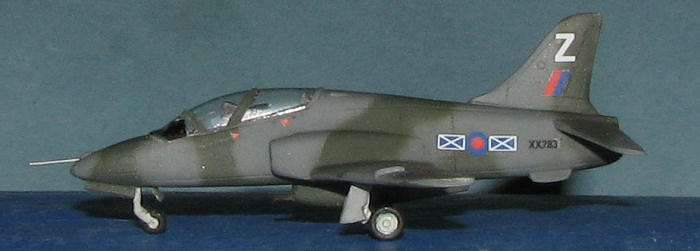
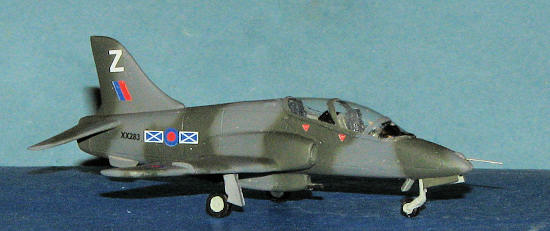
Markings are provided for two aircraft. One is the often photographed XX 283 of 151 SQ (TWU) in a wraparound Dark Green, Dark Sea Grey. The other is a Swiss aircraft in White uppers with wing tips and the underside in red. This one also has a black anti-glare panel. The tiny sheet is well printed.
| CONSTRUCTION |
As with most kits, I started by assembling the cockpit bits. These all required careful gluing and a lot of test fitting. There are no handy alignment marks or shelves or pins in this one so one does have to be a bit careful. The instrument panels will need to be sawn off the sprues (actually, using a fine tooth saw is pretty much needed for all the parts as the plastic is rather brittle), then the sprue attachment points that have intruded onto the part will need to be sanded away. This is less than easy due to the very small size of the parts.
 With the interior parts done, this assembly was glued into one fuselage half while the other was taped in place and the interior adjusted to the best fit. Use plenty of cement on this as one doesn't need it rattling about later on. Once dry, I put as much weight in the nose as I could. It doesn't take much as there isn't a lot of room, but I felt it was needed. When dry, the exhaust piece was glued in place (be sure that a bit of it sticks out) and the other fuselage half was attached.
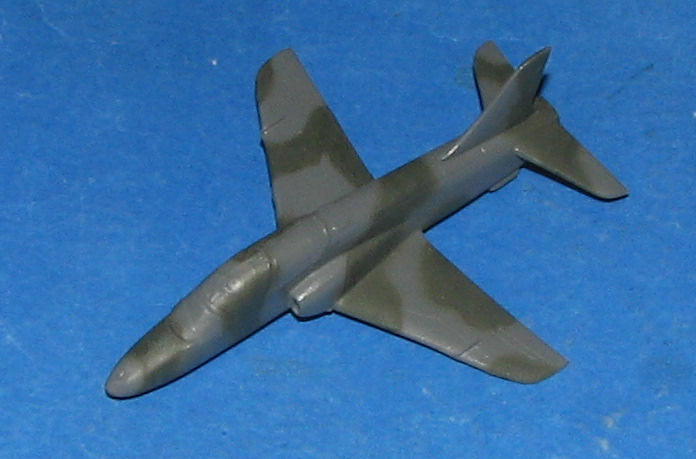
I then glued on the lower wing after the usual adjustments along with the fin. The attachment areas will all need to be opened up more or the tabs reduced in size to get a good fit. Still, quite a bit of filler was needed. I used Mr. Dissolved Putty for this and found that despite its thinness, it was still thick enough to provide good service. Most of the larger gaps took a second application.
At this juncture, I should advise you to install the inner wheel well doors in the closed position at this time. I waited until later and found it took a lot more work when I waited. Anyway, the upper wing halves were attached with no trauma and the considerable gap between the wing roots and fuselage was filled.....several times. First with a small strip of plastic for strength, then with filler. I also glued on the intakes. I then cut off the inner wheel well doors and tried to glue those in place. They did not fit at all well and after much hacking at them, they were installed. All this was dutifully filled and rubbed down. The tail planes also needed to have the holes opened up and the tabs reduced in width to get them to fit properly. This is all short run stuff and is pretty well something one expects to have to do.
I then cut out the good canopy (the other had been smushed in transit and had a crease in it). Careful trimming got it pretty close and due to my poor vac canopy record, close is good. But first, the bang seats were painted and then installed. It was at this time that I discovered that the floor was at a bit of an angle, but nothing to do about it now so the seats were glued, final interior painting was done and the canopy was masked. It was then attached using clear acrylic paint. I chose the Vallejo paint as it is handy and seems to hold well.
| COLORS & MARKINGS |
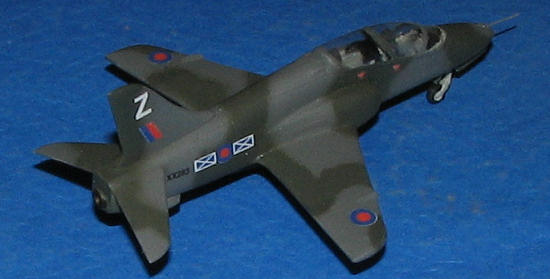
 Now for my favorite part of a build; the painting. I chose the disruptive green and grey wraparound scheme as used by the Tactical Weapons Units. I first painted the entire airframe with Dark Sea Grey. Next, the Dark Green was mixed to water thinness, the compressor turned down to about 7 psi and, using my Skybow AB-100 detail airbrush, I freehanded the green. First effort didn't look too good so I repainted over it with grey and mixed up another batch. This one looked just fine as you can see from the photo. You could mask it and it would look fine, but for me, I much prefer the fre
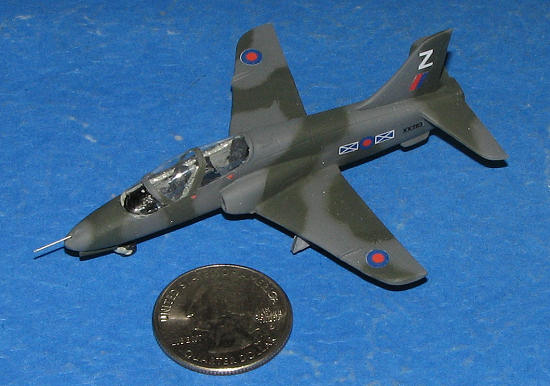 ehand approach, despite the slightly greater overspray in this scale.
Once it was all dry, I glued on the landing gear legs. These are a bit more 'flat' than round, but in this scale, it makes little difference. You can thin them down if that suits your style more. Once they were attached (and I painted them first with Light Aircraft Grey), I gave the overall model a clear gloss coat or two in preparation for decals.
OzMods decals are nicely done. The roundel colors seem a bit bright and the tail letter seems a bit large, but overall, they gave no problem. I did notice that there was a slight mis-registration on the roundels with some white peeking out on the edge. Unfortunately, I did not spot this until after the markings were slid from the backing sheet, but it isn't really that noticeable. The decals are covered by a single clearcoat so each one has to be individually cut out. Some are truly tiny. Once on, the airframe was given a matte clear coat.
| FINAL CONSTRUCTION |
 For this, there was not much left to do. The rest of the gear doors were glued on. I cut the nose gear doors in half and had one half chip into pieces so replaced it with a piece of plastic card. In retrospect,
 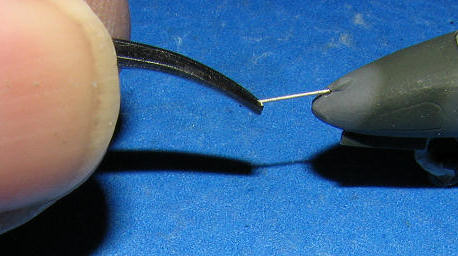 it would probably be best for all the gear doors to have this done. Even in standard injection plastic practices it is tough to get them to a scale thickness.
With that done, I then drilled out a hole in the nose for the pitot tube. Using Griffon Models tiny .3mm brass tubing, I cut a small section and installed it in the hole. It was then painted silver. The tape was removed from the canopy and that was it.
| CONCLUSIONS |
I have to say that despite taking over three weeks to build this kit (OK, I'm slow), I was and am pleased with how it turned out. I'm getting more and more into building 1/144 scale when many of my compadres are turning to the larger kits. If you like modern jets and have the skills needed for a short run kit, then this is one you should seriously consider. Not likely to see it from any other source.
| REFERENCES |
October 2008
Copyright ModelingMadness.com. All rights reserved. No reproduction in part or in whole without express permission from the editor.
If you would like your product reviewed fairly and fairly quickly, please contact the editor or see other details in the