Fujimi 1/72 BAe Hawk T.1
| KIT # | 7A-3 |
| PRICE: | $ at swap meets for $5-10 |
| DECALS: | Two options |
| REVIEWER: | Scott Van Aken |
| NOTES: | Model Alliance 729001 decals used |
| HISTORY |
 I'll keep the historical background brief. Needless to say, the Hawk has been the most successful trainer that Britain has had since World War II. In fact, it rivals the Hunter as to it's popularity overseas. Despite a general post-war history of producing aircraft that did not do well on the foreign market, the Hawk has been an aircraft that has done very well.
A very adaptable airframe that can perform both training and light strike missions with equal ease, the Hawk is suitable for those air arms who can handle some sophistication in terms of maintenance as well as those other more established countries that are looking for a capable and efficient trainer/strike aircraft. After at least 25 years in production, the Hawk is still coming off the lines.
| THE KIT |
For a look at what comes in the box, please visit the preview.
| CONSTRUCTION |
Fujimi kits of this era were known for having good surface detailing, fair fit and pretty empty cockpits and wheel wells. This one fits that description to a tee.
Starting where most modelers begin, the cockpit had the control sticks glued into the receptacles in the floor. These control columns look very little like what is actually in the aircraft and are very fragile as well I had to take extreme care not to break them. Fujimi plastic can be brittle and I knew from past experience to handle thin parts gently. Once the sticks were in place, I painted the cockpit, wheel wells and landing gear with Light Aircraft Grey, using some old Humbrol paint.
 Then I went to work on the wings. The upper wings are in two parts with a full span lower wing. I didn't want to fit any under wing pylons so filled the two outer holes that Fujimi provided and didn't open the inner ones. Then I glued the upper wings to the lower section and used filler to take care of the seams. I should mention that the Fujimi Hawks are the early versions that are used by the RAF and some early export customers. For the majority of other overseas users of the trainer version, the Italeri kit should be used as it has the correct wing with the additional smaller fences that were used on those aircraft.
Next I assembled the intake halves. I've got to tell you that these are not very well shaped. In addition, they both seem to look the same, a bit of a problem as the intakes are definitely handed. I glued them together, sanded the seams and then glued them to the fuselage halves. The left side generally looks good, but the right is the one that will give some trouble as it is a bit too fat and is a bit off shape as well. Filler and sanding will help, but not totally alleviate the problem.
After the interior had dried, I glued in the instrument panels and then glued in the interior. Just to make sure that it would sit on its gear, I added some weight under the forward cockpit floor. If I miss, I can always add more to the nose as the kit does not have boxed in wheel wells. Then I glued the fuselage halves together and added the wing. The fuselage fits well, but the wing fit around the intakes leaves a lot of gaps that required several applications of filler and some concentrated sanding.
 Once that was taken care of, I test fit the exhaust. Much to my dismay, it seems that this pretty much has to be installed when the fuselage halves are glued together. Fortunately, it is a tight fit and so I was able to sand off the normal attachment point and then slide the exhaust in place. I then glued it in to make sure it wouldn't fall out at a later date. I hate it when I screw up like that! I also glued on the ventral fins. These should probably be puttied in place and then sanded, but the fit was fairly good and the thought of doing more sanding on the fuselage didn't exactly thrill me so I left them as is.
Next the tail planes were glued on. Fit is good though one does have to ensure that they are drooping at the same angle or the end result will look a bit odd. I then painted the seats Dark Gull Grey with green/brown seat faces. Probably the wrong colors and definitely the wrong seats as all RAF Hawks have been upgraded with newer MB Mk.10s since this kit came out, but since the interior is a bit bare and probably wrong anyway, no big whoop. I next cut the canopy and windscreen from the sprues. These leave some rather nasty looking attachment stubs that need to be sanded down. Fortunately, they are on the framework so careful sanding should keep the clear parts clear. These were then glued in place and after they dried they were masked. The kit does not come with the blast shield for the back seat so those who are doing a lot of detail to the kit will want to add that. I also found I had to clamp the clear parts in place while the glue dried as the fit was a bit tight.
| COLORS & MARKINGS |
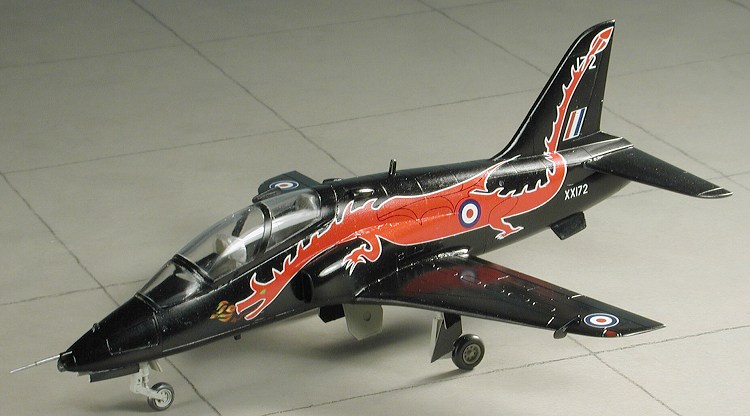
 All current Hawks are in a gloss black scheme and so I chose the new Model Alliance sheet for the St. Athan Hawks. One is a Raspberry Ripple scheme which is quite fetching but will require a lot of masking when painting it. The other is in a gloss black scheme so it was that one that I chose to do. Black isn't an easy scheme to properly paint, and even more so gloss. So I took the coward's way out and used matte black, painting the entire airframe with Floquil Engine Black.
Once that was done, the kit was returned to the bench where the landing gear were installed. These fit well though the main gear is a bit fiddly when trying to get the retraction struts done. It was back to the paint shop for a couple of coats of Future to gloss things up.
Now for the decals. As mentioned, I was going to use the Model Alliance decals for the Dragon Hawks. I first started with the wing roundels and once these were wet, I noted two problems. One is that the white outer ring on the roundels was off register a bit. It wasn't something I noticed on the sheet, but is apparent when putting it on a black background. Perhaps the white ring should have been a separate item. Next, it seems that Fujimi's kit is a pre-production version as the wing fences are way too far to the outside of the wing and interfere with the placement of the upper wing roundels. The result is that they have to be put more outboard. than I'd have liked.
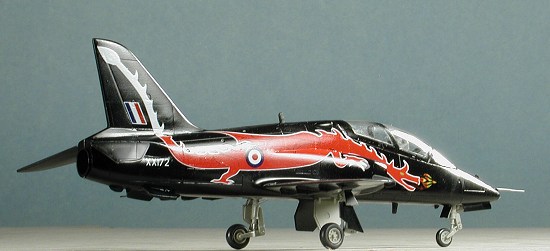
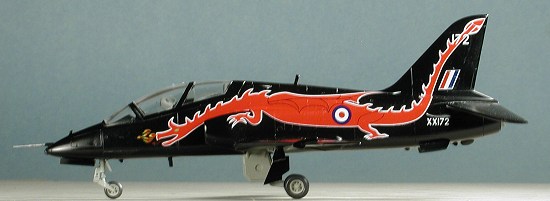
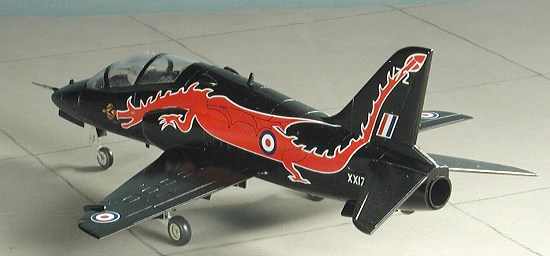
Next up was the nice dragon markings. I started on the left side and while the decal didn't fit precisely as shown on the markings guide, it was close enough. I used some Solvaset on the decals to get things to snuggle down properly over all the curves. Then the t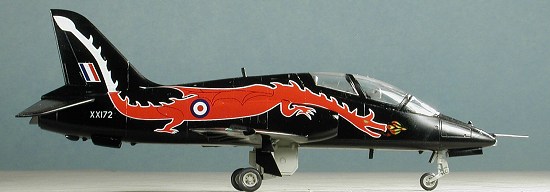 ail, which is a separate piece, was added and fit well. The other side I had no problems with the dragon body, but the tail was another thing. Apparently there was a goof that I missed when I reviewed the sheet and the right tail piece was exactly like the left instead of mirrored. Since I'd already soaked the right tail, I installed it upside down as if that part had not been fully painted. An impassioned e-mail to Model Alliance resulted in acknowledgement of the problem and a sending of an addendum. However, after 8 days, the addendum still hadn't arrived so I decided not to postpone publishing the review another week and to continue on without it. (2009 update: The replacement they sent was 1/48 so the model is still without the proper right side tail)
| FINAL CONSTRUCTION |
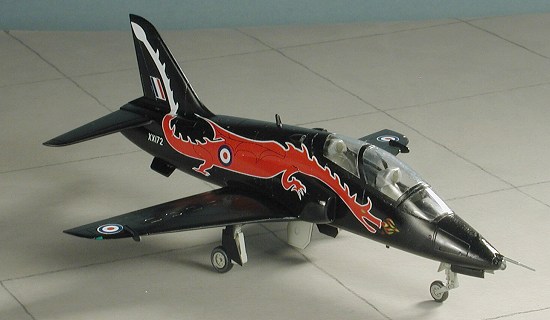
 Final construction consisted of attaching all the gear doors and doing some touch up painting. This included the wing tip formation lights, the pitot tube and various oleos, as well as installing the nose landing light. This last item was not a good fit. The kit was given another coat of gloss clear to seal in the decals and then the masking was removed from the canopy. That was it.
Now I should state that this model is not truly done as it needs that additional decal. Once it shows up, I'll finish things up and then re-shoot the right side images.
| CONCLUSIONS |
This kit just goes to show how memory plays tricks with you. I'd thought it to be a very good kit with no vices. Well it is a good kit, but you do need to use filler on it. I took good notes and the next one I do will be not only easier, but will incorporate a fix or two to bring it up to specs. Regardless, it is a neat airplane and one that I can recommend for those who don't mind a bit of extra filler work.
July 2004
#1320 in a series
Copyright ModelingMadness.com. All rights reserved. No reproduction in part or in whole without express permission from the editor.
If you would like your product reviewed fairly and fairly quickly, please contact the editor or see other details in the