Airfix 1/72 Hawk T.2
| KIT #: | A03073 |
| PRICE: | $12.99 SRP |
| DECALS: | Three options |
| REVIEWER: | Scott Van Aken |
| NOTES: |
| HISTORY |
The BAE Systems Hawk is a British single-engine, advanced jet trainer aircraft. It was first flown at Dunsfold, Surrey, in 1974 as the Hawker Siddeley Hawk, and subsequently produced by its successor companies, British Aerospace and BAE Systems, respectively. It has been used in a training capacity and as a low-cost combat aircraft.
Operators of the Hawk include the Royal Air
Force (notably the Red Arrows display team) and a considerable
 number of
foreign military operators. The Hawk is still in production in the UK
and under licence in India by Hindustan Aeronautics Limited (HAL) with
over 900 Hawks sold to 18 operators around the world.
number of
foreign military operators. The Hawk is still in production in the UK
and under licence in India by Hindustan Aeronautics Limited (HAL) with
over 900 Hawks sold to 18 operators around the world.
The Hawk 128 is the new Advanced Jet Trainer (AJT) for the RAF and Royal Navy. The Mk. 128 includes modern LCD displays instead of conventional instrumentation and is powered by the Rolls-Royce Adour 951 engine. The Ministry of Defence awarded a Design and Development Contract to BAE Systems on 22 December 2004. The T2 builds on the design of the Australian Mk. 127 and the South African Mk. 120s. A similar aircraft is currently being built under license in India for the IAF.
In 2012 orders were placed for the AJT version by the Royal Saudi Air Force and the Royal Omani Air Force for 22 and 8 aircraft respectively.
| THE KIT |
Typical of the latest batch of Airfix new molds, the engraved detail, which is
really quite good, seems to be a bit much, especially when compared to the
Japanese and even newer Czech releases. However, few have
 really found that to
be a deal breaker.
really found that to
be a deal breaker.
This one has a nice, though somewhat basic cockpit with decals for the instruments and a pair of crew members to help hide the bare seats. There are nicely done landing gear with complete wells. The nose gear is attached when the fuselage halves are cemented together, increasing the opportunity to break it during construction, though to be frank, it is a rather sturdy piece. The two piece canopy includes the blast shield, something missed in some other kits. Like other kits, it has it attached to the canopy. All of the gear doors and the speed brake can be posed up or down as one wishes, though there is no in flight display stand. For stuff to put under the plane there is a gun pod, and either tanks or Sidewinders, the latter of which are nicely molded. Thankfully, Airfix have not pre-opened these attachment holes so one can build a clean airframe.
In order to make the newer version, Airfix had added two new sprues. One contains the new fuselage halves. The other has new upper wings, the new strakes in front of the fin and things like wingtip sidewinder rails. All of the other bits were contained on the earlier sprues.
 Instructions
are typical for Airfix in that they are well drawn, follow a logical build
progression, and continue to use only Humbrol paint numbers for any colors
needed. It isn't until we get the full color markings and exterior painting
guide that we get generic names for some of these colors and only if used to
paint the outside of the model. The markings are for three planes.
One is a generic all-black Hawk T.2 for the RAF. One is a nice grey scheme
for an Indian Air Force version and one is for the box art plane, which is
the demonstrator. All of the black parts of the scheme are decals so one
only needs to paint the two grey shades. Thanks to black being quite opaque,
one only has to get these greys close and the decals will co
Instructions
are typical for Airfix in that they are well drawn, follow a logical build
progression, and continue to use only Humbrol paint numbers for any colors
needed. It isn't until we get the full color markings and exterior painting
guide that we get generic names for some of these colors and only if used to
paint the outside of the model. The markings are for three planes.
One is a generic all-black Hawk T.2 for the RAF. One is a nice grey scheme
for an Indian Air Force version and one is for the box art plane, which is
the demonstrator. All of the black parts of the scheme are decals so one
only needs to paint the two grey shades. Thanks to black being quite opaque,
one only has to get these greys close and the decals will co| CONSTRUCTION |
This kit is very much like the earlier T.1 in terms of the parts used, though many which are the same are on different sprues and attached to them at different points. in many ways, the fit was the same, but in others it was not. The first step for me was to paint all the interior bits with dark gull grey. I used a brush for this and for painting the wheel wells, interior gear doors and landing gear with light aircraft grey. Actually, Airfix offers this interior grey as one of the acrylic colors that come with the kit. I did a test bit with it and it is a bit lighter than the Testors grey I used. Dries quickly, though. Anyway I also painted the seats with dark sea grey and did the cushions in Vallejo's British Uniform color. Once the instrument panels had dried, the instrument decals were applied.
With all those bits being painted and drying, I glued the wings together. Fit
is quite good. The interior was then built up. During this time I discovered
that I'd placed the instrument decals too low on the panels. Fit them more near
the top or you'll cut off the side bits. Actually, you won't see much of them
once everything is buttoned up, but if someone aims a flashlight in there, it
will be obvious they are too low. The control sticks were glued in, followed by
the front and rear bulkheads. Then the seats. The interior was glued in and
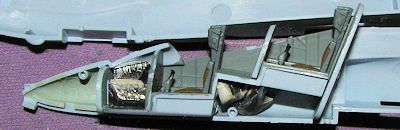 when dry, I cut up sections of
weight. The instructions state 5 grams to fit into the small area forward of the
front instrument panel, but I couldn't get it all to fit so added another gram
or two and placed that under the rear seat section. The image is of a T.1 but
the T.2 fits exactly the same way.
when dry, I cut up sections of
weight. The instructions state 5 grams to fit into the small area forward of the
front instrument panel, but I couldn't get it all to fit so added another gram
or two and placed that under the rear seat section. The image is of a T.1 but
the T.2 fits exactly the same way.
I taped the fuselage halves together while the interior dried and tried to install the nose gear through the gear opening. It won't work so you need to glue on the nose gear to the forward bulkhead before cementing the fuselage halves. Personally, I don't like gear hanging down when I have to fill seams, but there is no other option on this one.
With the halves together, there was the usual fit of filling and sanding.
Probably because I'm a sloppy builder, I had to do the filler and s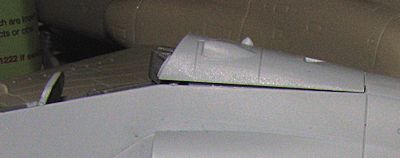 anding
thing with every seam. Sometimes twice. The intakes needed some help to fit.
Unlike the T.1, the holes in the intakes for the pins on the fuselage are too
small. I had to drill these out to get the intakes to attach properly. Like the
T.1, the
upper fuselage section behind the cockpit will not properly fit. This is because
the rear bulkhead is too tall. This needs to be sanded down to get this insert
to fit flush. I then installed the wing and found it had not only some
goodly gaps at the lower forward join, but also had a pretty large step. Rear
fit quite well.
anding
thing with every seam. Sometimes twice. The intakes needed some help to fit.
Unlike the T.1, the holes in the intakes for the pins on the fuselage are too
small. I had to drill these out to get the intakes to attach properly. Like the
T.1, the
upper fuselage section behind the cockpit will not properly fit. This is because
the rear bulkhead is too tall. This needs to be sanded down to get this insert
to fit flush. I then installed the wing and found it had not only some
goodly gaps at the lower forward join, but also had a pretty large step. Rear
fit quite well.
After the usual rounds of filler, I attached the rear speed brake piece in
the closed position. Unlike the T.1, this is a very loose fit and you will have
a goodly gap on one end. Next were the flap hinges. These were a very tight fit.
On the T.1 they slipped into place with ease, but on this one I had to press
them firmly into place. The ventral stabs were next. These are very loose
fitting and leave some rather large gaps at the back. Returning to the cockpit,
I glued in the rear seat instrument panel anti-glare shield. Like the section
aft of the cockpit, it did not fit without trimming on the instrument panel and
this includes parts going down the outer sides of the panel. Not sure why these
panels were not a good fit as you'd have thought that the kit would have been
test built prior to full production. I would put it down to my goofing something
up, but it was the
 same on another kit I was building.
With that in place, the wing fences were added. On the T.1 kit they are molded in place and personally, I'd have preferred that for the T.2 as there is inevitably a gap where it curves over the leading edge of the wing. Next item was to install the bang seats prior to getting the clear bits in place. Unlike the T.1 kit, the T.2 version has gun sights for the front and rear cockpit. I found the openings for these to be too small and so had to enlarge them before attaching the bits. Like the T.1, it includes a blast shield that fits behind the front seat. Also unlike the T.1 kit, this has a two piece cockpit canopy with a separate windscreen. I would imagine this would be a handy feature if you did a resin cockpit for it. The main clear bits were masked and then glued in place.
I also glued in the horizontal stabs and the little stabs just in front of them. Apparently BaE learned from their part in the T-45 program that these bits are handy to have. I also glued the VOR antennas on the fin before realizing there was going to be a decal going under them so pulled them out. The instructions would have you install a flare/chaff dispenser above the exhaust and an in-flight refuelling probe forward of the cockpit, but unless you are building the demonstrator, those are not required. If using aftermarket decals, check photos to see if these are installed. Since I wasn't installing any pylons or weapons on this one, it was time for some painting.
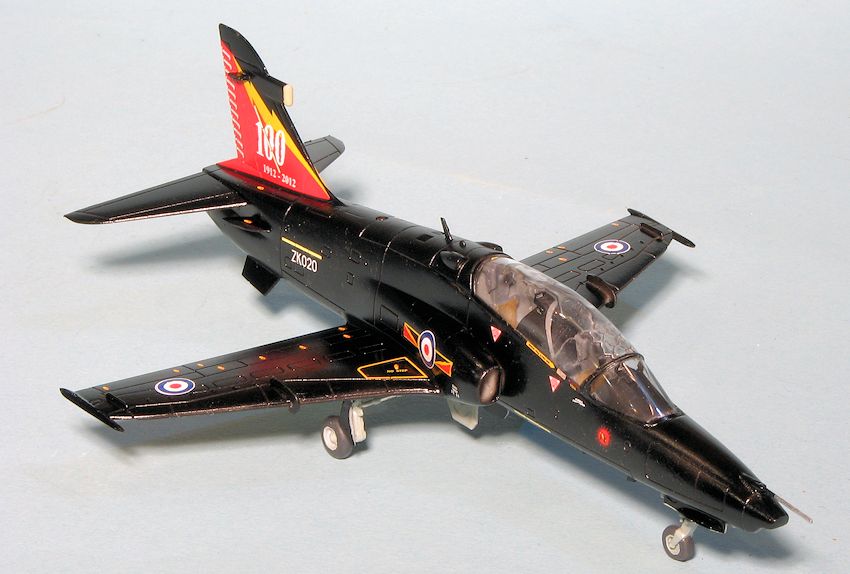
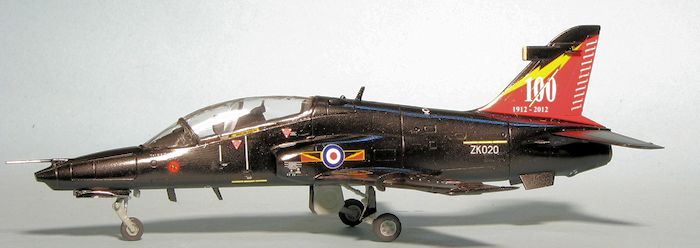
| COLORS & MARKINGS |
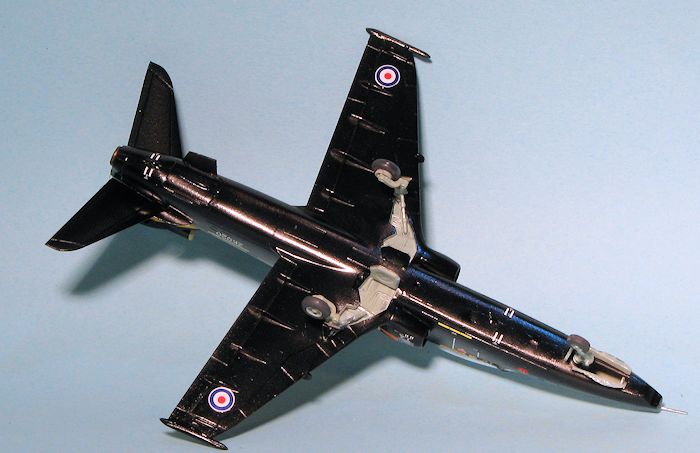
The scheme for this one is super simple: gloss black. I used an old bottle of Badger Freak Flex black acrylic. Now I'm not sure how well it will hold up, but since no masking is required, it shouldn't be an issue. The paint went on with no worries and was gloss so once I repainted the gear wells, I installed the main landing gear.
 The gear legs and struts are the same as with the
Hawk T.1, though the receptacles in the wing are larger. These are a fairly good
fit, but it seems that the retraction struts are a tad short as they do not
reach far enough to positively mate in the holes for them in the gear. If you do
get them to reach, the gear legs are bowed inward a bit. Once those were on and
dry, I started applying decals.
The gear legs and struts are the same as with the
Hawk T.1, though the receptacles in the wing are larger. These are a fairly good
fit, but it seems that the retraction struts are a tad short as they do not
reach far enough to positively mate in the holes for them in the gear. If you do
get them to reach, the gear legs are bowed inward a bit. Once those were on and
dry, I started applying decals.
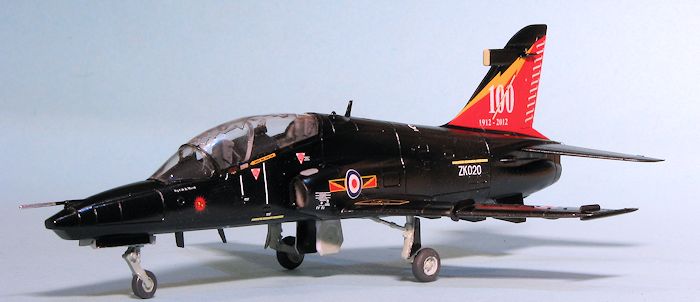
For this scheme, I used Xtradecal sheet 72-156 that has markings for a 4 Squadron plane in 100th anniversary scheme. It is somewhat sad to see such a well know RAF unit relegated to being on trainers, but such is what happens when a force downsizes. I see this in the USAF as well with some well known units being demoted to non-flying 'squadrons'. Anyway, the decals went on quite well and Solvaset worked very well. I'm not sure if these markings are for the Airfix kit as the fin markings seemed a bit off. Italeri produced a Hawk 100 series kit shortly after the prototype flew so it may be these are for that kit. There is no indication on the decals as to what kit they are designed, though it does specify kits for a couple of other aircraft types. Anyway, with a mixture of sheet and kit decals, I put on enough to make it look busy.
| FINAL CONSTRUCTION |
With the decals on and dry, it was time to add the
final pieces. As I'd decided not to use any wing tip ord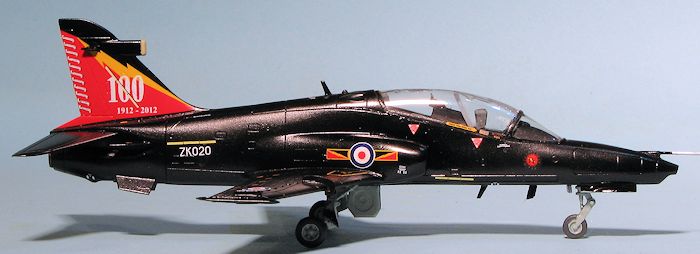 nance,
the 'blanking plates' were installed. I also glued on the various radio
antennas. One antenna, part F16, was to go under the forward fuselage and just
atop the fuselage near the fin base. However, only one antenna is provided! I
then installed the ILS antennas on the fin and promptly lost one. Easy enough to
make with plastic card. The gear doors were then glued in place as was the nose
probe. There is a clear bit with no indication of where it goes. This was
followed by touch up painting and then a coat of something a bit less gloss. The
last steps were the removal of the masking and the installation of the tailpipe.
nance,
the 'blanking plates' were installed. I also glued on the various radio
antennas. One antenna, part F16, was to go under the forward fuselage and just
atop the fuselage near the fin base. However, only one antenna is provided! I
then installed the ILS antennas on the fin and promptly lost one. Easy enough to
make with plastic card. The gear doors were then glued in place as was the nose
probe. There is a clear bit with no indication of where it goes. This was
followed by touch up painting and then a coat of something a bit less gloss. The
last steps were the removal of the masking and the installation of the tailpipe.
| CONCLUSIONS |
This kit offers everything we have come to expect from the 'new' Airfix. A nicely done model that doesn't overwhelm one with tiny bits, though they are there to be sure. An of course, the decal sheet is rife with small markings, but that is to be expected. Naturally, the kit is somewhat simplified in that there are no AOA probes and some of the smaller antennas and things are missing. I also found the instructions to be a bit ambiguous at times. As most of you know, Italeri released a 1/72 Hawk 100 back 14 years ago. It cannot be built as a Hawk T.2 being more of an early prototype and the variant that was apparently purchased by Australia. Though it looks a lot the same, there are detail items such as having four small wing fences instead of the large one on each wing that the current T.2 is wearing. Having said all this, it is a kit that I have no trouble recommending. It has all the major bits most modelers want and builds into a very nice model.
| REFERENCES |
http://en.wikipedia.org/wiki/Bae_Hawk
March 2014 Thanks to me for picking this one up.
If you would like your product reviewed fairly and fairly quickly, please contact the editor or see other details in the Note to Contributors.