| KIT #: | ? |
| PRICE: | $11.95 when it was new |
| DECALS: | Two options |
| REVIEWER: | Scott Van Aken |
| NOTES: | Vacuformed plastic with injected and metal parts |
| HISTORY |
Once the Italian aero industry got back underway after WW2, itmostly started designing training aircraft, some of which were quite successful.When there was a need for a light attack aircraft for NATO, several countries,including the US, became involved in the design of the new jet. As often happensin these types of situation, a number of the initial participants pulled out,leaving just Italy and Germany. The US pulled 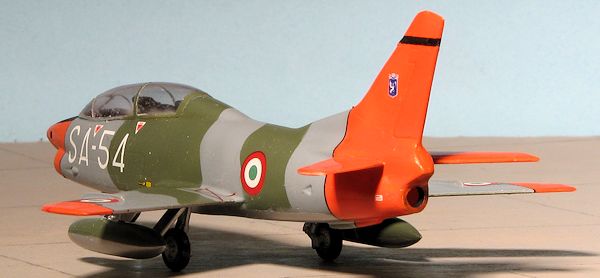 out as the Army was the interestedparty, and Congress told them they can't have anything that would normally beused by the USAF (like most fixed-wing aircraft).
What resulted was a very nice light attack jet, the Fiat G.91.This aircraft soldiered on for a number of years, being finally retired by theAMI in the early 1990s. The Germans, however, seem to use up aircraft a lotfaster than most countries and ended up transferring a number of them toPortugal, who used them until just a few years ago.
As with most modern jets today, there was a need for a two seatconversion trainer. This is where the G.91T came into being. Unlike Germany,Italy also used the aircraft for a general fast jet trainer, one that pilotsdestined for tactical jets would fly after initial jet training in the MB.326.
| THE KIT |
Aeroclub's multimedia kitconsists of no etched brass, but lots of metal and vacuformed bits. Basicallythe fuselage and cockpit tub are vacuformed with injected styrene wings and tailplanes. Metal makes up the rest.
The metal is quite well done andis up to Aeroclub's usual standards. You get the four wing pylons, two seats,two control stick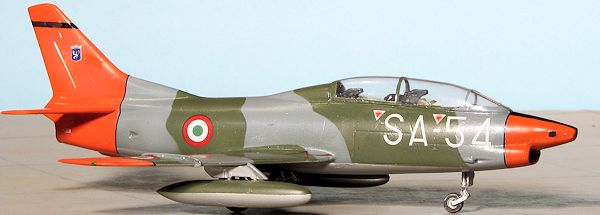 s, two instrument panels, two guns, main and nose landing gearand wheels and the speed brakes.
The vacuformed parts consist ofthe fuselage, cockpit tub, wing tanks and everything else except the wings andtailplanes. The injected plastic parts are low pressure with raised detail. Theplastic itself is very glossy and slick. Detailing is fair but a bit soft, notuncommon for low pressure molds.
Decals are for two aircraft, oneGerman and one Italian. I have used Aeroclub decals before and they are verygood. This one was in register and though a bit thick, should work quite well.Though I have not mentioned the canopies, they are vacuformed and well done.There are two of them as the profile for the German and Italian aircraft are notthe same. The German one is not as smooth as the Italian one.
Instructionsare mostly paint scheme. The assembly instructions are printed only with nodiagrams. They are also rather general: "Assemble the tail group and fillthe gaps". Definitely not for the beginner. In fact, the writteninstructions are the same as those for the G.91R kit!
| CONSTRUCTION |
Several years ago, I decided to give this one a go. Now I know that many modelers with more skill and staying power than I would have had this one done as, for a vacuformed kit, it really isn't that complex. Well, we are dealing with me and I would work on the kit, then let it set for many months before picking it 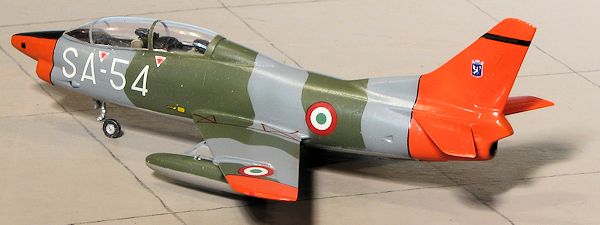 up and working on it some more. That doesn't include the well over a decade that it just sat around waiting to be worked on.
First things first and in this case it means removing the majority of the parts from the vacuformed sheet. This is really quite a simple task. Many will take a felt tip pen and run it around the edges of the part as a guide. Then, taking a sharp scalpel or hobby knife, simply score around it a few times. When done, simply flex the plastic and the parts will come free. Now in this initial step, just do the outline of the part. Leave all the other bits that need to be cleaned up until after the major parts are free and sanded down. This keeps the parts relatively strong as cutting out intakes, exhaust, wheel wells and such will only weaken the part. When removed, use wet and dry sandpaper with lots of water to slowly scrub the parts level.
As usual, I overdid it and had to use shims to bring things back to normal. This was discovered by taping the fuselage halves. At this stage (the adding shims part), I cut out the canopy to be sure it won't be too wide or too narrow and adjust the fuselage and shims to fit. It is really easier to do it this way. Once the main parts are cut and sanded, any other openings can be cut away by scribing and snapping. I leave space to edges and take that off with files and sandpaper to be sure I don't remove too much. If you don't have a set of miniature files, get one. I got my set of cheapie Chinese files for $6 several years back and they are quite handy.
 Now it was time to work on the interior. The set provides a floor, control sticks, instrument panels and bang seats. First I glued in the floor and any bulkheads as well as the metal instrument panels. When I was sure all was OK, I glued the fuselage halves together. I also took the opportunity to install a piece of plastic tubing for the engine exhaust. Naturally, the instrument panels fell out and it was a major PITA to get them back in place in any semblance of looking good. Once they were sort of installed, the interior was painted dark gull grey with a brush. Then the somewhat softly molded plastic wings and tail planes were glued on.
All this sounds pretty quick, but it was five years in the making to get to this point. That includes several applications of filler to take care of glitches. I guess it was all the careful sanding that made me lose interest so often. One has to be careful as vacuformed plastic is softer than most styrenes and so sanding is tediously slow.
The entire project would have died were it not for the Meng G.91R kit, which got me to dragging this one out again in an attempt to finish it. I added more filler to the areas that needed it and cut out the inner main gear doors, which were normally closed. To say these doors do not even come close to fitting would be about right. The are too short and too broad. Frankly, I think they are the inner gear doors for the G.91R rather than the 91T as they appear to be about the right size and shape. Regardless, they do not fit the T so I trimmed them down to begin to fill the hole. Meanwhile, I sanded the edges of the flight surfaces as they were pretty rough. I also painted the instrument panels and the cockpit.
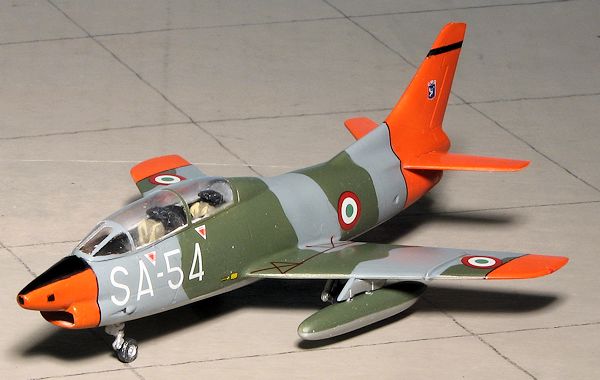
 Smoothing out the underside took a considerable amount of time and during that, I prepped the metal seats. These are a bit too wide to fit into the cockpit area, so I glued some tabs of plastic to the underside. One has to be sure they do not sit too high or the canopy will not fit. I also prepped the control sticks by cutting squares of plastic card and drilling holes in them to fit the sticks. I then glued in the seats and discovered that there was not room in the back for the control stick. The forward one was then glued in place. The canopy was masked with some difficulty as the frame lines are quite indistinct. I took the time to spray some white over all the work I had done to see if I missed anything major and to prep some of the resin for the rest of the paint that would be used.
| COLORS & MARKINGS |
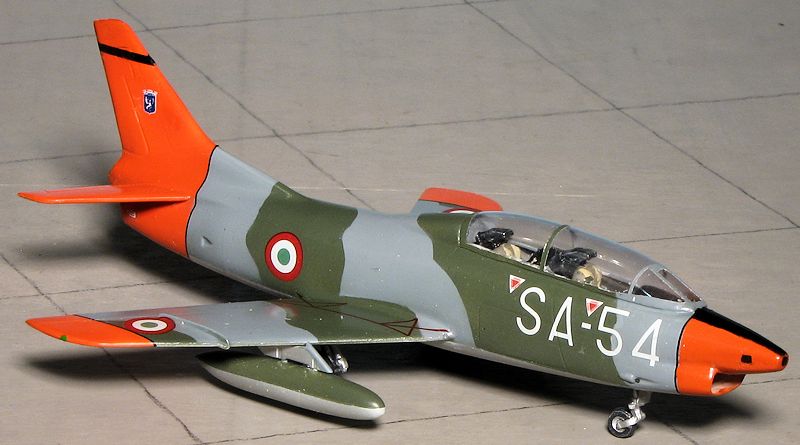
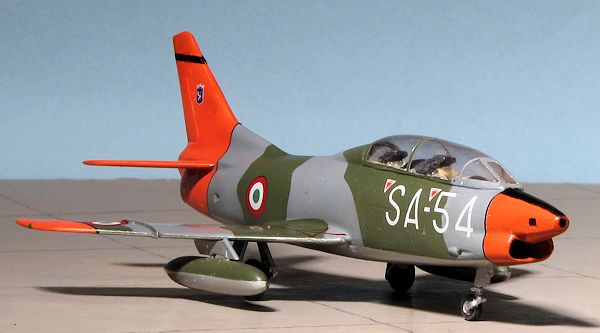
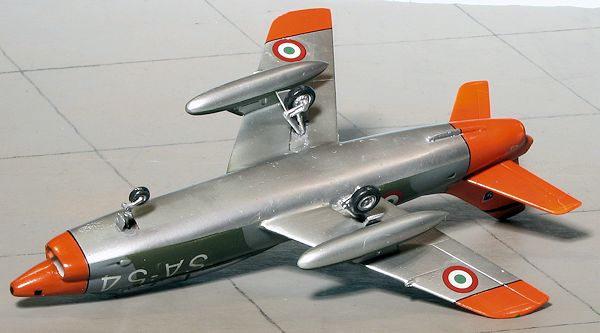
First off, the nose, tail and wing tips were painted white. When dry, I used International Orange over the white painted areas. These were then masked and I painted on a nice Grey that was lighter than that used on the German G.91R reviewed a while back. This was then masked off and I used RAF Dark Green for the other upper surface shade. The underside was painted using Alclad II Aluminum. The nose anti-glare area was masked off and that was then painted as well.
| FINAL CONSTRUCTION |
Back on the bench, I attached the landing gear and on the rear legs, the metal wheels after cleaning them up and painting them. Then the kit sat for a few weeks while I waited for some black stripes which I ordered from the LHS. These are Microscale sheets and I ordered three sizes as I was not sure which would fit best. Turns out the smallest one of these, 1/64 inch, were the ones that matched the painting and markings diagram the best. Than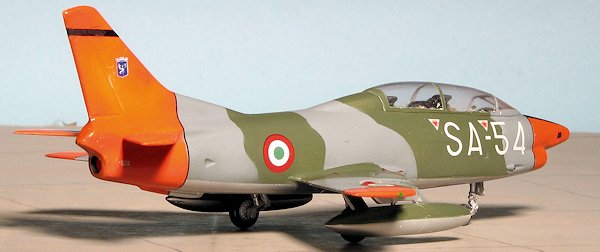 ks to their thinness, they are not the easiest to apply, but they conform well to all the convolutions on the rear fuselage.
I used the conversion decals for it and found that while the decals fit pretty well, they have very large clear carrier edges. I also found that, typical of some very old decals, they had a white detritus that required washing each marking prior to use. I used Mr. Mark Softer for a setting solution and it was fairly good as weaker solutions did pretty much nothing. There were few data decals and no serial number decal, but not having anything else, I used them anyway.
I had to do a bit of touch up painting as the paint tended to scratch rather easily for some reason. Gear doors were made from the remnants of the vacuform backing sheet. The tail stripe and camera windows were also made using decals. A matte coat was sprayed over the airframe, the drop tanks were installed and a nearly decade long project was finally finished!
| CONCLUSIONS |
 I am sure that folks like Carmel Attard could turn this one into a real beauty, but I have come to realize that if things aren't pretty much good from the box, there is no way I'll be able to produce like many whose work I see. This one is not pretty much good from the box and requires a level of ability that not everyone will be able to reach. Because this kit is at least 20 years old, I am not sure if Aeroclub still produce it. I would wait for Meng to come out with a nice injected plastic version.
March 2013
Thanks to me and perseverance for bringing this to you.
If you would like your product reviewed fairly and fairly quickly, please contact the editor or see other details in the