
Hasegawa 1/72 Mitsubishi F-2A/B
| KIT #: | 00545 |
| PRICE: | $28.95 SRP |
| DECALS: | Multiple options |
| REVIEWER: | Scott Van Aken |
| NOTES: | Base kit from 2003 |
| HISTORY |
The Mitsubishi F-2 is a multirole fighter manufactured by Mitsubishi Heavy Industries (MHI) and Lockheed Martin for the Japan Air Self-Defense Force, with a 60/40 split in manufacturing between Japan and the USA. Production started in 1996 and the first aircraft entered service in 2000. In FY2005, Ministry of Defense changed the category from Support Fighter to Fighter.
The F-2's maiden flight was on 7 October 1995. Later that year, the Japanese government approved an order for 141 (but that was soon cut to 130), to enter service by 1999; structural problems resulted in service entry being delayed until 2000. Because of 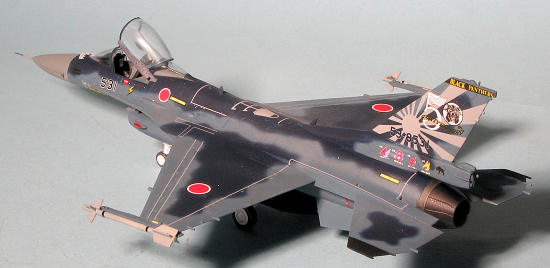 issues with cost-efficiency, orders for the aircraft were curtailed to 98 in 2004.
On 31 October 2007, an F-2B crashed during takeoff and subsequently caught fire at Nagoya Airfield in central Japan. The jet was being taken up on a test flight by Mitsubishi employees, after major maintenance and before being delivered to the JSDF. Both test pilots survived the incident with only minor injuries. It was eventually determined that improper wiring caused the crash.
On 12 March 2011, 18 F-2s based at the Matsushima Airbase in Miyagi Prefecture were swamped by the tsunami caused by an 9.0 scale earthquake. Of these 18, 12 were deemed beyond repair and will be scrapped. The remaining 6 F-2s will be repaired at the estimated cost of ¥80 billion yen.
The last of 94 aircraft ordered under contract was delivered to the Defense Ministry on 27 September 2011. During the roll-out ceremony of the last production F-2 fighter jet, Mitsubishi Heavy Industries confirmed that production of the F-2 would end and no more F-2 fighters will be produced by the manufacturer.
| THE KIT |
It was no surprise when Hasegawa released this kit in 2003. They were smart enough to wait until the production aircraft had been finalized before cutting tooling, something they did not do with earlier prototype jets. It is surprising to many of us that there are not two separate boxings; one for the F-2A and the other for the F-2B. Either type can be built from this kit by using different upper nose sections and cockpits.
 There are detail differences between and A and B model, but those are clearly shown in the instructions. If you have built a Hasegawa F-16 in this scale, then you will see a great deal of similarity. Parts are, for the most part, not interchangeable between the F-16 and F-2 as the latter is an overall larger airframe.
The cockpits are fairly well appointed, though are somewhat Spartan in terms of high detail. The bang seats are acceptable and there are decals for the instruments, something that is rather common in Hasegawa 1/72 kits. Both have canopy sections that can be posed open if one wishes. I should mention that though not shown in the parts layout, the clear sprues are well designed to keep the parts from being scratched. As you would expect, the kit comes with three fuel tanks. Probably because there is no weapons set for Japanese weapons, the AAM-3 and ASM-2 missiles are included in the kit. Those choosing not to install all the pylons will have to fill holes as all but the outboard pylon are pre-drilled.
Instructions are typical Hasegawa with Gunze paint references. The differences between the F-2A and F-2B are clearly shown in terms of holes to open up for each version. The decal sheet is well printed and while there are officially markings for three planes, the sheet has spare serials so you can do any F-2 from 21 and 3 Squadron for which you have a photo. The dark blue disruptive scheme is quite striking and quite appropriate for an aircraft designed for maritime strike. Those not wanting to use the kit markings have a number of special scheme sheets on the market from which to choose.
| CONSTRUCTION |
 After a bit of procrastination, I got underway on the kit. Being totally standard on this one, I started by painting a bunch of parts, which included the interior and wheel well/intake bits. I used Testors for the FS 36231 interior bits and Tru-Color white for the wells. Then I applied the decals to the interior and instrument panel. I have to tell you that the panel bits are the pits as they are teeny and difficult to install, but I got them in place. After attaching the control stick, I glued the interior into the lower fuselage section.
I then went to work on the intake. This is pretty standard Hasegawa F-16 stuff in that it has the wheel well, two side pieces (do not forget to drill out the holes for the sensors) and intake section. I have never gotten a good fit out of these and had to resort to filler and sanding to smooth things out. Fitting the intake brace was also quite an experience. This was then cemented to the lower fuselage along with the prepainted bits for the main gear well. Meanwhile, I installed the exhaust compressor section in place and then glued the upper rear fuselage. As this kit is for both the A and two seat B, the forward fuselage half is separate.
 Decided at this time to paint the exhaust sections, using Alclad II Jet Exhaust. During this time, I prepainted the wings, stabs and part of the fuselage with Intermediate Blue. Not having access to Gunze paints, I used a conversion chart to find the closest Testors paint and that is what it came up with. Glued on the forward fuselage section, which is a very snug and pretty good fit. The LEREX wraps around on the upper section and while there is a bit of a gap on the underside, I decided it would be more work to fill than it was worth. The wings were then glued on. Fit is quite good, but again, there is a bit of a gap. This time, I did fill it as these are supposed to be seamlessly smooth transitions from fuselage to wing.
I also built up the tail section. The F-2A has sensors on this part that are not on the F-2B. The fit of these is not the best as the bases are too curved for the place where they are to fit. Again, there are holes to be drilled out prior to fitting these pieces. Test fitting this on the fuselage showed a very good fit, so I glued it in place to have a consistent camo scheme. I then masked the clear bits and glued on the windscreen and backlight using clear paint. The canopy was simply tacked in place so it would be easy to remove later.
| COLORS & MARKINGS |
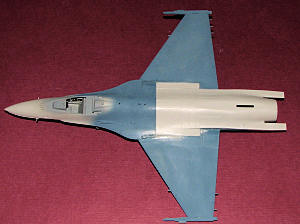
This seemed like a good time to get really involved in painting. I used Testors paints for the Intermediate Blue and Sea Blue. But before that, the metal area around the exhaust was painted with Alclad II Steel after the exhaust compressor face and the burner can were painted with Alclad II Jet Exhaust. This was then masked off as well. The nose was painted with FS 36230 and it, too, was masked off. The wheel wells had been painted white and stuffed with tissue. I also painted the centerline tank black to go with the scheme I was using.
 Then the entire airframe was painted Intermediate Blue. On the upper surface, the Sea Blue was painted in the pattern shown in the instructions. It took the usual back and forth before I got things right. Then a trip to the work bench to stick on the landing gear and wheels before decals. One thing I have found out that if I handle a kit too much, I break things and so it went with several of the little static discharges that hang off the rear of the flight surfaces and one of the nose sensors.
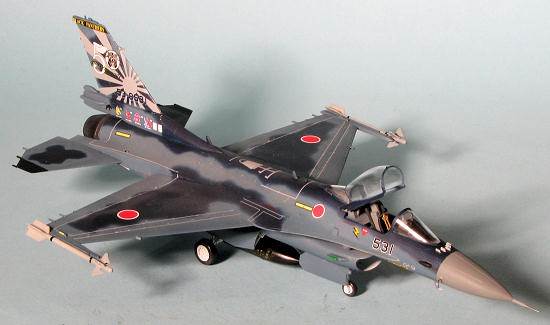
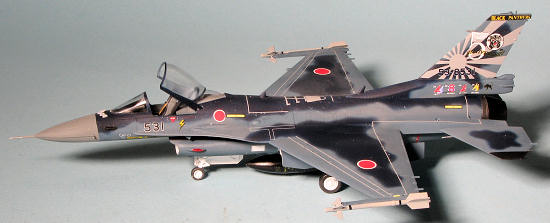
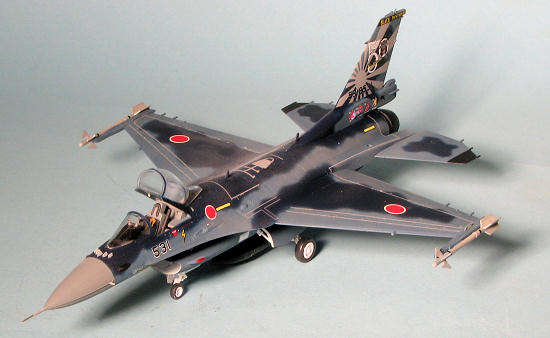
The kit was then given a couple of coats of Pledge (with Future shine) in preparation for the decals. For this aircraft, I used DXM Decals with the number 13-7102 printed on the lower left of the instruction sheet. This has several special schemes and I chose the 8 Sq 50th Anniversary of Misawa Air Base scheme. These decals are not the easiest to use. They are very thin and can easily tear. They also MUST have a rather strong setting solution used or will silver. I used Mr. Mark Softer and it worked great. For the most part they worked as advertised, but the yellow script for the centerline tank was not backed up by white and pretty much disappeared when placed on the black tank. Applying decals to modern jets is, to me, rather tedious as there are so many stencils. I basically applied markings on and off for about a week then stopped, with easily another week's worth of markings to go. I am slow about this, applying a handful of markings, letting them dry a bit, applying setting solution and waiting until it can be handled before continuing. Once I had them all on, I gave it a coat of matte clear using Pledge mixed with Tamiya flat base.
| FINAL CONSTRUCTION |
The last bit consisted of assembling the missiles, attaching gear doors and the main wheels. This is not exactly easy for those with fat fingers and there are a lot of s mall parts involved with the landing gear and doors, so I used tweezers for much of it. I had considered adding weapons to this one, but in the end, though painted, both weapons and pylons were left off as display planes are frequently clean when doing their flying displays. This does mean holes in the bottom of the wings for the pylons (which may still be added later), but I can live with it.
Though the decals include a metal pitot tube, i used the one from DXM set 13-7001 as it included belts for the seat. Well, they are not exactly the greatest as I think they are too short and not involved enough, however, they are a LOT better than nothing or tape so they were glued on the kit seat. After installing the pitot, patching up any paint needed and gluing on the centerline tank, I removed the masking, installed the 'open cockpit' frame, slid in the seat and attached the canopy. That was it.
| CONCLUSIONS |
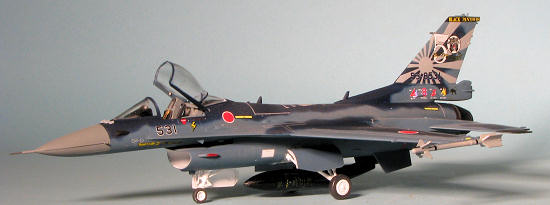 The end result is a very nice looking special scheme model of Japan's newest fighter. The color scheme is pretty striking and the color of all maritime attack aircraft. It is very much like building an F-16 (thank you Mr. Obvious), so the same fit issues were not a surprise. I did find it similar to most modern Hasegawa jet kits in that it is pretty fiddly and takes some constructive masking to get things to look right. However, the end result is worth the effort. If your penchant is towards modern jets, then this one should be on your list.
| REFERENCES |
http://en.wikipedia.org/wiki/Mitsubishi_F-2
June 2012 Thanks to me for picking this one up from the LHS. Thanks to http://www.thepmw.com for the decals and the detail set. If you would like your product reviewed fairly and quickly, please contactme or see other details in the