Minicraft/Hasegawa 1/72 MiG-27 Flogger
| KIT #: | 1143 |
| PRICE: | $2.00 on the junk kit table |
| DECALS: | Four options (basically red or blue numbers) |
| REVIEWER: | Scott Van Aken |
| NOTES: |
| HISTORY |
 The Mikoyan MiG-27 (Russian: Микоян МиГ-27) (NATO reporting name "Flogger-D/J") is avariable-geometryground-attack aircraft, originally built by theMikoyan design bureau in theSoviet Union and later license-produced inIndia byHindustan Aeronautics as the Bahadur ("Valiant"). It is based on theMikoyan-Gurevich MiG-23fighter aircraft, but optimized for the air-to-ground role. Unlike the MiG-23, the MiG-27 did not see widespread use outside Russia, as most countries opted for theMiG-23BN andSukhoi Su-25 instead. It currently only remains in service with the Indian, Kazakh and Sri Lankan Air Forces in the ground attack role. All Russian and Ukrainian examples have now been retired.
| THE KIT |
 Hasegawa produced a pair of MiG 'swing wing' aircraft with first the MiG-23S and later the MiG-27. These kits shared a few of the same components as the main difference in the two was the nose, intake and armament carried.
This is one of Hasegawa's raised panel line kits and due to the thinness of the plastic compared to their first releases, is what some of us call a 2nd generation kit. The 3rd would be those with engraved panel lines. As you'd expect from a swing wing kit, the main fuselage is divided horizontally with the nose section divided vertically. This also makes it easy to use the same main fuselage for the MiG-23. The one-piece wings are trapped between the upper and lower fuselage halves.
The cockpit is very basic with a generic seat and floor that doubles as the nose gear well. The instrument panel has a decal. No control stick, no rudder pedals and a pilot figure to hide the lack of detail. Landing gear are suitably complex for the kit. Intakes are quite long and as this is the MiG-27, have the simple and short splitter plates. A ventral fin is included and can be glued in the folded position for the ground. 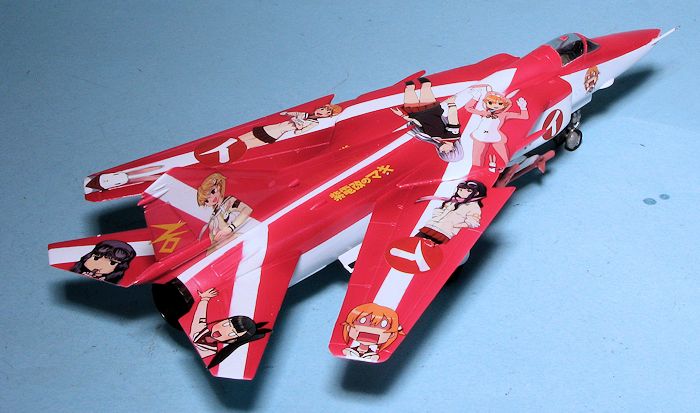 Those building the kit on a stick can have it extended. The kit comes with a goodly number of things for under the fuselage. These include a gun, air to air missiles, rocket pods, bombs and two types of fuel tanks; one for the centerline and one for the wing itself.
As this is a Minicraft boxing, the instructions are all in English with seven construction steps, each listing the items to be cemented in order. Generic colors are given for the painting guide. Markings for two somewhat generic aircraft are given. You are given Bort numbers in both blue and red. One can be an overall light grey while the other is in a brown/dark green over light blue camouflage. The decals are well printed and my set are so old as to be useless. Fortunately, you can find aftermarket markings for this aircraft. However, be aware that this kit is of an early preproduction variant and what few markings these had were Soviet.
| CONSTRUCTION |
I bought this kit already started. Apparently the previous owner of the collection from whence it came started kits to a varying degree from just gluing a couple of bits to having them about 80% done and then lost interest and moved on to something else. 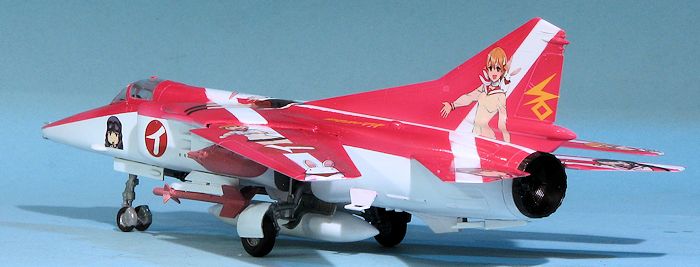 The shop where I bought this was selling what was there for his widow and there were easily 500 or more kits in this condition.
This kit had the fuselage halves together along with the nose, though they had not been joined. He had also assembled the landing gear (scrape seams?? what's that?) and glued the landing lights into the lower part of the intakes.
I took over by gluing the nose to the fuselage then attaching the intakes. For some reason, kits with side intakes NEVER seem to have these items fit perfectly. Putty was used for both bits. I then went to search for appropriate decals before going much further. Not really finding any (pre-production, remember), I put the kit back on the shelf and awaited inspiration. That came several months later and so I continued the build.
This consisted of masking and installing the canopy as well as attaching some pylons. It was then that I decided to start painting.
| COLORS & MARKINGS |
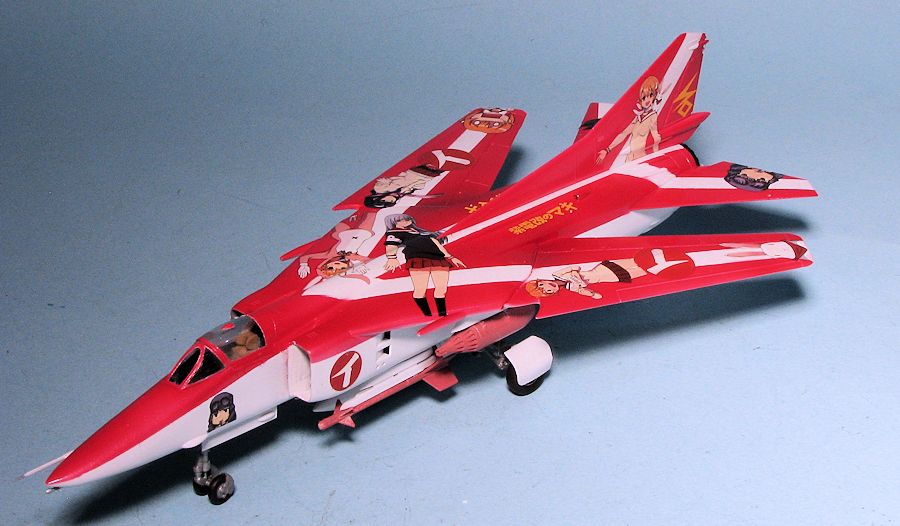
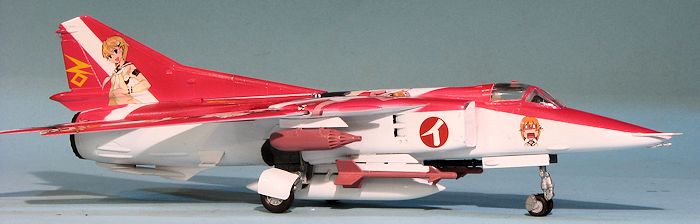
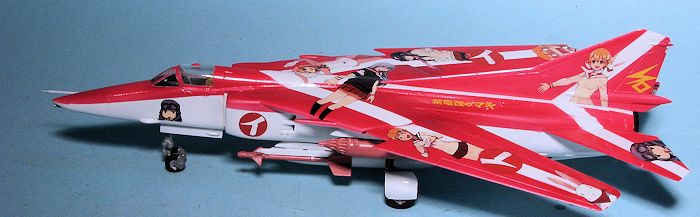
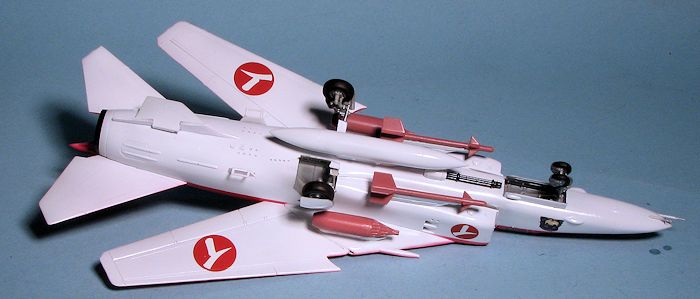 With this endeavor, I decided to break with tradition and do a non-standard paint scheme. First off I primered the airframe with Tamiya grey, then sprayed it with Tamiya gloss white. This included the gear doors, the gun pod, ventral and vertical fins, which were simply placed into their respective slots. I then removed them and masked lower surfaces. I also put strips of tape along the centerline of the fuselage and the center of the wings, tailplane and fin. Not having the fin attached made this an relatively easy task. I then sprayed the upper surfaces and fin with Boyd's Dusty Rose Pearlescent.
 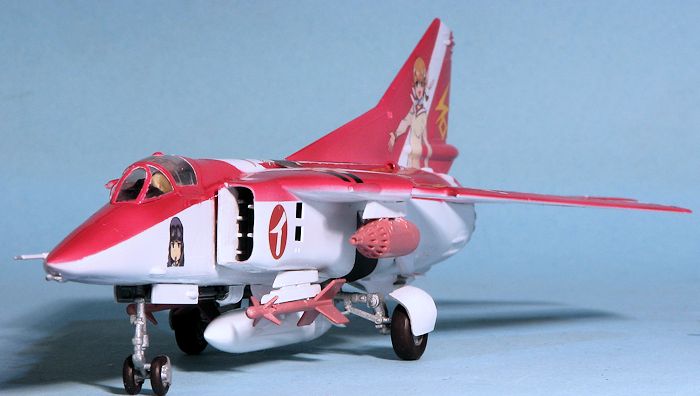 decals. These were used liberally over the upper airframe as one often sees in the aforementioned anime-inspired kits, many of which are from Hasegawa. While this sort of thing may well make purists cringe, the fact is that without this sort of treatment, this kit may well have never been completed.
 | CONCLUSIONS |
I am quite sure that few if any of you reading this far will bother doing something like this. I did it just to clear another unfinished kit off the shelves. I wasn't concerned about getting things perfect and you can see a few areas of light overspray where my massive masking wasn't effective. No green radomes or wing lights, just a model that if anything else is unique. I've done things like this to slot cars for years and this is my first aircraft. Will there be others? Not sure about that, but at least this is different.
July 2015
If you would like your product reviewed fairly and fairly quickly, please contact the editor or see other details in the