Supermodel 1/72 MB.339A
|
KIT # |
10-018 |
|
PRICE: |
$10 |
|
DECALS: |
See Review |
|
REVIEW : |
|
|
NOTES: |
|
HISTORY & THE KIT |
For a short history and a look at the kit, please go here.
|
CONSTRUCTION |
 The first step for this kit was to do the interior. I glued a
number of common parts together and then painted all of the interior bits and
the fuselage interior Dark Gull Grey. There are decals for the instrument and
side consoles and these were then put in place. I used Champ setting solution to
ensure that they would snuggle down well and it was quite effective. The
interior was then glued to the inside of the fuselage and weight was placed in
the nose. There isn't much room there, so I only hope I was able to get in
enough. There is no tailpipe so any extra weight needed can be shoved in through
the rear.
The first step for this kit was to do the interior. I glued a
number of common parts together and then painted all of the interior bits and
the fuselage interior Dark Gull Grey. There are decals for the instrument and
side consoles and these were then put in place. I used Champ setting solution to
ensure that they would snuggle down well and it was quite effective. The
interior was then glued to the inside of the fuselage and weight was placed in
the nose. There isn't much room there, so I only hope I was able to get in
enough. There is no tailpipe so any extra weight needed can be shoved in through
the rear.
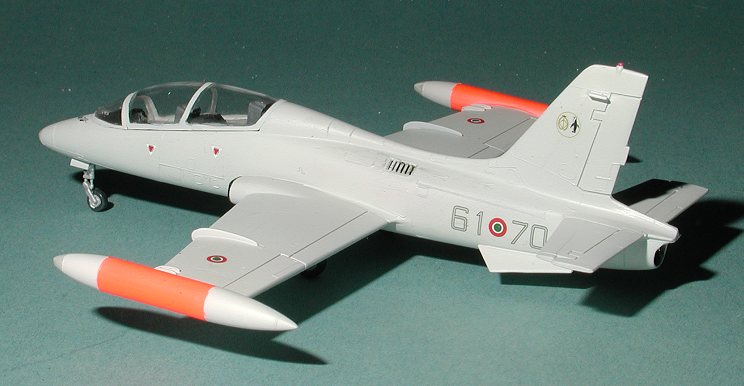
The fuselage was then glued together. The fit is fair and filler was needed. While this was drying, I assembled the wings, a simple two part affair, and the tip tanks. Since I wanted to do a current MB.339, the newer round tanks were chosen. Again, fit was fair and some filler was needed.
Once the fuselage was cleaned up, the wings were attached. These didn't fit that well and lots of filler was needed to fill in the gaps at the wing root. Once dry the tailplanes were glued in place. These fit fairly well and no filler was used. The tip tanks show a slot for a tab, but there isn't one on the wings. Fortunately, the butt join is good, though again, filler was needed to clean up the gaps. The whole time I was building this kit, I was thinking about how nice it would have been had Supermodel engineered this kit to '90s standard instead of 1970's. I find it odd that this kit, which was released in the mid 1990s, was so much like their kits that were released in the 70's. It is almost as if no progress was made during that time!
The speed brake was glued in the up position after removing the small attachment arms. To do it lowered, one would have to cut notches in the underside of the fuselage as there aren't any! Naturally, the part was too small for the hole so filler was needed. At the same time the aft fuselage strakes were glued in place and when dry, filler was also used.
 While
this was drying, I assembled and painted the ejection seats. They both have HUGE
sink marks right in the center of the top of the seat. Most of you will want to
replace these, but I am building it out of the box so left them as is. And, as
happens to a percentage of kits that I build, I lost interest in the kit and it
languished in the box for over four months!
While
this was drying, I assembled and painted the ejection seats. They both have HUGE
sink marks right in the center of the top of the seat. Most of you will want to
replace these, but I am building it out of the box so left them as is. And, as
happens to a percentage of kits that I build, I lost interest in the kit and it
languished in the box for over four months!
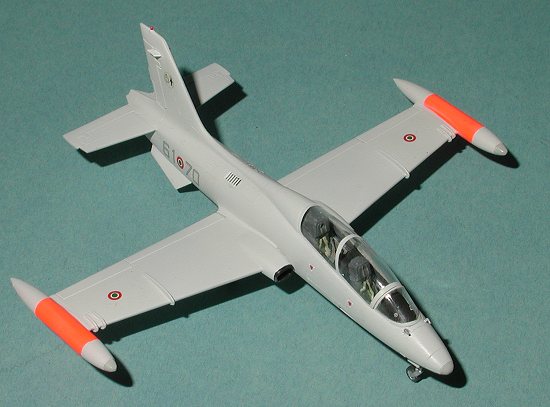
When I got back to the kit, the first thing I did was to knock off a mountain of dust and clean it up. Then the seats were installed. The instructions show the canopy in the open position. For this there is a small bar that goes across the bottom of the canopy which attaches to the actuating cylinder. I wanted to do mine with the canopy closed. Do not install that small bar or there is no way the canopy will fit in the closed position. General fit of the clear parts was poor. Some sanding helped things a bit and the canopies were cemented using non-fogging superglue. They were then masked using Tamiya masking tape. The small VOR antennas were then cemented to the tail.
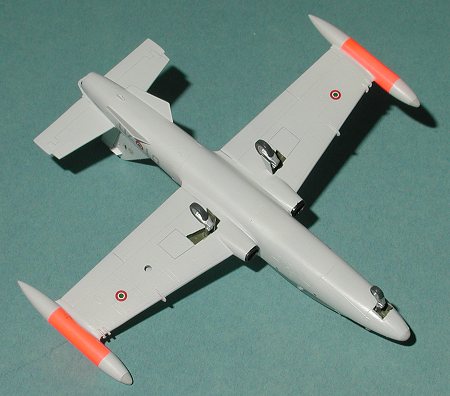
I was wondering about using the underwing pylons and fuel tanks, however, for most training flights, these were not fitted. Good thing as the ones in the kit are not really that well done. It does mean that the attachment markings under the wing will have to be sanded off, a job that took but a few minutes. Now that I had a relatively complete airframe, it was time to do a bit of painting.
|
PAINT & DECALS |
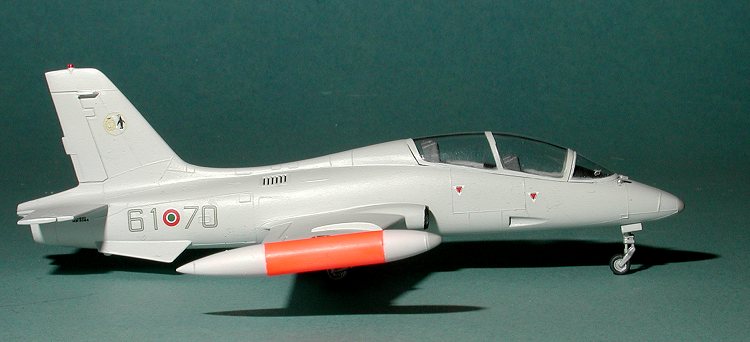
 The first thing I painted were the tip tanks. These have a large
daglo band around them. Daglo is a particularly transparent paint so it needs a
nice white undercoat. I used Testors Model Master white for this, then painted
on the Daglo. It was then
masked off and the airframe painted overall light grey as given in the
instructions. Frankly, I think the color suggested is too light and that a
darker color should be used instead. However I wanted to finish this kit so did
not bother repainting it. The tips of the nose and wing tanks were painted FS
16440 to give it a bit of a contrast.
The first thing I painted were the tip tanks. These have a large
daglo band around them. Daglo is a particularly transparent paint so it needs a
nice white undercoat. I used Testors Model Master white for this, then painted
on the Daglo. It was then
masked off and the airframe painted overall light grey as given in the
instructions. Frankly, I think the color suggested is too light and that a
darker color should be used instead. However I wanted to finish this kit so did
not bother repainting it. The tips of the nose and wing tanks were painted FS
16440 to give it a bit of a contrast.
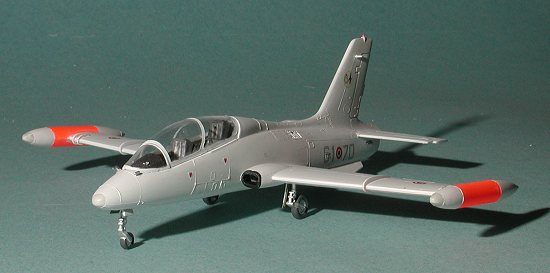
Next the wheel wells and inside of the gear doors were painted a dark green, which is what is normally used in these areas, from what I understand. The landing gear themselves were painted aluminum. These were then glued in place. The nose gear seems to have been molded in the fully extended position as it makes the kit sit rather nose high. You may want to trim it down as the plane sits a lot more level than my kit! Once all this was done, the model was sprayed with a gloss clear acrylic and it was on to the decals.
I decided to use Sky Models decals on this kit as I had a very comprehensive sheet. The kit decals were off register which made them unsuitable. The Sky decals are very well done and are glossy. Despite using them on a gloss surface and using Solvaset to soften them, I had troubles with silvering. Perhaps the model wasn't gloss enough or something. Anyway, once the decaling was done, the kit was resprayed with clear semi-matte clear.
|
FINAL BITS |
 The last things
that needed done were some touch up painting that included the black edges to
the intakes. These were done by hand using Tamiya flat black. The air data
probes were glued on in front of the windscreen and then painted aluminum. I
managed to lose the underwing taxi light. I'll probably put in an MV lens some
time in the future as a replacement. Finally the masking was removed from
the canopy and the kit was complete.
The last things
that needed done were some touch up painting that included the black edges to
the intakes. These were done by hand using Tamiya flat black. The air data
probes were glued on in front of the windscreen and then painted aluminum. I
managed to lose the underwing taxi light. I'll probably put in an MV lens some
time in the future as a replacement. Finally the masking was removed from
the canopy and the kit was complete.
|
CONCLUSIONS |
As much as I like the MB.339, I would really wish that Italeri would produce a kit of it. The Supermodel kit isn't that much better than the kits they put out 25-30 years ago. Fit wasn't the best and it took a lot of fussing to finally get the thing done. In fact, I got frustrated with the kit and basically did a mad build and painting session just to get it off my bench. The result isn't bad, but it isn't one of my better efforts either.
I'll recommend it to those who must have an injected 1/72 MB.339, but if you are looking for state of the art, this isn't it. I'm sure that it can be made into a superb representation, but not by me.
February, 2001
Copyright ModelingMadness.com. All rights reserved. No reproduction in part or in whole without express permission from the editor.
Review copy courtesy of me and my wallet!
If you would like your product reviewed fairly and fairly quickly, please contact the editor or see other details in the Note to Contributors. 2016