Italeri 1/72 Saab JAS-39B Gripen
| KIT #: | 1216 |
| PRICE: | Price tag says $15.00 |
| DECALS: | Three options |
| REVIEWER: | Scott Van Aken |
| NOTES: | Date on box is 2001 |
| HISTORY |
The Saab JAS 39 Gripen (English: Griffin) is a light single-engine multirole fighter aircraft manufactured by the Swedish aerospace company Saab. It was designed to replace the Saab 35 Draken and 37 Viggen in the Swedish Air Force (Flygvapnet). The Gripen has a delta wing and canard configuration with relaxed stability design and fly-by-wire flight controls. It is powered by the Volvo RM12, and has a top speed of Mach 2. Later aircraft are modified for NATO interoperability standards and to undertake in-flight refuelling.
In 1979, the Swedish government began development studies for an aircraft capable of fighter, attack and reconnaissance missions to replace the Saab 35 Draken and 37 Viggen. A new design from Saab was selected and developed as the JAS 39, first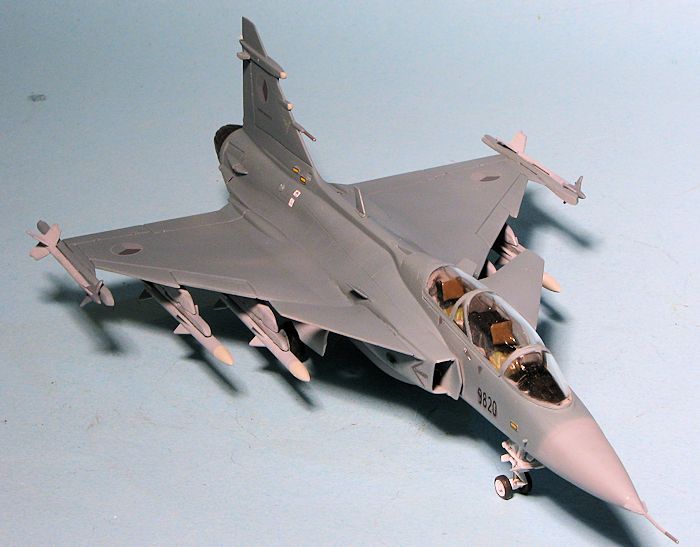 flying in 1988. Following two crashes during flight development and subsequent alterations to the aircraft's flight control software, the Gripen entered service with the Swedish Air Force in 1997. Upgraded variants, featuring more advanced avionics and adaptations for longer mission times, began entering service in 2003.
In order to market the aircraft to export customers, Saab has formed several partnerships and collaborative efforts with multiple overseas aerospace companies. One example of such efforts was Gripen International, a joint partnership between Saab and BAE Systems formed in 2001. Gripen International was responsible for marketing the aircraft, and was heavily involved in the successful export of the type to South Africa; the organization was later dissolved amidst allegations of bribery being employed to secure foreign interest and sales. On the export market, the Gripen has achieved moderate success in sales to nations in Central Europe, South Africa and Southeast Asia; bribes have been reportedly involved in some of these procurements.
A further version, designated Gripen JAS 39 E/F, is under development as of 2014; it has been referred to as Gripen NG or Super-JAS The changes include the adoption of a new powerplant, the General Electric F414G, an active electronically scanned array radar, and significantly increased internal fuel capacity. Saab has proposed other derivatives, including a navalised Sea Gripen for carrier operations and an optionally-manned aircraft for unmanned operations. Sweden and Brazil have ordered the Gripen E/F and Switzerland initially selected it for procurement. As of 2013, more than 247 Gripens have been built.
| THE KIT |
While this is not a new kit, per se, it is about 15 years old so is representative of the earlier Gripen A/B variants and not the NATO enhanced C/D versions. As such, while it looks the same, it does not have the air to air refueling panels, but I doubt if many will be overly concerned about it.
 The engraving is nicely done, though not as crisp as on Tam/Has kits. There are two separate cockpit tubs, each with a seat, instrument panel and control stick. There is raised detailing on the instrument panels and side consoles. Rudder pedals are molded into the floor. The two tubs are joined by a center piece that forms the back seater's anti-glare panel. This construct then sits atop the nose gear well. Instructions state that 20 grams of weight is needed and this is a lot so I'd start filling the forward fuselage once the cockpit/nose gear piece is in place as you certainly will not be able to fit that much in the radome. The fin/rudder is molded into the left fuselage side.
Wings consist of a single lower piece with two upper wing halves. The flight control surfaces are molded into the upper halves. Missile rails are separate items. The kit's speed brakes are separate and you can pose them open if you wish, though they are normally closed. A separate windscreen and canopy are provided so you can pose the canopy open. Not that much to see in the cockpit, though Italeri has molded belt detail on the bang seats. There is what appears to be a seam that runs down the center of the canopy, but since this is on the inside, I'll assume it is supposed to be there as removing it will be difficult 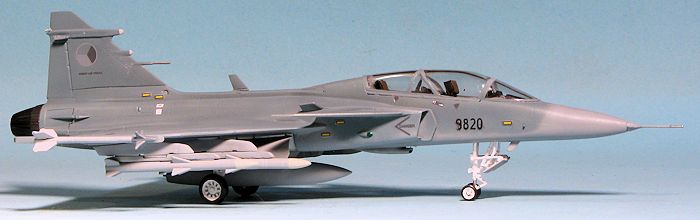 at best. Intakes are relatively shallow and there is no compressor face to see when peering down these though there is one for the exhaust.
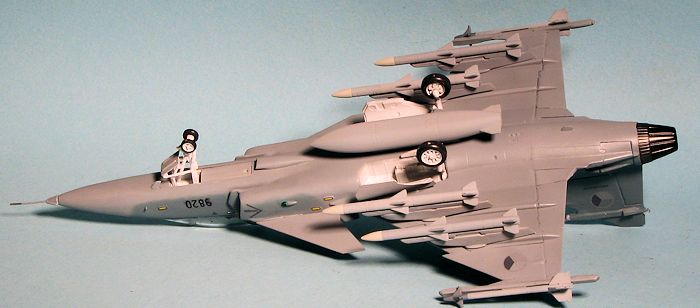
The landing gear are properly sturdy looking with separate one-piece wheels. Gear doors are well done with the only detail inside them and some other parts being ejector pin marks. The kit does have a ton of stores and you'll be able to fill up almost all the pylons with something. There are two Sidewinders and six AMRAAMs along with acenterline fuel tank. Only the the right forward pylon will be empty, though you might be able to stick one of the spare missiles on it. I assume this is to be used for a jamming pod.
Instructions are well done with Model Master paint references. Note that the in the painting instructions, the two grey shades are listed backwards. The darker FS 35237 should be on top with the FS 36375 on the underside. Markings are provided for three planes. Two are development aircraft while one is an active duty plane. All are with the Swedish Air Force. There are aftermarket decals available if you want to do something different.
| CONSTRUCTION |
 lower fuselage antenna. There are some other very minor differences in other places, but only those who are fanatic Gripen fans will notice those. Some of these areas mentioned can be changed, while others are not worth the effort. For instance, I won't scribe a refueling probe door on the intake, nor will I enlarge the fin antenna housing or make any attempt to duplicate the new APU exhaust and intake areas. The ILS and lower antenna thing are things I can do as they are easy.
 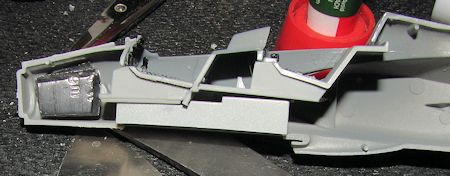 he instructions state that 20gms of weight is needed, which seems like an awful lot of weight and more than will fit into the nose cone. Taping the wings to the two fuselage pieces, I saw that even 14 gms was overkill so placed about 4 on the nose and that seemed about right. This will be placed in the fuselage forward of the cockpit and if more is needed, I'll add that when I attach the nose cone.
 | COLORS & MARKINGS |
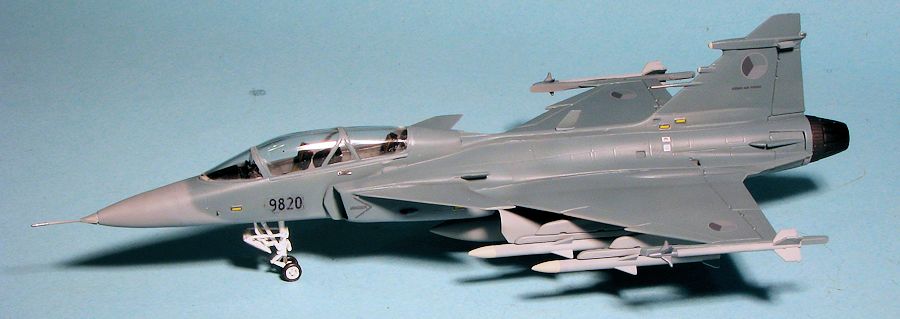
 The HAD decals do not offer a nose number for the two seat Czech aircraft, so using a photo, I made some nose decals. I tried to get close to the dark grey, but my attempts either ended up too dark or so light as to disappear against the paint. I ended up using some of the dark ones. The HAD decals are very thin and prone to folding up. They come off the backing in seconds and have to be applied nearly immediately as the glue soon dissipates. Kit markings will be needed for the slime lights. I applied minimal markings as the HAD ones are not very crisply done and there is some confusion as to what common stencils are used on the Czech option.
 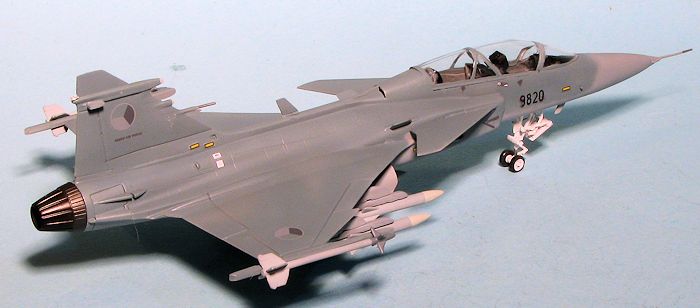 The next move was to attach the prepainted gear doors. The attachment points are small but there are two three of them per main gear door. These will require some patience and fiddling until the glue dries to keep them straight. When it came to the nose gear, here is where things got complex. The forward nose gear door is held up by two small and separate hinges and a ladder-like assembly. Instructions are not all that helpful and one has to be very careful when gluing all this. On top of that, it seems the gear door positioning or something changed as photos of current JA-35 two seaters show something rather different. Here is a photo to help. Note in this that the two other nose gear doors are closed. Italeri would have you model these open, but the left side
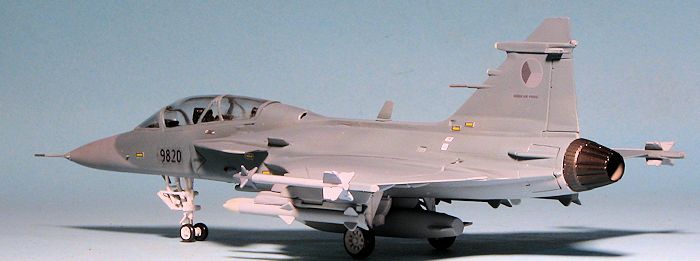
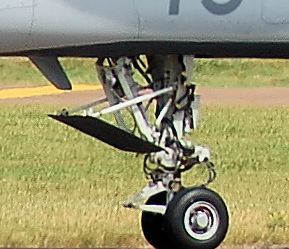 will not clear the landing light. I ended up gluing the two doors together and then trimming them so they'd fit the opening in the closed position. The width is fine, but they need a mm or so taken off the length as they are too long. I could not find a photo of the main gear doors so am not sure if the large forward ones are normally open or not. Italeri also provides no raised wheel rim so painting the tires is a real pain. Those were then glued on and I added a lower fuselage radio antenna and the ILS antennas on the fin.
 | CONCLUSIONS |
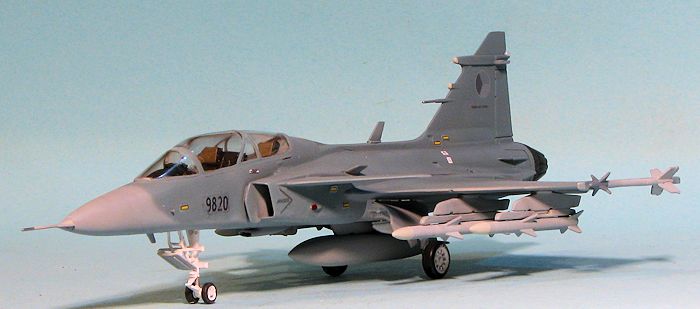
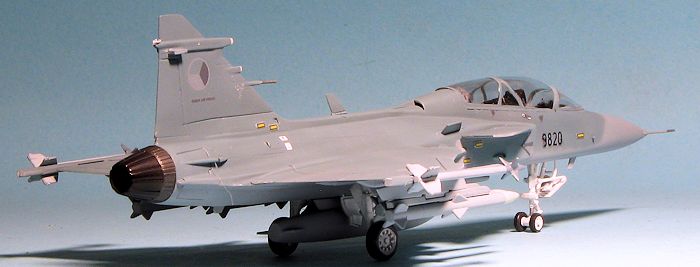 The kit did not disappoint. While there are some differences between this and a later D variant, it isn't all that different. It proved itself to be a typical Italeri kit, which means that not everything goes according to plan and you do have to expend a bit of work on the final product. Nonetheless, it looks very nice when done and I can stick it next to my F-2, which is a very similar sized aircraft. Guess I need to get a Typhoon and Rafale built to add to the collection as well.
 | REFERENCES |
http://en.wikipedia.org/wiki/Saab_JAS_39_Gripen
May 2015 Thanks to a raffle win back quite some time ago for this one. If you would like your product reviewed fairly and fairly quickly, please contact the editor or see other details in the