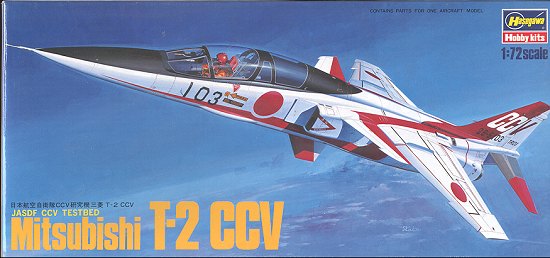
Hasegawa 1/72 Mitsubishi T-2 CCV
|
KIT # |
E 20 |
|
PRICE: |
$12.50 |
|
DECALS: |
Just the one aircraft |
|
REVIEW : |
|
|
NOTES: |
|
|
HISTORY |
The second post-war indigenous jet trainer/light attack aircraft
was the Mitsubishi T-2. Looking strikingly like the Sepecat Jaguar of the French
and British Air Forces, the T-2 was developed along similar lines as the
American T-38. The JASDF wanted a supersonic trainer that could also be
converted into a light attack aircraft. This was done and the F-1 is that light
attack aircraft. While the F-1 is currently slated for phasing out as the F-2
comes on line, the T-2 should be an aircraft that is capable of taking the
Japanese Air Force well into the 21st Century. As with many
aircraft types, the T-2 has been used to test new technologies. Similar to the
F-16 used at Edwards AFB, a very early T-2 (the third one built) was chosen as a
test bed for the CCV or Control Configuration Vehicle studies. What this
entailed is a set of fixed canards on the intakes just ahead of the wing, and a
movable canard on the underfuselage. The rear seat was filled with
instrumentation. The underfuselage canard allowed the aircraft to be yawed
beyond the normal parameters of the airframe. This allowed studies of the way
that air movement flowed around the aircraft and looked into the possibility of
such devices being used to improve the maneuverability of the aircraft. It is
unknown if the aircraft is still extant in this configuration. 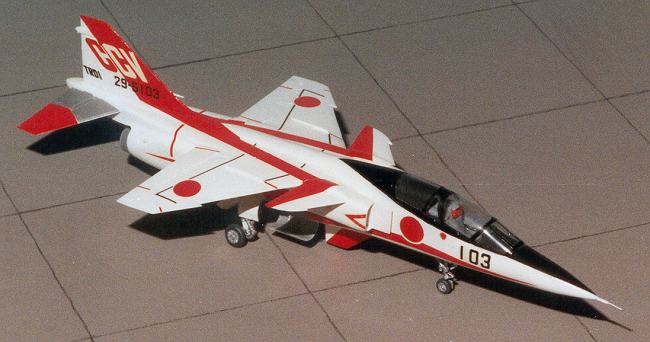
|
THE KIT |
There is only one set of decals, and that for the kit on the
box. However the decals include everything you need and, with careful
construction, no additional painting is needed for this rather complicated
looking scheme. Typical of the decals of the day, the reds are too light when
compared to the box art, though that does not detract from the impact of the
scheme. The instruction sheet is quite complete, being of the
newer variety with color call outs in Gunze paint colors. All the CCV parts are
on a separate sprue, so there is little that is not used in this kit other than
the back seat . 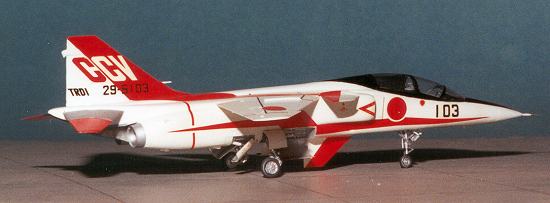 Hasegawa's T-2 kit is one that I have never seen built other
than the one shown in this review. It is a child of mid-80s technology and so
has raised panel line detail and a complete cockpit, though not to the level of
detail that is expected in today's kits. It is in white plastic, which is
supposed to make it easier to do the kit scheme in.
Hasegawa's T-2 kit is one that I have never seen built other
than the one shown in this review. It is a child of mid-80s technology and so
has raised panel line detail and a complete cockpit, though not to the level of
detail that is expected in today's kits. It is in white plastic, which is
supposed to make it easier to do the kit scheme in.
|
CONSTRUCTION |
One area of concern is the engine intakes. These needed some filler as well to
smooth them into the fuselage sides. Once that was done, the rest of the kit
went smoothly. The canopy fit well as did the other bits and pieces of the
landing gear. The nose gear doors are given separately, but the larger main door
should be closed when the aircraft is on the ground, again, similar to the
Jaguar. The extra canards fit well to the fuselage intakes,
though they do look a little more lumpy than the box top painting would have
your believe. Fitting the tailplanes is a breeze as they just snap into place .
On the bottom of the fuselage you have your choice of extended or retracted
speed brakes. I chose extended just to add some interest in that area.
 It is difficult to go into any real depth on the construction
part of this kit other than to say that it fit very well indeed. It is rather
difficult to find areas that cause any real construction problems. One reason is
that Hasegawa have engineered this kit in such a way that a lower fuselage
insert between the engines is not needed. This area generally gives modelers
fits trying to get the insert properly seated. By not having an insert between
the engines, it does make cleaning up the seam a bit more difficult, but, in my
opinion, this method is much preferred!
It is difficult to go into any real depth on the construction
part of this kit other than to say that it fit very well indeed. It is rather
difficult to find areas that cause any real construction problems. One reason is
that Hasegawa have engineered this kit in such a way that a lower fuselage
insert between the engines is not needed. This area generally gives modelers
fits trying to get the insert properly seated. By not having an insert between
the engines, it does make cleaning up the seam a bit more difficult, but, in my
opinion, this method is much preferred!
|
PAINT & DECALS |
The
rest of the paint scheme was decal. To be honest, the decals didn't fit
perfectly and are of 'old school'. By that I mean that they are thick and the
reds too light. They also do not take kindly to setting solutions, however the
stick of the decals is very good. Some trimming and fussing is needed to get a
good fit on the decals, but you can get full coverage without any real problems.
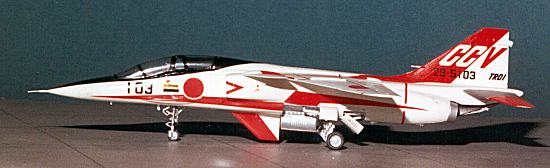
Once
all the painting and decaling was done, the masking material was removed and any
additional touchup was accomplished. Just a note. Because I compress these
images a bit to speed up download time, the solid red on the decals appears to
be streaky. It isn't that way at all on the kit.
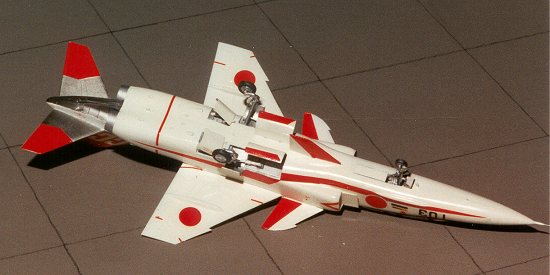 Painting is a snap. Basically, everything is painted white! I
used Testors Model Master Gloss white. When dry, the cockpit area was masked off
and painted black as per the instructions. The inner portions of the tailplanes
and underside aft of the jet exhaust were painted in metallic colors.
Painting is a snap. Basically, everything is painted white! I
used Testors Model Master Gloss white. When dry, the cockpit area was masked off
and painted black as per the instructions. The inner portions of the tailplanes
and underside aft of the jet exhaust were painted in metallic colors.
|
CONCLUSIONS |
Overall it is a very nice kit. No major building problems and a
final result that is pleasing and usually gets comments wherever it is shown.
Despite having been built over 10 years ago, the kit holds up quite well with
some of the newer ones that I have recently built. One nice thing about holding
on to older models is that you can see how much your skills have improved!!
Recommended
to all but the beginner.
May 2000 Copyright ModelingMadness.com. All rights reserved. No
reproduction in any form without express permission from the editor. If you would like your product reviewed fairly and fairly quickly, please contact
the editor or see other details in the Note to
Contributors.
Back to Reviews Page 2025