
Dragon 1/144 Kfir C2/C7 (F-21A)
| KIT #: | 4608 |
| PRICE: | $7.65 from www.greatmodels.com |
| DECALS: | Two Options |
| REVIEWER: | Scott Van Aken |
| NOTES: | Two complete kits |
| HISTORY |
The project that would ultimately give birth to the Kfir can be traced back to Israel's need for adapting the Dassault Mirage IIIC to the specific requirements of the Israeli Air Force (IAF).
The all-weather, delta-winged Mirage IIICJ was the first supersonic aircraft acquired by Israel, and constituted the backbone of the IAF during most of the 1960s, until the arrival of the A-4 Skyhawk and, most importantly, the F-4 Phantom II, by the end of the decade. While the Mirage IIICJ proved to be extremely effective in the air-superiority role, its relatively short range of action 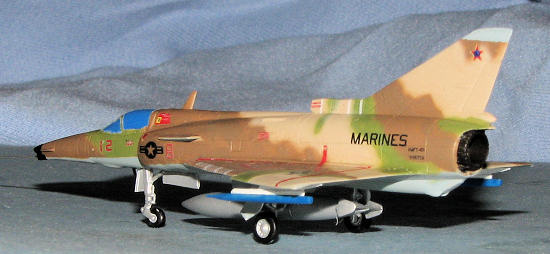 imposed some limitations on its usefulness as a ground-attack aircraft.
Thus, in the mid-1960s, at the request of Israel, Dassault Aviation began developing the Mirage 5, a fair-weather, ground-attack version of the Mirage III. Following the suggestions made by the Israelis, advanced avionics located behind the cockpit were removed, allowing the aircraft to increase its fuel-carrying capacity while reducing maintenance costs.
By 1968, Dassault had finished production of the 50 Mirage 5Js paid for by Israel, but an arms embargo imposed upon the country by the French government in 1967 prevented Dassault from ever delivering the aircraft. The Israelis replied by producing an unlicensed copy of the Mirage 5, the Nesher, with technical specifications for both the airframe and the engine obtained by Israeli intelligence.
The development of this aircraft has been attributed to covert action on the part of Mossad. Mossad was able to acquire the plans for the Mirage III, which were used directly in the design process of the Kfir aircraft series. The designers at IAI then began work on the project to improve upon the Mirage III, deciding first to find a replacement engine.
Two powerplants were initially selected for trials—the General Electric J79 turbojet and the Rolls-Royce Spey turbofan. In the end, the J79 was selected, not the least because it was the same engine used on the McDonnell Douglas F-4 Phantom II, which the Israelis began to acquire from the United States in 1969, along with a license to produce the J79 themselves. The J79 was clearly superior to the Atar 09, providing a dry thrust of 49 kN (11,000 lbf) and an afterburning thrust of 83.4 kN (18,750 lbf).
 In order to accommodate the new powerplant on the Mirage III's airframe, and to deliver the added cooling required by the J79, the aircraft's rear fuselage was slightly shortened and widened, its air intakes were enlarged, and a large air inlet was installed at the base of the vertical stabilizer, so as to supply the extra cooling needed for the afterburner. The engine itself was encased in a titanium heatshield.
A two-seat Mirage IIIBJ fitted with the GE J79 made its first flight in September 1970, and was soon followed by a re-engined Nesher, which flew in September 1971.
An improved prototype of the aircraft, with the nameRa'am ("Thunder"), made its first flight in June 1973. It had an extensively revised cockpit, a strengthened landing gear, and a considerable amount of Israeli-built avionics. The internal fuel tanks were slightly rearranged, their total capacity being increased to 713 gallons.
There were unconfirmed reports that a number of the original Mirage IIICs, re-engined with the J79 and given the name Barak ("Lightning"), took part in the Yom Kippur War of 1973, but some sources point out that there is no real evidence that these aircraft ever existed.
The Kfir entered service with the IAF in 1975, the first units being assigned to the renowned 1st Fighter Squadron. Over the following years, several other squadrons were also equipped with the new aircraft. The role of the Kfir as the IAF's primary air superiority asset was short-lived, as the first F-15 Eagle fighters from the United States were delivered to Israel in 1976.
 The Kfir's first recorded combat action took place on November 9, 1977, during an Israeli air strike on a terrorist training camp at Tel Azia, in Lebanon. The only air victory that the Kfir achieved during its service in the IAF occurred on June 27, 1979 when an Israeli Kfir C.2 shot down a Syrian MiG-21.
By the time of the Israeli invasion of southern Lebanon in 1982 (Operation Peace for Galilee) the IAF was able to use both its F-15s and F-16s for air superiority roles, leaving the Kfirs for carrying out unescorted strike missions. Soon after all the IAF's C.2s began to be upgraded to the C.7 version, which enhanced the performance of the aircraft as a fighter-bomber, the Kfirs' new role in the IAF's order of battle.
During the second half of the 1990s, the Kfirs were withdrawn from active duty in the IAF, after almost twenty years of continuous service.
| THE KIT |
This 2007 boxing includes two full kits with options to build either a C2 or C7 variant of the Kfir. As it is 1/144, there are not a ton of parts, but those provided are well molded. The engraved detailing is a bit overdone for this scale, but is typical of standard injection molded kits.
 The cockpit is a single piece with a pilot figure in a generic seat. Landing gear are well molded and as the doors are molded in the closed position, one could do this kit in flight if one wished to build a stand. The only real difference between a Kfir C2 and C7 is the size of the intake mounted canards. On the C2 they are much smaller than on the C7. If one wished to do an F-21A from this kit, one would choose the smaller canards. The small canopy is thick and well molded.
The set includes a sprue of weapons that include laser-guided bombs and some missiles, however, none of these parts are mentioned at all in the instruction sheet. Any of these would be appropriate for either variant. The instructions are really just two small construction steps with a full page for each of the two options. You can do one aircraft in the later greys scheme or one in the earlier desert camouflage. I have to assume that the C2 in IAF service was later upgraded to the larger canards as the C2 option (the one in greys), has the larger C7 canards. The small decal sheet is well printed and offers a full array of warning and data markings.
| CONSTRUCTION |
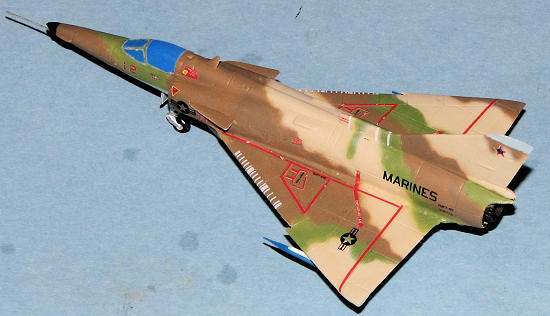
Right away I knew I was not going to build this as an Israeli Kfir. I wanted an F-21 and fortunately, the Dragon kit includes the smaller canards to allow this variant to be done. Jumping right into things, I immediately realized that this was not the most modern 1/144 kit in Dragon's inventory. I've built a couple of their early kits (F-18 and F-15A), and realized this one was very much like those. In other words, it is not a shake and bake kit.
 After building up the interior such as it is (OK, I painted it), it was installed in the fuselage halves with a little bit of weight added just in case. Trapping the exhaust between the halves made me realize that something had to give and so I trimmed the exhaust cone until the fuselage halves actually joined. Even then, the fit is not all that great. The wing was next and it also didn't fit all that well, sanding and filling on the roots was needed. As I wasn't going to use the wing tanks, the oversize attachment holes were filled. Should have done the same for the missile rail holes as well, but didn't. The attachment of the intakes required some healthy sanding as well to get them to blend in properly.
Then it was canard time. Huge gap, again, thanks to the oversize slot on the fuselage/intake. I put the biggest gap on the underside and filled it with superglue, followed by sanding, etc. During all this, I broke the nose probe, but no worries as I have a replacement in mind. During this time, I glued together the centerline tank. No worries.
What was a worry was attaching the canopy. This part is so thin that I snapped it in half. That put any hope of looking into the cockpit to rest. I glued it together and when dry, attached it to the airframe. I then sanded down and filled and sanded the crack. It was then painted a dark blue and masked in preparation for painting.
| COLORS & MARKINGS |
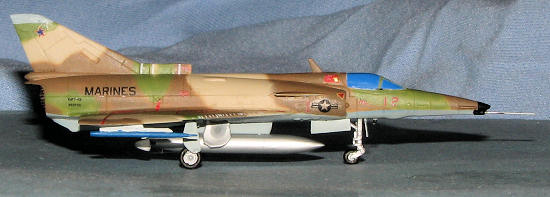
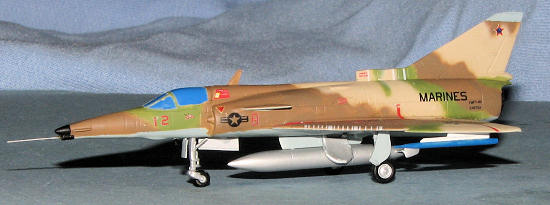
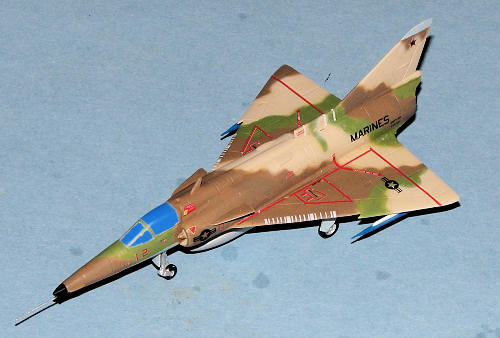
I wanted to build this kit to try out a set of Starfighter Decals. I chose sheet 144-100 which has F-21As for both USN, USMC and the civilian contractor, ATAC. I chose the USMC one from VMFT-401 and one in the desert camouflage scheme. This required standard old style Israeli camouflage. I used Model Master enamels and mySkybow AB-100 detail airbrush. Paint was water thin and air pressure down around 7 psi. When painting like this, it is a good ideal to be painting onto a matte surface to help prevent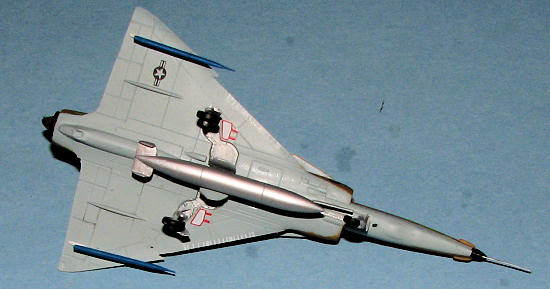 'splash'. I used the underside color to paint the entire airframe, then went in with the sand, brown and green. painted on the upper surfaces. It was work that requires magnification and while OK, I always have trouble spraying brown and green for some reason.
Once that was done, the airframe was put onto its landing gear. This was a bit of frustration as well as the gear really doesn't fit into the attachment points on the airframe all that well. I ended up grinding off the gear attachment pins and butt joining them. Then a coat of clear gloss was applied (Future/Kleer) and it was time to add the decals.
First problem I had was that there was no match up with nose numbers and the serial numbers that are provided. In fact, there are not enough serial blocks to cover all the possible Kfirs. So I just used a set and left it at that. Secondly, the markings are tiny in may cases and in cutting them out, I over-handled some and damaged the decal. I realize that ALPS printing helps keep down costs and that they can be clear coated before use, but I guess I'm not all that careful when it comes to decal application. Fortunately, there are spares of what I hosed up the most, the national insignia. Leery about strong setting solutions I used Microsol only and had some issues with silvering even after a few applications. I eventually started going crosseyed so did not apply all the date markings!
| FINAL CONSTRUCTION |
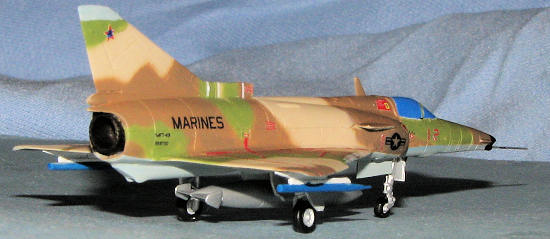
 Next step was to drill out the nose and find a replacement pitot. For this, I usedGriffon Model .3mm Brass Hollow Pipe. It is quite small and easy to cut with an X-acto. A tiny hole was drilled and it was glued in place. Then the gear doors were cut apart and installed. These were also difficult to install, but eventually, I think I got them all in place. Putting on the centerline tank was no problem at all. The outer missile rails, as I mentioned earlier, had oversize attachment holes. This made connecting them a bit difficult as they constantly wanted to fall over. Super glue fixed that and the blue dummy acquisition rounds. A bit of touch-up painting, a coat of clear matte (Future and Gunze Flat Base, a concoction I've been using for about 15 years) and that was it. The masking was removed and it looks great from about three feet away!
| CONCLUSIONS |
I have to say that none of the 1/144 Dragon aircraft kits I've built have been easy. All have had their own challenges. This one was the most challenging though not an impossible build by any stretch. It is a kit that may not be for the fussy beginner, but as always, the end result is what is important and it did turn out fairly well.
| REFERENCES |
March 2009 You can get this and other kits and accessories atwww.greatmodels.com If you would like your product reviewed fairly and fairly quickly, please contact the editor or see other details in the