MPC/Airfix 1/72 F-15D Eagle
| KIT #: | 4406 |
| PRICE: | $4.85 when new in 1984 |
| DECALS: | Two options |
| REVIEWER: | Scott Van Aken |
| NOTES: | MPC boxing |
| HISTORY |
Since the late 1970s, the F-15 Eagle has been the USAF's premiere fighter. Developed to replace the F-4 Phantom II, the Eagle was optimized to be able to perform as an interceptor and to excel in air to air combat. We had learned our lessons in Vietnam, that a missile-only interceptor type was not the perfect aircraft for all types of combat. The enemy's older, slower, and much more agile gun-armed MiG fighters were a great deal more effective than thought and required the F-4s and F-105s that fought against them to completely re-vamp the way they fought these types.
 The US had to perform either hit and run attacks, or start turning the battle into a vertical fight where the excess power of the Phantom allowed it to gain altitude over the less powerful MiGs. Early USAF and all Navy Phantoms were also hampered by the lack of an on-board gun, something the USAF rectified half way through Phantom production, but that the Navy never did.
The Eagle was, in many ways, an improved and optimized F-4. Its larger wing area and greater engine power allowed it to have both the additional thrust it needed and a greater agility. Gun and missiles were both pretty much the same as in later model Phantoms. Eagles first started entering into training squadrons around 1974/75 and regular units about a year later. Even then, there were not enough Eagles to totally replace the standard F-4 and though those remaining units were concentrating in the ground attack mission, they soldiered on until the late 1980s until replaced by the Strike Eagle.
Early F-15As are now gone with the later versions being replaced by the newer, more capable, and ridiculously expensive F-22A. There will never be as many F-22s as there were F-15s, a pretty standard state of affairs in modern military operations. Due to the complexity of the Eagle, few nations were able to afford it, but those that did (basically Israel thanks to the huge Jewish lobby in the US congress) and Japan were able to operate Eagles soon after USAF introduction, with the Japanese building them under license. Saudi Arabia, never lacking for money to buy US weapons and able to hire out for maintenance, also got the fighter-only Eagle.
| THE KIT |
 Now one has to remember that this kit was built over 20 years ago. At that time, there was little to choose from in terms of Eagle kits with the only other viable option being the first Hasegawa effort. Both these kits had raised panel line detail with the Airfix kit having a canopy that could be displayed open, a more detailed cockpit and the ability to build the kit as a two seat version. This is what drew my attention to it when it came time to add an Eagle to the collection.
At that time, the price leader for these kits was MPC. MPC had an arrangement with Airfix wherein they reboxed Airfix kits, often with the original Airfix decals and only a revamped set of instructions and slightly altered box work that included photos of a completed model. Sort of the same way Minicraft and Hasegawa did things.
Options were quite limited to the ability to have the canopy open or closed as well as the speedbrake. The kit was provided with a full weapons load and drop tanks. Decals, by Airfix, were best tossed.
| CONSTRUCTION |
Back in the mid 1980s, I was building up to a dozen kits a month. These were the heady days for me where I basically slapped them together with some attention paid to seams and such, but not to the extent that I do today. It is a pretty standard 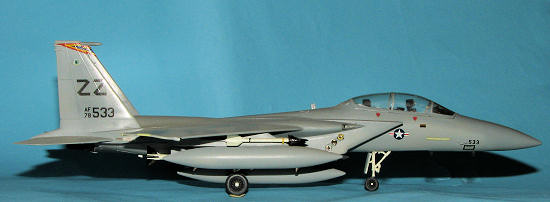 progression for modelers that they do this and I'm sure most of you have gone through this frenzied construction period or are currently in it.
Typical of Airfix kits of the time, the fit was relatively good, but there was always the need to add filler to the various seams. This was particularly true of the fuselage, wing join and the lower wing insert piece. The alternate cockpit section was also a bit rough and filler was used there as well. No rescribing panel lines at this time so none was done. I did put a bit of weight in the nose, but it seems it was really not needed. Intakes are a rather convoluted construct and while the outside was fixed with the usual mass of filler on the seams, the inside of the intakes were left untreated.
Though the larger main gear and nose gear doors were normally closed on the ground, Airfix provided these as separate items. They were duly glued in place, despite a somewhat loose fit after the landing gear were attached. The gear legs and wheel wells were painted gloss white. I also assembled the drop tanks and all the pylons. Tail planes were also glued in place as were the fins. The fins required filler to blend in with the mounting section. I seem to recall that these were keyed so you couldn't accidentally glue them on the wrong side. The cockpit was painted a dark gull grey and seats were painted matte black with OD cushions. A decal was used for the instrument panel. No drybrushing as I'd not learned the skill at the time.
| COLORS & MARKINGS |
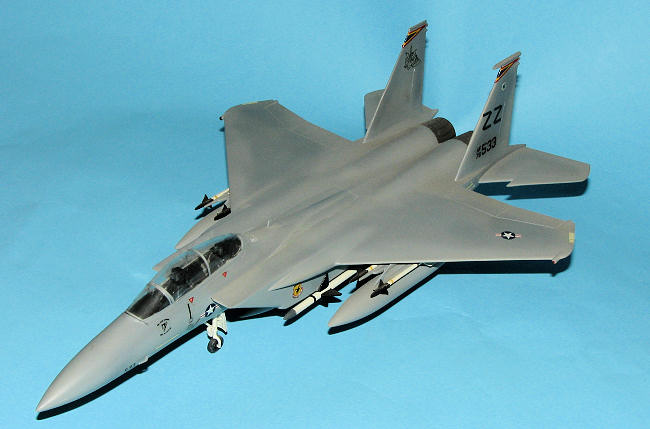
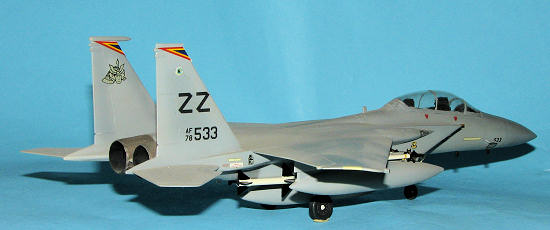
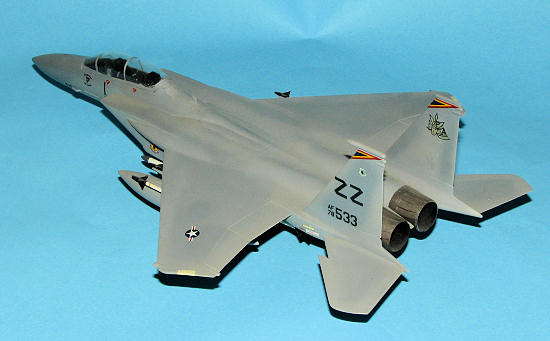
Eagles are generally pretty boring aircraft to look at. This one was an earlier version so was painted in the two Compass Ghost Grey colors. I was using Gunze paints at the time and sprayed those on. These two shades are very close to each other so it is difficult to notice them on the finished model. The large area below the afterburners was painted using Testors A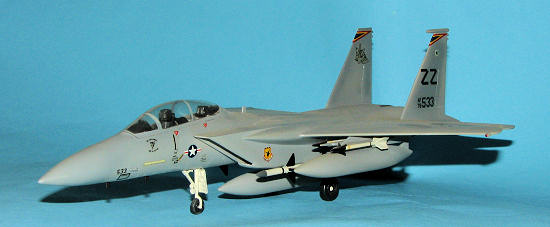 luminum Metallizer while the burner cans were painted a Magnesium color
The kit decals were a disaster so I turned to a Scale Aircraft Modeler sheet that was in one of their magazine issues. SAM used to be famous for providing decals on the main subjects, but quit after their finest sheet on Meteor F.8s was delivered and installed in the magazine without the wax sheet to protect it and all of them were ruined by humidity during delivery. I still have mine and was quite unable to salvage any of it as the two faces stuck to each other on the inside of the magazine.
Anyway, I chose a set of markings for an F-15C attached to the 18th TFW in Okinawa. The decals went on quite well with no hassles and while a bit thick and not as crisp as modern ones, looked fine to me. I used Detail and Scale's 1/72 Slime Light sheet for the formation lights. I should point out that at the time, I wasn't the least bit concerned that I was putting F-15C single seat serial numbers on a two seat F-15B and calling it an F-15D. Of course today, such a thing would keep me up nights. A nice misting of Future and Tamiya matte base (yep, I was using that mixture way back then) sealed in the markings and made things way too matte
| FINAL BITS |
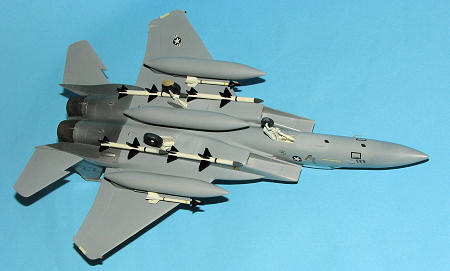 The final bits consisted of gluing on the wheels, missiles, drop tanks, burner cans, and the pitot tubes. I pulled off the masking tape and while the glue was still drying, set it on the shelf to hurry off and work on another one. I've not built a 1/72 Eagle since. Sharp eyed readers will notice that in the intervening decades and several moves, I've managed to break one of the fin mass balances. Such is life.
| CONCLUSIONS |
Most modelers will poo-poo the Airfix kit and head straight for the newer mold Hasegawa one and I don't blame them. However, there are a goodly number who are not concerned with spending $35 on a 1/72 Eagle and will seek out an alternative. This one is such an alternative. It is not as detailed, but yet still looks the part when one is done. For most of us, that is enough.
Detached from its chains and pulled from the model dungeon for you to see. Even knocked off most of the spider's webs!
August 2008
Copyright ModelingMadness.com. All rights reserved. No reproduction in part or in whole without express permission.
If you would like your product reviewed fairly and fairly quickly, please contact the editor or see other details in the
Back to the Review Index Page 2021