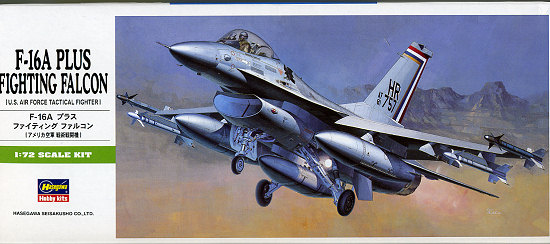
| KIT: | Hasegawa 1/72 F-16A plus Fighting Falcon |
| KIT #: | 00231 (B 1) |
| PRICE: | $ |
| DECALS: | Three options |
| REVIEWER: | Scott Van Aken |
| NOTES: | Baseline kit |
| HISTORY |
When I was quite a bit younger, I can remember the fly-off between the Northop YF-17 and the GD YF-16 for the lightweight fighter competition. To me, both of them were not pretty aircraft, though the YF-16 was a tad better looking. The fly-off showed that both aircraft met specifications, but as usual, there was some politics involved and the USAF wanted a single engine aircraft so the YF-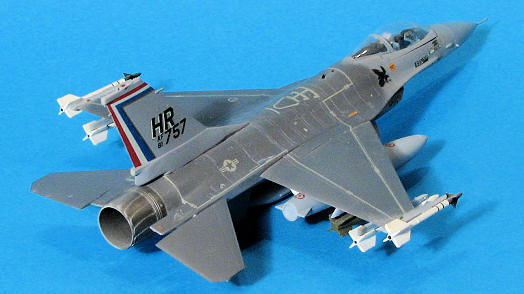 17 lost out and was eventually developed into the F-18.
Initial production aircraft were rather quick to come off the assembly line. The pre-production YF-16s were all 75-xxxx serial planes while the first F-16A was 78-0001. It quickly entered USAF service, in many cases supplanting the larger F-4 Phantom II, which allowed Guard and Reserve units to transition out of older aircraft into the now spare F-4s. Within five years, the F-16 was a common sight at bases throughout the world and was also eagerly bought by friendly forces, including many NATO countries, where license production got underway.
Eventually, the F-16A reached the end of its useful life and though many block 15 aircraft were converted to ADF variants, even those were out of the inventory by around 2000 or so. Now, it is different variants of the F-16C that are carrying on until they, too, will need to be replaced. It will be quite interesting to see what that aircraft will be like. For one thing, they won't be building over 2,500 copies of it!
| THE KIT |
 When this kit first came out in 1985 or so, it was the best 1/72 F-16 of any kind on the market. It surpassed the Italeri and ESCI kits in terms of details and the weapons load it provided. Both of those other kits were earlier block 5 and block 10 aircraft with the smaller stabilizer while the Hasegawa kit has the larger one provided with the block 15 aircraft.
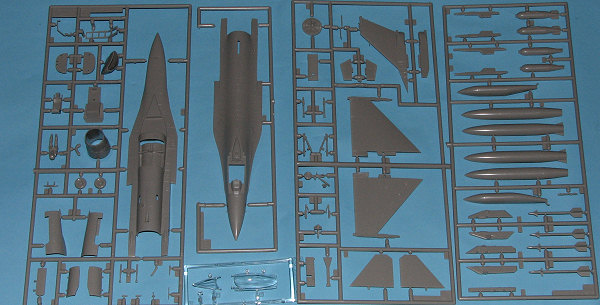
It is very much like any modern Hasegawa 1/72 kit in that it provides nicely engraved panel lines, one piece wings with the pylon mounting holes already drilled in them, a one piece fin/rudder with lower section in two halves, well detailed landing gear and gear bays, and a boarding ladder. It also includes a pilot figure. Looking at the parts, they are in quite good condition even after all 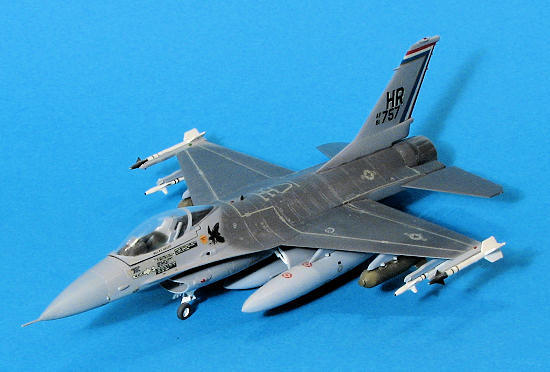 these years. I found the expected ejector pin marks on the inside of gear doors and on the missile bodies. The intake is in three sections and can be a bit fiddly to assemble cleanly as it incorporates the nose gear well. No nose weight is really needed, but you can put some in there if it makes you feel better.
Canopy is a two part affair in quite clear plastic. I know that these are generally tinted and you can do so with some Tamiya 'Smoke' or something similar if you wish. The 'things under wings' includes a centerline tank, two large wing tanks, a pair of cluster bombs and two different types of Sidewinder. Those wishing to not carry everything can fill in whatever holes they wish.
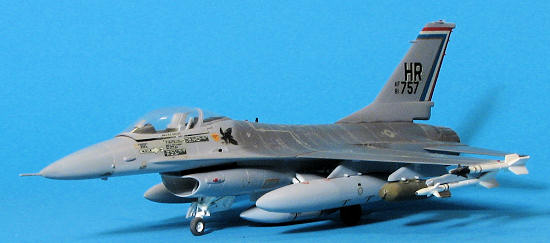
Instructions are pretty standard Hasegawa fare and have changed little in 20 years. Markings are for three aircraft. First is the box art plane from the 50th TFW which was based at Hahn, Germany in 1983. The other US option is from the 8th TFW at Kusan, Korea about the same time. The third is from 311 Squadron, Dutch Air Force, at Volkel. Decals are standard Hasegawa fare and are a bit thick. Lots of data markings and they are the original orange ones that were fitted to the planes when they were built. There are a goodly number of aftermarket sheets even for early F-16s so finding some alternates will not be difficult.
| CONSTRUCTION |
Other than perhaps the Fujimi kit, which is quite similar, this is probably still the best 1/72 F-16A on the market. Not only that, but the standard boxing is quite inexpensive, allowing a Falcon fan to have quite a number of them for very little money. Of course, the kit I built was in the original boxing, this one having been built in April of 1986, as one of ten completed in that month. Though 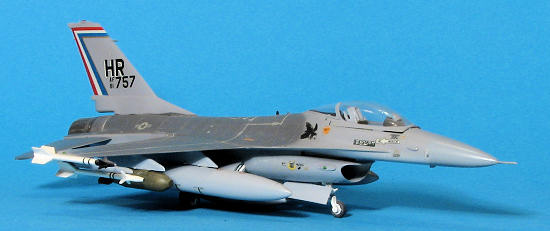 several other Hasegawa Falcons have been built, this is the one that stays on my shelf.
As with nearly all aircraft kits, this one started with the cockpit. The cockpit is rather basic, having decals to simulate instruments and an un-harnessed and somewhat generic-looking Aces bang seat. The kit does supply a separate throttle and control stick, wisdom indicating that these items not be attached until just before the fuselage halves are glued together. Once the cockpit was painted, it was cemented into the lower fuselage half and the halves cemented. With a separate tail cone, the exhaust can be glued in place just about any time during construction. There is a seam that some may want to fill where the exhaust section meets the fuselage. Now is the time to take care of that before other bits get in the way. No nose weight is needed, but I always put in a bit just in case.
Probably the most difficult parts of the build is getting the intake just right. The multiple piece construct ensures that you'll need to use filler to fair things in properly. Wings are a single piece and have holes for stores already drilled. Means that you have to fill them if you don't want to install all the pylons. Attaching the wings is not a problem, just be sure that they are straight. I waited until after painting and decaling to install the stabilators. The fin was also an easy item to glue in place and fit well. Same for the ventral fins. I attached the canopy bits and masked them off in preparation for painting.
| COLORS AND MARKINGS |
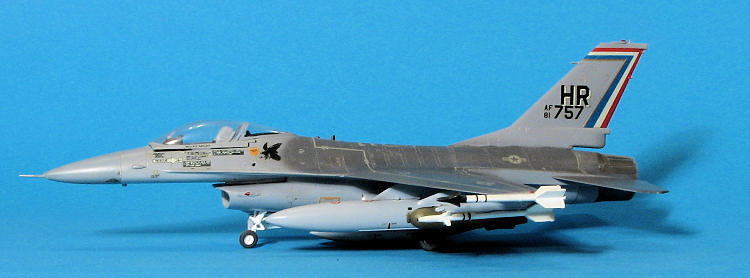
 F-16s of this era were in the three greys' scheme and at the time this kit was built, I was pretty well only using Gunze acrylics for paints. The painting process is somewhat drawn out because of the colors and you do have to do some masking, but in the end, it is well worth it. All the landing gear and wheel wells had been painted white as were the missiles. Once the wells had dried, they were stuffed with tissue so the rest of the airframe could be painted. When all the paint was dry, I clear gloss-coated it and decided to use the kit decals, picking the 50 TFW boss bird as shown on the box art. The sheet is quite extensive and includes all the data stencils and the walk area stripes. This was all applied over several days. I used rather hot water and had no real issues with the markings.
| FINAL BITS |
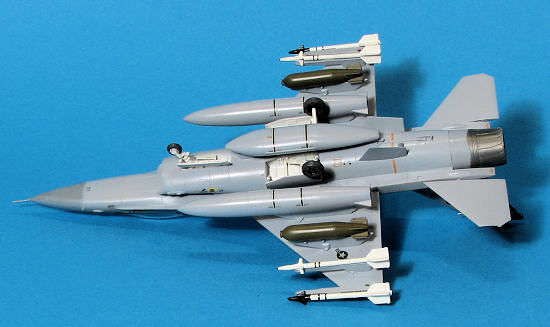
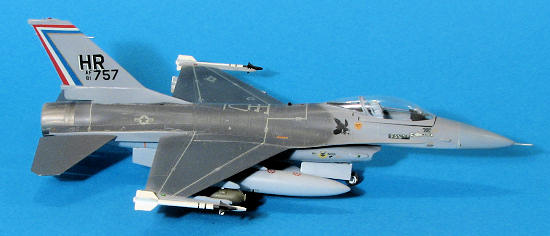 As you might imagine, doing the last parts of the build took a while I had to attach the landing gear parts as well as all the various things under the wings. Fortunately, Hasegawa does provide a full weapons load with this kit so no need to resort to a weapons set to fill things out. You get two variations of Sidewinder for the outer rails, a nice 500 lb bomb for the middle pylon and two large fuel tanks for the inner ones. You also get a centerline fuel tank so the plane is well loaded when you are finished. I also originally had the canopy posed open, but somewhere in the several moves I've made since the kit was built, the piece that holds the canopy up has disappeared so you see it somewhat 'cracked open', a position that is not un-prototypical as it is often left this way to keep it from getting too hot while sitting in the sun.
| CONCLUSIONS |
 Overall, it is a nice kit and even twenty years since being built, it still looks good on the shelf. Though not the newest F-16 kit on the market, it is one that is easily found for $10 or less and best of all, it goes together well.
If you would like your product reviewed fairly and fairly quickly , please contactme or see other details in the