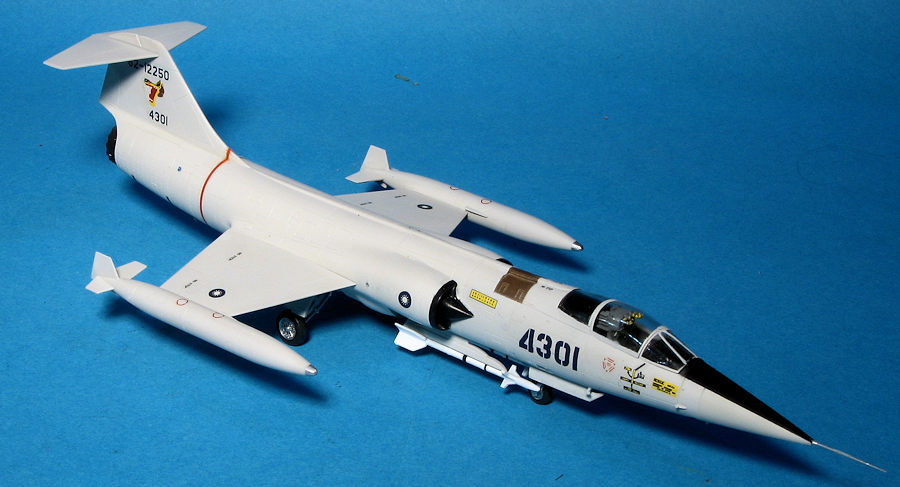
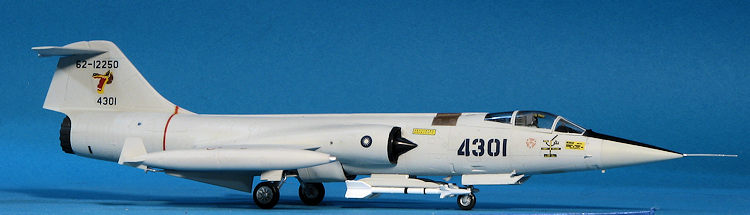
Hasegawa 1/72 F-104G 'World Starfighter'
| KIT #: | 02877 |
| PRICE: | 1200 yen when new |
| DECALS: | Six options |
| REVIEWER: | Scott Van Aken |
| NOTES: | 1995 limited edition |
| HISTORY |
 vertical fin, strengthened landing gear with larger
tires, and revised flaps for improved combat maneuvering. Upgraded avionics
included a new Autonetics NASARR F15A-41B radar with air-to-air and ground
mapping modes, the Litton LN-3 Inertial Navigation System (the first on a
production fighter), and an infrared sight.
vertical fin, strengthened landing gear with larger
tires, and revised flaps for improved combat maneuvering. Upgraded avionics
included a new Autonetics NASARR F15A-41B radar with air-to-air and ground
mapping modes, the Litton LN-3 Inertial Navigation System (the first on a
production fighter), and an infrared sight.| THE KIT |
 Despite owning a number of these
kits, this is only the second I've ever built. The kit is typical of
Hasegawa kits from the 1990s until today. Finely engraved detail, a somewhat
bare cockpit that uses decals and raised detail, and two seats. One is the
type used by Canadian and Japanese Starfighters so is not used in this
boxing. An interesting feature of the cockpit tub is that it has to be
'bent' along some scored lines to be the proper width.
Despite owning a number of these
kits, this is only the second I've ever built. The kit is typical of
Hasegawa kits from the 1990s until today. Finely engraved detail, a somewhat
bare cockpit that uses decals and raised detail, and two seats. One is the
type used by Canadian and Japanese Starfighters so is not used in this
boxing. An interesting feature of the cockpit tub is that it has to be
'bent' along some scored lines to be the proper width.
 so test
fit it. The forward main gear doors are almost completely closed, but again,
should not be attached until after the main gear due to the retraction struts.
so test
fit it. The forward main gear doors are almost completely closed, but again,
should not be attached until after the main gear due to the retraction struts.
| CONSTRUCTION |
First step was to assemble the fuel tanks. This
kit had a bit more flash on it than I'd have thought, so more parts cleanup
was needed. I then painted all the interior bits with dark gull grey.
I used the decals to cover the instrument panel and consoles. These are a
bit oversize, but when dry (after a dab of Mr. Mark S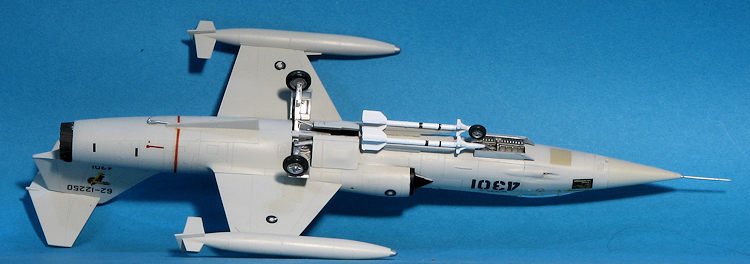 ofter), look very nice.
The control stick was added as was the rear bulkhead and the nose gear well.
This was then installed in one fuselage half. The fit is excellent. The
other half was glued on after opening the holes for the missile rails. Fit
is fairly good. One has to have a photo of the plane being modeled as the
molded on antennas are different. For mine, I ended up sanding off all but
one.
ofter), look very nice.
The control stick was added as was the rear bulkhead and the nose gear well.
This was then installed in one fuselage half. The fit is excellent. The
other half was glued on after opening the holes for the missile rails. Fit
is fairly good. One has to have a photo of the plane being modeled as the
molded on antennas are different. For mine, I ended up sanding off all but
one.
Next step was building up the aft fuselage section. This needs to trap the exhaust section. After painting the inside of this assembly with Alclad II's jet exhaust, I glued this into the fuselage. There are guides on the back of the mounting plate that show how this fits. The burner can was simply pushed in place to keep the exhaust aligned. There is a forward bulkhead that not only adds stiffness, but is also the back of the gear well. The gear wheel roof was glued in as well. Once all that was dry, I removed the burner can and sanded things down.
It was then time to join the front and rear fuselage
pieces. The truth raised its ugly head and I had to install the landing gear and
the center gear brace. I glued those in and then attached the front fuselage.
Before the glue dried, I glued on the intake pieces. Having all this sort of
fluid allowed me to get things as well aligned as I could. I still needed a
little filler, but that is me. Once that was done, I attached the wings. Prior
to that I filled in the holes on the underside of the wing as my Starfighter
wasn't going to be carrying un der wing fuel tanks.
With that done, the tailplane was glued in place. I next tackled the main landing gear. This had to be installed or the fore and aft brace would not be able to be painted. I prepainted all these piece with Alclad II aluminum, hitting the front gear well while I was at it along with the inside of the gear door pieces. The main gear have brake lines that fit on them. These are prone to breaking when removing them from the sprue. It is a good idea to attach the forward braces once the airframe has been painted. The wells were filled with Silly Putty and the main gear legs masked.
Moving to the cockpit, I masked the clear bits and glued them in place after painting and installing the seat. This was followed by the fuel tanks. I also glued on the missile rails.
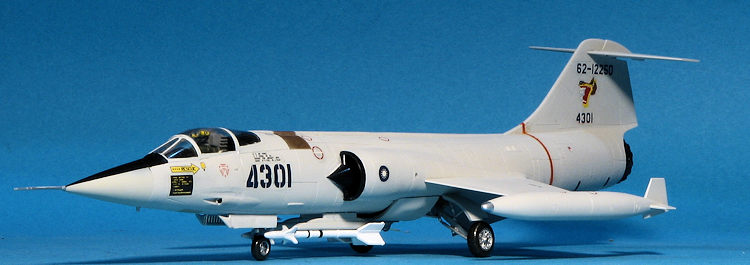
| COLORS & MARKINGS |
 lso
be painted dark olive drab. This was then masked off. The intakes were
painted black and masked as well.
lso
be painted dark olive drab. This was then masked off. The intakes were
painted black and masked as well. 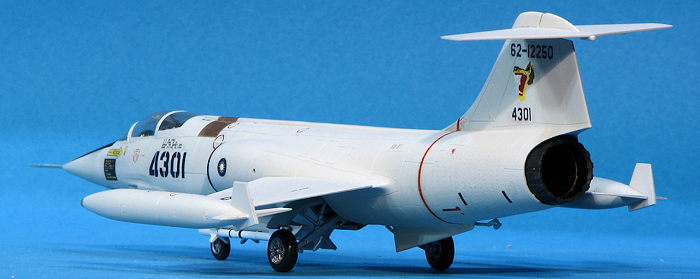 stencils and on a scheme like this, it helps break up the solid color. I had
some problems with silvering even though I used Mr. Mark Softer on all the
decals. I also had a couple of them crack and one of them, an underwing
roundel, shattered.
stencils and on a scheme like this, it helps break up the solid color. I had
some problems with silvering even though I used Mr. Mark Softer on all the
decals. I also had a couple of them crack and one of them, an underwing
roundel, shattered. | CONCLUSIONS |
| REFERENCES |
Copyright ModelingMadness.com. All rights reserved.