Tamiya 1/72 F-16CJ (Block 50)
| KIT #: | 60786 |
| PRICE: | 1900 yen SRP (1520 yen at HLJ) |
| DECALS: | Three options |
| REVIEWER: | Scott Van Aken |
| NOTES: | New tool kit |
| HISTORY |
 the Block 40/42 and Block 50/52 as the main Falcons in the
USAF. These will be replaced by the F-35, despite all of the issues of
ballooning expenses and poorly functioning systems that have plagued the F-35
over the last decade or so.
the Block 40/42 and Block 50/52 as the main Falcons in the
USAF. These will be replaced by the F-35, despite all of the issues of
ballooning expenses and poorly functioning systems that have plagued the F-35
over the last decade or so. Block 50/52plus
This variant, which is also known as the Block 50/52+ has solely been developed for foreign sales with no USAF units flying the type. Its main differences are the addition of support for conformal fuel tanks (CFTs), a dorsal spine compartment, the APG-68(V9) radar, an On-Board Oxygen Generation (OBOGS) system and a JHMCS helmet.
The CFTs are mounted above the wing, on both sides of the
fuselage and are easily removable. They provide an additional 440 US gallons or
approximately 3,000 pounds (1,400 kg) of additional fuel, allowing increased
range or time on station and frees up hardpoints for weapons instead of
underwing fuel tanks. All two-seat
 "Plus" aircraft have the enlarged avionics
dorsal spine compartment which is located behind the cockpit and extends to the
tail. It adds 30 cu ft (850 L) to the airframe for more avionics with only small
increases in weight and drag.
"Plus" aircraft have the enlarged avionics
dorsal spine compartment which is located behind the cockpit and extends to the
tail. It adds 30 cu ft (850 L) to the airframe for more avionics with only small
increases in weight and drag.
Poland took delivery of its first F-16C Block 52+ aircraft on 15 September 2006. The "Poland Peace Sky program" includes 36 F-16Cs and 12 F-16Ds. All 48 aircraft were delivered in 2008. The Hellenic Air Force took delivery of its first F-16C Block 52+ aircraft on 22 May 2008. The total Greek order is for 20 F-16Cs and 10 F-16Ds. The remaining 26 aircraft should be delivered by March 2010. The Israeli F-16I and its Singapore equivalent variant are based on the block 52+ aircraft. In March 2010 it was announced that the Egyptian Air Force would purchase 20 Block 52 aircraft (16 F-16Cs and 4 F-16Ds), the first of which arrived for testing in April 2012
| THE KIT |
As several of you know, Tamiya has developed a superb F-16 in 1/48 and it was only a matter of time before this kit was released in 1/72 scale. Now the kit is out and has been snapped up by buyers everywhere it has been offered for sale. I am assuming that Tamiya will be offering other variations on this kit, as it only makes sense to do so.
It is no surprise to find the parts superbly molded with the
sharp, finely engraved detail that we have come to expect from Tamiya. It is
also no surprise to find that the kit has been designed in such a way that there
are a  lot of inserts so that other versions can be done with the basic airframe.
The builder will also need to open some holes along the way, fill a few, and
remove some bits as well.
lot of inserts so that other versions can be done with the basic airframe.
The builder will also need to open some holes along the way, fill a few, and
remove some bits as well.
As it is customary to start describing the cockpit, I'll begin there. You have a nicely done tub with raised console detail and a separate throttle and control stick. Into this (at a much later time during construction), will fit a nicely shaped bang seat as well as an instrument panel and anti-glare shield. No decals are provided for instruments.
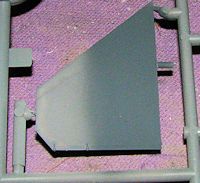
The forward upper fuselage is separate so that a two seat version can be boxed at a later date. There is an insert just ahead of the canopy for either a blanking plate or the 'road warrior' IFF antennas. There are also inserts on the side of the nose near the radome for antennas and one near the rear lower fuselage. Wings are a single piece that have no holes drilled for pylons, which is not surprising as, amazingly, this kit has none. No bombs, no drop tanks, no centerline rack. In other words, you can only build a clean aircraft with missiles on the wing tips. Not very prototypical and something that has many modelers disappointed. While on the subject of the wings, these do have the small 'beer can' antennas.
The exhaust is several pieces that fit into the aft of the
airframe. I'd wait to put the burner can in until after it has been painted.
Main landing gear are well done with separate brake housings on the inside of
the wheel. The nose gear has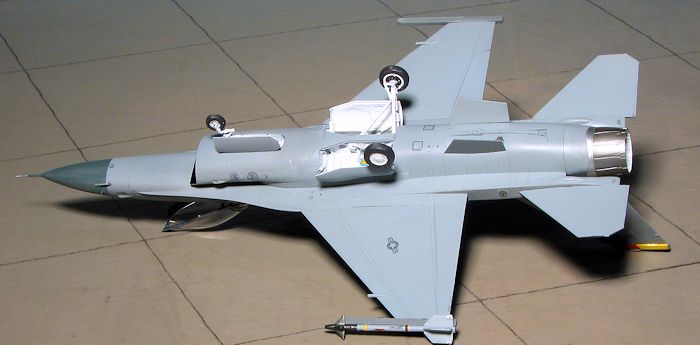 a separate wheel/tire. The intake is a rather
complex looking construct. There is a two piece intake that fits inside a two
piece outer housing. This housing has another piece that fits atop it at the
very front. There are also two inserts for vents along the side of the outer housing.
Again, it sounds very complex, but I'll bet that it fits very well. The tail
section is made up of a separate fin and the fin base is four pieces; two on
either side.
a separate wheel/tire. The intake is a rather
complex looking construct. There is a two piece intake that fits inside a two
piece outer housing. This housing has another piece that fits atop it at the
very front. There are also two inserts for vents along the side of the outer housing.
Again, it sounds very complex, but I'll bet that it fits very well. The tail
section is made up of a separate fin and the fin base is four pieces; two on
either side.
The canopy is designed to be posed open or closed. One needs to drill out the tip of the radome for the pitot. For weapons, one either has AIM-120s or Sidewiders.
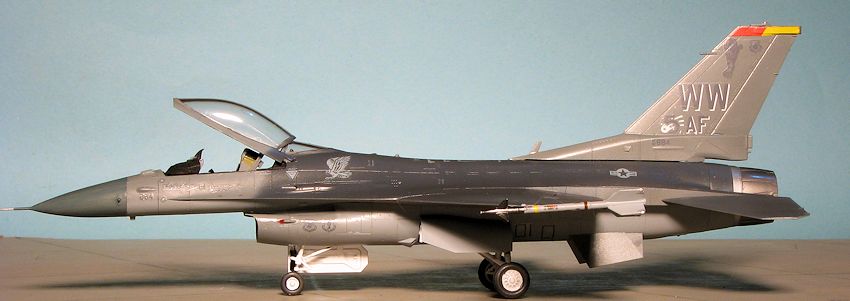
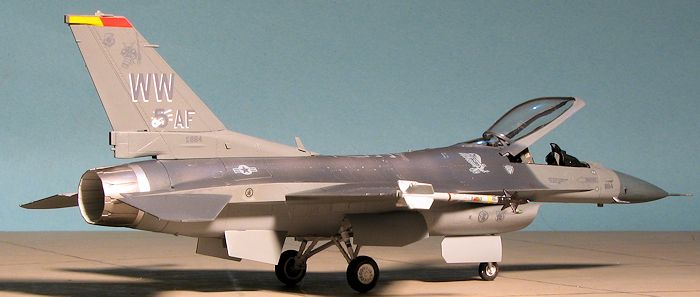
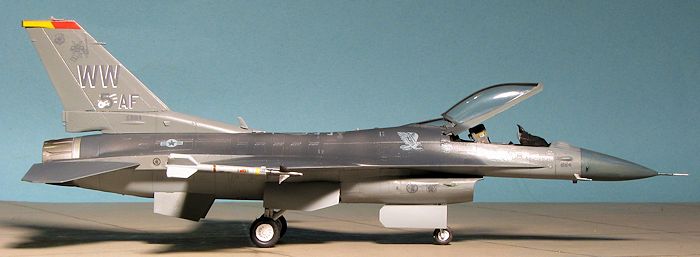
Instructions are well drawn with only Tamiya paints listed so there is some mixing required for some of the colors. Markings are for three planes, all shown in the three greys scheme. I would have thought that the more recent ones would have been repainted in the more simple two greys scheme that all the ANG F-16s have been using for the past 15 years. One is the box art lane from the the 5th AF at Misawa in 2010. Next is the 52FW boss bird from Spangdahlem in 2011 and the third is a 79FS Tiger Meet plane from 2001. The decals are nicely done and provide all the stencils needed. In fact, there are stencils for the non-included targeting pods, HARMs, and fuel tanks. Tamiya has included a separate and large painting and markings guide.
| CONSTRUCTION |
 that
the base of the base is not too skinny. Sounds convoluted, but when you get
your kit you'll see what I mean. I also glued in the upper after fuselage
insert and attached the cockpit section to the rear fuselage bit. The gun
insert was also installed. Fit on these is quite good, but the gap is larger
than the engraved detail. I also glued together the radome, cursing Tamiya
for molding on the sensor tips which will probably get broken off.
that
the base of the base is not too skinny. Sounds convoluted, but when you get
your kit you'll see what I mean. I also glued in the upper after fuselage
insert and attached the cockpit section to the rear fuselage bit. The gun
insert was also installed. Fit on these is quite good, but the gap is larger
than the engraved detail. I also glued together the radome, cursing Tamiya
for molding on the sensor tips which will probably get broken off. 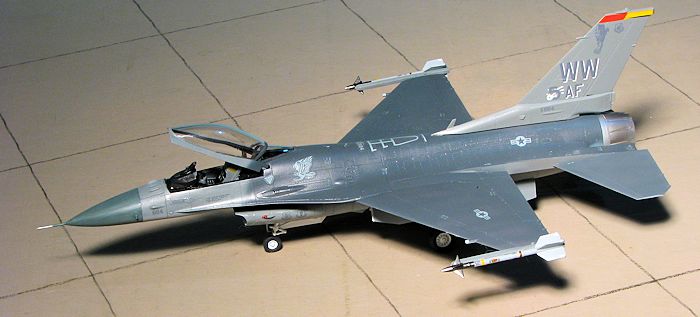 I then moved to the wheel wells. This is another rather complex area as
there are separate gear door strut assemblies, the main gear legs themselves
and two retraction struts per side. There is also a centerline bulkhead
running fore and aft as well as a transverse bulkhead. What this means to
the modeler is that one has to pre-paint the underside of the fuselage
before attaching any of the gear bits or masking will be nearly impossible.
When those were installed, I then attached the section just in front of the
gear well in addition to the fuselage section that would normally hold the
centerline rack. I found the forward section to not be the best fit. There
was a step between it and the intake that required several applications of
filler.
I then moved to the wheel wells. This is another rather complex area as
there are separate gear door strut assemblies, the main gear legs themselves
and two retraction struts per side. There is also a centerline bulkhead
running fore and aft as well as a transverse bulkhead. What this means to
the modeler is that one has to pre-paint the underside of the fuselage
before attaching any of the gear bits or masking will be nearly impossible.
When those were installed, I then attached the section just in front of the
gear well in addition to the fuselage section that would normally hold the
centerline rack. I found the forward section to not be the best fit. There
was a step between it and the intake that required several applications of
filler. | COLORS & MARKINGS |
 FS 36118. For this shade,
I had used Aeromaster Acrylics, which were 'pre-lightened'. However, it
just did not look dark enough so I repainted it with the same shade in
Testors. There is quite a difference as you can see in the image with
the Testors enamel on the right side. Of course, all of these colors
will require finishing touch-ups as areas will need to be masked where
overspray is inevitable. The clear bits were masked and though the rear
section was glued in place, the main canopy itself was simply tacked on
using clear paint. I then painted on the upper surface FS 36118.
FS 36118. For this shade,
I had used Aeromaster Acrylics, which were 'pre-lightened'. However, it
just did not look dark enough so I repainted it with the same shade in
Testors. There is quite a difference as you can see in the image with
the Testors enamel on the right side. Of course, all of these colors
will require finishing touch-ups as areas will need to be masked where
overspray is inevitable. The clear bits were masked and though the rear
section was glued in place, the main canopy itself was simply tacked on
using clear paint. I then painted on the upper surface FS 36118. 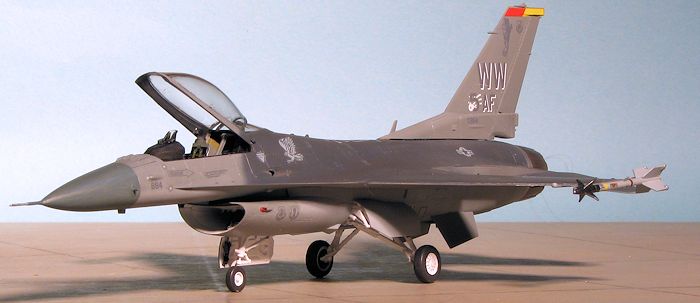 bottom of it, was next. That was painted Jet Exhaust prior to
installation. Also painted before gluing was the burn petals. The outside
was painted Dark Aluminum, then masked and the interior painted white.
Apparently modern jets have a ceramic coating on the inside. I first noticed
this on a VMFA-225 F-18D back in the early 1990s. This was then glued in
place as were the ventral fins (after repainting as I painted the two colors
on the wrong sides!).
bottom of it, was next. That was painted Jet Exhaust prior to
installation. Also painted before gluing was the burn petals. The outside
was painted Dark Aluminum, then masked and the interior painted white.
Apparently modern jets have a ceramic coating on the inside. I first noticed
this on a VMFA-225 F-18D back in the early 1990s. This was then glued in
place as were the ventral fins (after repainting as I painted the two colors
on the wrong sides!). | FINAL PARTS |
 Solvaset
worked well on them. There are a lot of stencils, but not as many as,
say, an F-15 so for me, decaling only took four or five days. With the
decals in place, I attached the tailplanes and the radome. I should have
added some weight as without the stores, the plane is borderline tail
heavy and will sit back if you push down on the fin. I then gave it a
coat of semi-matte clear.
Solvaset
worked well on them. There are a lot of stencils, but not as many as,
say, an F-15 so for me, decaling only took four or five days. With the
decals in place, I attached the tailplanes and the radome. I should have
added some weight as without the stores, the plane is borderline tail
heavy and will sit back if you push down on the fin. I then gave it a
coat of semi-matte clear.| CONCLUSIONS |
 Now that the angst is over about the lack of stores, I have to
say that this is very much a typical Tamiya kit. Engineering is very good and
the parts all fit where they should. This one took me longer than the usual jet
kit of this size for some reason. Probably due to having to paint bits, let them dry, and
then attach them, whereas normally I fully build the airframe then paint it.
This is also what I'd call a 'tweezer kit'. There are a lot of rather small bits
or areas where there isn't room for fingers that require one to be deft with
tweezers during construction. I have to give the kit an A for fit and a B- for
completeness. Like the majority of plastic kits, it would benefit from a decent
resin seat. I would hope that Tamiya takes the hint and includes stores with the
next release, which I'm sure they will. It is kit that, with reservations
regarding the lack of stores, I can easily recommend to you.
Now that the angst is over about the lack of stores, I have to
say that this is very much a typical Tamiya kit. Engineering is very good and
the parts all fit where they should. This one took me longer than the usual jet
kit of this size for some reason. Probably due to having to paint bits, let them dry, and
then attach them, whereas normally I fully build the airframe then paint it.
This is also what I'd call a 'tweezer kit'. There are a lot of rather small bits
or areas where there isn't room for fingers that require one to be deft with
tweezers during construction. I have to give the kit an A for fit and a B- for
completeness. Like the majority of plastic kits, it would benefit from a decent
resin seat. I would hope that Tamiya takes the hint and includes stores with the
next release, which I'm sure they will. It is kit that, with reservations
regarding the lack of stores, I can easily recommend to you.
| REFERENCES |
http://en.wikipedia.org/wiki/F-16_Fighting_Falcon_variants
May 2014
Thanks to Hobby Link Japan for the review kit. You can get yours at this link.
If you would like your product reviewed fairly and fairly quickly, please contact the editor or see other details in the Note to Contributors.