| KIT #: | AC-4 |
| PRICE: | ¥3800 MSRP |
| DECALS: | Five options |
| REVIEWER: | Scott Van Aken |
| NOTES: | New mold kit |
| HISTORY |
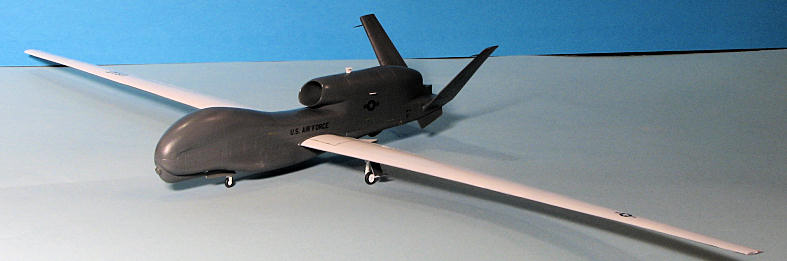
The Northrop Grumman (formerly Ryan Aeronautical) RQ-4 Global Hawk (known as Tier II+ during development) is an unmanned aerial vehicle (UAV) used by the United States Air Force as a surveillance aircraft.
In role and design, the Global Hawk is similar to the Lockheed U-2, the venerable 1950s spy plane. It is a theater commander's asset to both provide a broad overview and systematically target surveillance shortfalls. The Global Hawk air vehicle is able to provide high resolution Synthetic Apert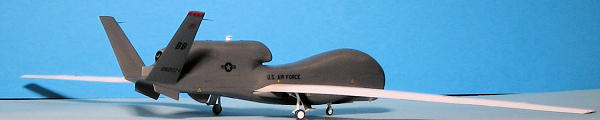 ure Radar (SAR)—that can penetrate cloud-cover and sandstorms—and Electro-Optical/Infrared (EO/IR) imagery at long range with long loiter times over target areas. It can survey as much as 40,000 square miles (100,000 square kilometers) of terrain a day.
Potential missions for the Global Hawk cover the spectrum of intelligence collection capability to support forces in worldwide peace, crisis, and wartime operations. According to the Air Force, the capabilities of the aircraft will allow more precise targeting of weapons and better protection of forces through superior surveillance capabilities.
The "R" is the Department of Defense designation for reconnaissance; "Q" means unmanned aircraft system. The "4" refers to it being the fourth of a series of purpose-built unmanned aircraft systems.
The Global Hawk costs about $35 million USD (actual per-aircraft costs; with development costs also included, the per-aircraft cost rises to $123.2 million USD each).
From what I can gather, the RQ-4B differs externally from the RQ-4A by having ventral strakes and single wheel main gear.
| THE KIT |
It was quite a pleasant surprise when the postman delivered this one to the door. On the heels of the Predator drone, this one is a much larger and strictly surveillance vehicle.
 The kit comes with five sprues of grey plastic and a screw. The detailing on the kit is superb with crisply done panel lines and none of the over accentuated stuff we have seen from many model companies recently.
This is not a complex kit. With no cockpit and no weapons, the parts count is relatively low. aside from the landing gear, the only real fussy bit might be the engine intake and exhaust. Both have compressor faces so no see through effect. The kit does need about 10 grams of weight, but there is a ton of space for it. The screw seems to be for a plate on the fuselage that acts as a spreader bar for the lower fuselage inert.
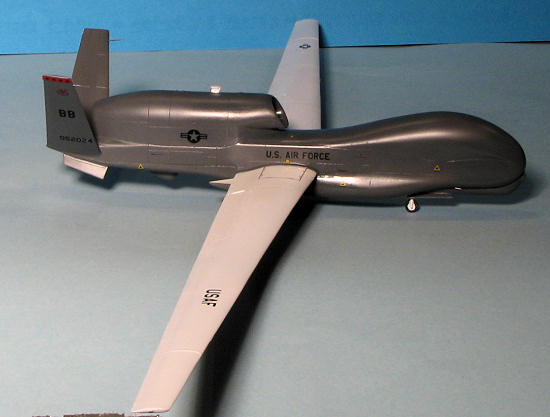
Instructions are completely in Japanese with Gunze and FS 595 paint references. You'll basically need Gunship Grey and White for the airframes of the operational planes and some International Orange for the Edwards aircraft. Four markings options are provided. One is the cover art plane from the 9 SRW in Gunship Grey (FS 36118) with white upper wings. The other camouflaged version is with the German Air Force test unit. A white NASA plane is a third option, while the fourth is a test plane at Edwards AFB with International Orange wing tips, ventral stabs and vertical stabs. This would be the most colorful option. The decal sheet is very well done with all the data markings you'd need as well as insignia and other unique markings. Also included are a set of Taiwan insignia as the US has a history of loaning 'spy' planes to the Nationalist Chinese. There are also additional numbers so you can duplicate any plane in the fleet. The decals are superbly printed by Cartograf so you know they are good.
| CONSTRUCTION |
 It has often been said that simple isn't always easy. Well, I was to find out that this was somewhat true during the build of this kit.
It is true that not having a cockpit or weapons will greatly speed the building of any kit and while the parts are very nicely molded, they are not exactly a tight fit as I was to find out. My first task was to assemble the wings. The lower section fits within the upper wing; the leading and trailing edges being part of the upper wing mold. However, there is a considerable gap that I felt I had to fill. As the wings are long, it took quite a bit of filler and several applications to get it all taken care of.
Back at the fuselage, I glued in nose weights and cemented the fuselage halves together. There are bulkheads to add stiffness to the fuselage and these seemed to keep the halves from 100% joining together. Even after glued, I could look from the underside and see light through the fuselage seam. To take care of this, I applied superglue to the underside of the join to add stiffness. There is a lower fuselage piece that doesn't quite fit flush on the back section behind the wings. I'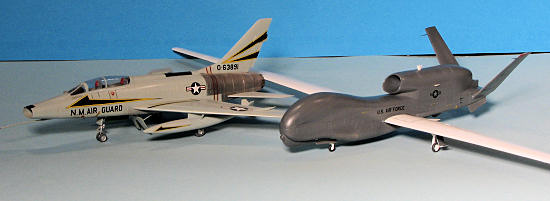 m assuming that there is a mission palette that juts out from the fuselage on all sides in this area as it really would take a LOT of sanding to sand it flush.
The intake and exhaust blanks were painted and glued in place. I masked off the compressor face in the front as the intake is to be painted the upper surface color. There is also in insert that fits behind the exhaust. To be honest, there was not a join that did not require filler. This keeps this kit from being a weekend project and it took me the better part of three weeks to complete it. I eventually got the fuselage and tail completed and with the engine compressor long done, it was time for the paint shop. For those of you wondering how big this thing is, here is an image of an AMT 1/72 F-100F I built many years back for comparison. The fuselage is about the same size.
| COLORS & MARKINGS |
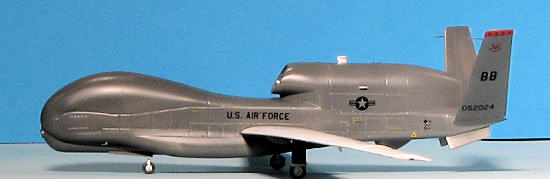
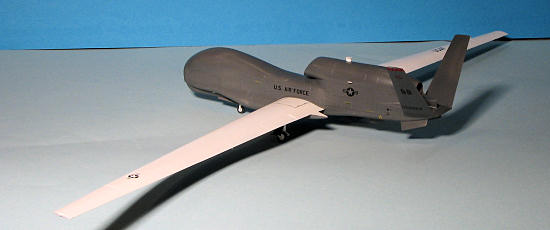
I chose an operational aircraft in overall FS 36118 Gunship Grey, so that meant that the best way to tackle this was to paint the wings separately from the rest of the airframe. The upper wings are white as are the wheel wells, gear legs, inner gear doors, antennas, and wheels. I used Testors Model Master enamels for all the various paints. I should mention as well that there is little relief between the wheels and tires so painting the tires requires a steadier hand than I have to get a perfect circle.
| FINAL CONSTRUCTION |
 With the paint dry, I then attached the wings. These are snap fit wings as one of the earliest parts of construction is to screw a plate in the fuselage to which the tabs on the wings strongly snap in place. However, the wings won't go all the way into the fuselage, even after some trimming so there is a gap.
I then glued on all the little antennas (one seems to have gotten lost), the landing gear and the doors. The retraction struts for the main gear attach far back into a closed section of the wheel well so one has to take care when gluing these in place. I highly recommend gluing the retraction strut and main gear strut at the same time to get the proper gear angle.
As mentioned, I chose the operational 9 SRW aircraft. The decals are quite well done and succumb to Solvaset rather well. I found that setting solution was a requirement to keep these markings from silvering. There are actually quite a few data markings to go on this so it is not a quick job to get them all in place. Naturally, I had to do a bit of touch-up painting, but nothing major. When done, a coat of semi-gloss was sprayed over the entire airframe to help hold in the decals and tone down the gloss white upper wings. The last thing added were some tiny pitot tubes that I knew I'd knock off during the decalling process.
| CONCLUSIONS |
This is probably the most modern aircraft kit I've yet built as the Global Hawk has only been in service for a few years. It is one of the more interesting subjects out there and if you have the shelf space for it, I can easily recommend it to you.
| REFERENCES |
 http://en.wikipedia.org/wiki/RQ-4_Global_Hawk
April 2010
Copyright ModelingMadness.com. All rights reserved.
No reproduction in part or in whole without express permission from the editor.
If you would like your product reviewed fairly and fairly quickly, please contact the editor or see other details in the
Back to the Review Index Page
2025