| KIT #: | 093 |
| PRICE: | $3.00 from the 'junk kits' table |
| DECALS: | Two options |
| REVIEWER: | Scott Van Aken |
| NOTES: | Initial release in Minicraft box |
| HISTORY |
The F-15 Eagle was developed in the late 1960s as a replacement for the F-4 Phantom II, though not a total replacement as the Eagle was to be strictly an air defense airplane. There was no plan on having it perform the fighter-bomber role, that was to be left to what was to become the F-16.
 Unlike the F-16 there was no fly-off competition as the plane was ordered right off the drawing board, so to speak. The plane was big and quite powerful, having the most up-to-date avionics and engines. Lessons were learned from Vietnam and it was designed with a 20mm Vulcan cannon installed in the right wing leading edge near the intake. The rest of the armament was four Sparrow missiles and four Sidewinders. It was also able to carry three fuel tanks, one on the centerline and two under the missile pylon, allowing it an impressive range.
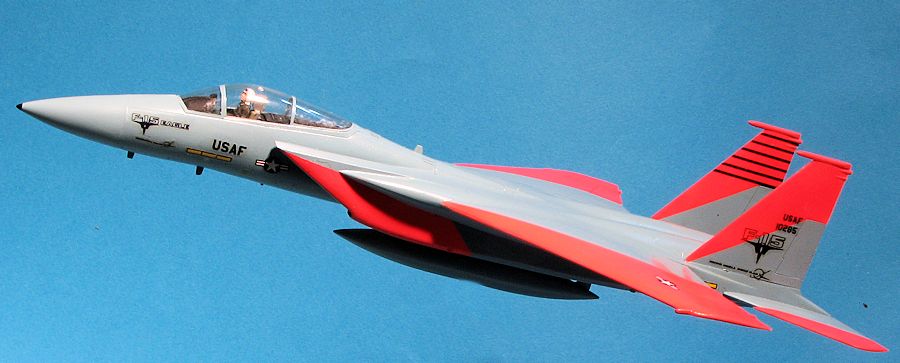
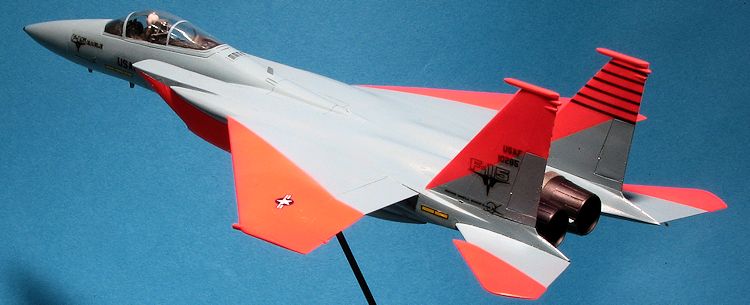
Since there was no prototype, several pre-production airframes were built in order to allow the various test units to check out the various systems and determine the full flight envelope of the aircraft. It was during this testing that it was discovered that there were some issues with wingtip stall characteristics and so the wing tips were cut back a bit, this feature improving the handling of the aircraft. This kit represents the Eagle pre-production aircraft before the wing tips were modified.
| THE KIT |
Back in the 1970s, it was not uncommon for model manufacturers to try to be the first on the market with a kit of a new airplane. This frequently resulted in new kits being of the prototype or pre-production airframes before the design was fully finalized. Hasegawa was among those who did this. It gets their kits to modelers first, but it also makes the kit obsolete once there have been shape changes for the production aircraft. This happened to Hasegawa for all the 'teen' fighters and this kit is one of them.
It is for a pre-production Eagle with the square wing tips. A kit that is a boon for those who like early versions of a plane, not so great for those who want a full production version. Hasegawa later retooled the wings and, using the same box and decals, provided a production plane. One does not know which is which until the box is opened.
 Hasegawa kits of this era appear very crude to today's modeler. This one is no exception and has a pretty meager parts count compared to the more recent tooling. The cockpit has a generic seat, a floor, instrument panel and pilot figure. That is it. No avionics bay, no front or rear bulkheads, not interior sidewall detail. The fuselage is a full upper and lower half with a separate one-piece radome. The wheel wells are molded into the lower fuselage half.
Landing gear is a single piece with separate wheels for all three struts. Gear doors are a single piece that will need to be cut prior to application. Exhaust nozzles are pretty basic. No intake trunking and the intakes are two pieces that simply attach to the fuselage sides. The wings are an upper and lower half on each side with the upper wing containing the wing wing tips and the ailerons/flaps. There are no under wing pylons and no Sidewinder missiles or wing fuel tanks. A centerline tank has an integral pylon and a large slot is already open in the lower fuselage half for it.
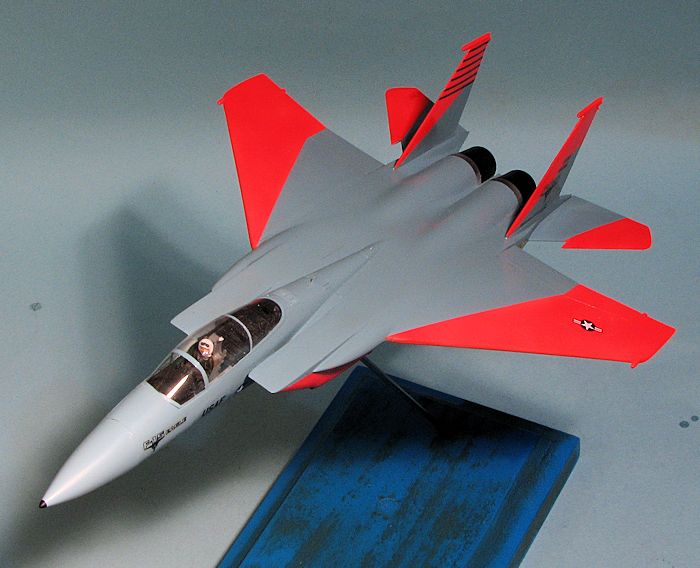
Missiles are only the Sparrows and are pretty generic looking. Though there is a separate aft canopy frame, the canopy is a single piece. No tail hook is included and the fin tips both have the small counter-balances. The kit also has notched stabilizers, a feature not fitted to the first two Eagles, but later retrofitted to them.
Instructions are fairly well done and the decal sheet includes the instrument panel decal. Markings are for two planes. Both in air superiority blue with box art plane haveing large da-glo sections that will need to be painted. The other is just in the blue and has no unique markings, being just a generic F-15. The decal sheet is well printed by old.
| CONSTRUCTION |
 I have had this kit in my stash for many years and just never got around to building it. When another copy became available on the 'junk kit' table at the LHS ('junk' as it was missing the seat), I picked it up and decided to go ahead and build it.
First I painted all the interior bits with Soviet blue-green as that was the standard color of F-15 cockpits for a while and may still be for all I know. I used the instrument panel decal from the ancient sheet and though it broke up a bit, was still solvent enough to use. The console tops were painted black and this was attached to the lower fuselage with the instrument panel glued to the upper. The halves were then closed. I also assembled the upper and lower wing halves as well as the centerline tank and the intake halves.
There then followed much sanding on the fuselage, intake and centerline tank to get rid of the seams and overlap. Attaching the intakes required even more filler and sanding. All of this pretty well wiped out any of the finely raised detail in the general vicinity, an occupational hazard when building these older Hasegawa kits. I then attached the vertical fins and then the wings themselves. Again, more filler and sanding until things were smooth.
 I robbed a seat out of a Hasegawa F-15B kit I have so there would be something to stick into this one. These are both pretty much the same kit with only the upper fuselage and 'interior' being different. An aftermarket seat would have been nicer, but I wanted to build this one out of the box. Once the seat was painted, it was glued in place.
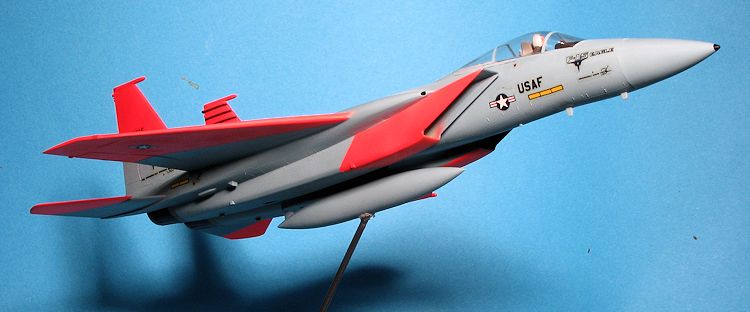
Turning the fuselage over, I decided to go with the gear up. I know some will think that this is taking the easy way out, but actually, building it gear down is easier as the gear doors do not fit all that well. In order to be sure they would fit sort of flush, I put modeling clay into the wheel wells and used that to support the gear doors. There were quite a few gaps, especially on the main gear that needed to be filled. Once that was finished, I painted the pilot and installed him in the seat. Then the canopy was masked and glued in place. Time for painting.
| COLORS & MARKINGS |
The first items painted were the small metal areas near the exhaust. I used Alclad II Steel for this. These were masked and the airframe primed with Tamiya white extra fine primer. Then much of the airframe was painted white using Tamiya X-1 gloss white. This was to provide a base for the fluorescent red. I 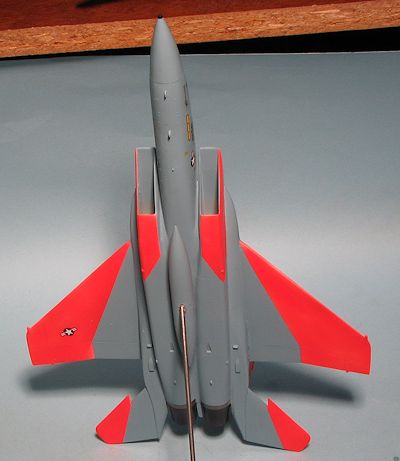 used Model Master paint for this and again, pretty well covered the airframe. I found that this paint needs a white base coat and also needs to be applied in several coats to get good coverage. When that was done, a lot of masking was required before going on to the next shade. For this I used Mr.Color air superiority blue. This is a lacquer so needs to be quite thin or one will get a mass of 'spider webs'. This also needed a couple of thin coats. The other item painted this shade was the centerline fuel tank and its pylon.
For decals, I had no real option but the ancient kit markings. I started with a single 'slime light'. It took a very long time to come free of the backing and when it did, it broke in several sections. Therefore, I then used Microscale's decal film to coat the remainder of the sheet. This also caused a couple of issues. One is that they didn't seem to stick very well on their own and when I used Microsol setting solution on them, they tended to curl. Even when they did not they silvered. The next thing I tried was to place the marking in some Pledge (Future) clear acrylic. This was relatively successful. However, I still had decals breaking or disintegrating so I put on only the minimal number. The borderless insignia were among those that fell apart so I used some standard versions from an Aeromaster insignia sheet.
With the decals in place, I then glued on the centerline tank, making sure it was securely mounted as this would be where the mounting rod would be attached. The airframe was then given clear coats; matte on the underside and gloss on the upper surfaces.
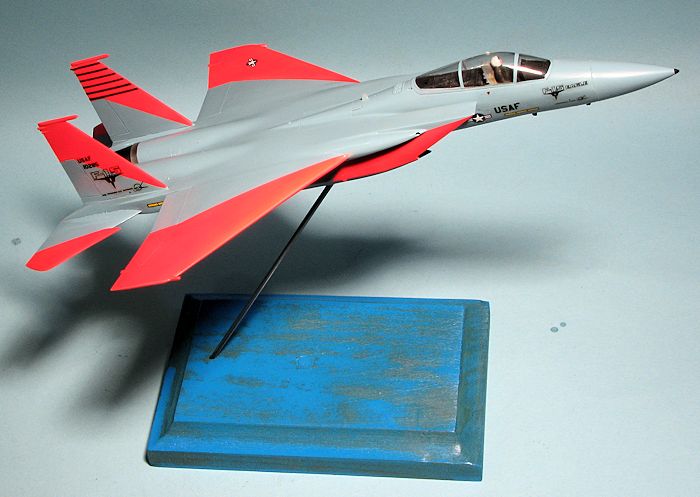
My next step was to locate a stand. For this I grabbed a wooden plaque from the handy 'pile of bases' and then cut a section of 3/32 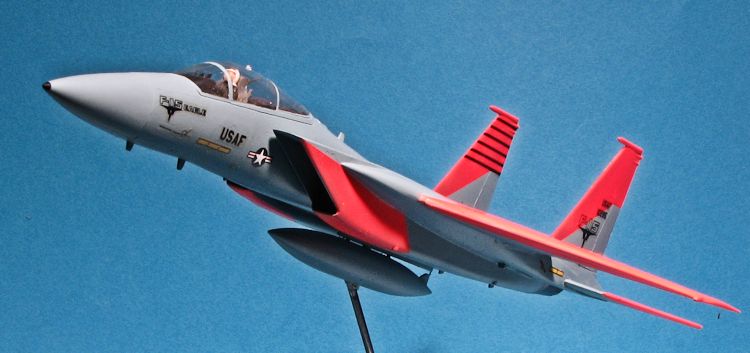 inch piano wire. Next, I drilled a hole in the bottom of the centerline tank and one in the wood base. The base was then sprayed with Tamiya light blue just so it would not be bare wood. Since I had not bothered to seal the base first, I got a rather 'spotty' looking base. I then inserted the wire into the base and after applying some Goop, stuck the plane on it. This took a while to dry and had to be supported as the plane kept flopping around on the slick wire mount. However, even the goop was not enough to keep it firmly attached, but it is better than it was. As a final step, I removed the masking from the canopy and dipped the tip of the nose in black paint.
| CONCLUSIONS |
Granted, this kit is not on the top of many modeler's lists. It is rather crude and as you have seen, the decals are by now, trash. It would be great if someone did a full sheet of all the preproduction F-15s as they were eventually tricked out in all sorts of interesting schemes. The kit's saving grace is that it is an early Eagle and pretty much the only place you will be able to get one in this scale without doing some scratchbuilding. It is also very colorful with all that fluorescent paint.
January 2015
If you would like your product reviewed fairly and fairly quickly, please contactthe editor or see other details in the