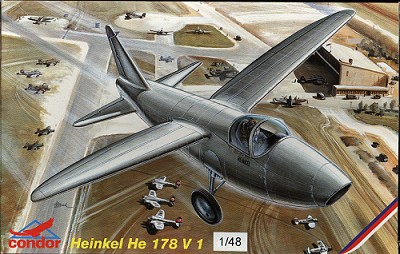
Condor 1/48 He-178
Kit Number: C48002
Price: $10.00
Decals: None
Reviewer: Scott Van Aken
Date of Review:19 September 1997
As most aviation enthusiasts know, the first turbine engine (jet) aircraft to fly, was the He-178. That feat was accomplished on August 24, 1939 at Marienehe, Germany, in the 178v1 piloted by Erich Warsitz. A small aircraft made of aluminum and wood with no room for any thing besides the pilot. Unfortunately, this historic aircraft was destroyed along with a number of other aircraft, in 1943 by a bombing raid on the Berlin Air Museum.
The Condor kit (I could say MPM as they are one in the same) is typical of the type of short-run kit that has been coming out of the Czech Republic in the last few years. The one major deviation is an injected plastic canopy instead of the usual vacuformed one. The brass fret is very well done and consists of seat belts, instrument and side panels as well as a few bits for the fuselage and landing gear. The rest of the kit consists of 25 parts in light grey plastic with thick attachments to the sprue that need careful removal to prevent breaking the parts. The panel lines are all finely scribed, but many of them will disappear as fit is not perfect.
First part is usually the cockpit and this kit is no different. The only parts that did not fit well were the rudder pedals. There is no way that they would ever fit as they are very much too large for the given area. These were consigned to the parts bin. The rest of the parts fit fairly well. The fuselage halves needed to be sanded down, but this is typical of the genre. I also had to reshape the blanking plate to get it to fit properly. Once that was done, the fuselage was glued. This had to be done in sections as my fuselages were slightly warped. Once that was accomplished, I used putty on the joints to get a smooth blending.
While the fuselage was drying, I attacked the wings. They are a three-piece affair with one upper and two lower sections. They are a butt fit. There are huge injector posts on the wings (and fuselage) that must be removed prior to assembling the parts. The wings fit well, but are thick at the trailing edge. I needed putty on these as well.
Once the fuselage was properly puttied, it was time to attach the wings. For this, I had to sand down the lower wing root area to get the wings to fit. There were large gaps at the front and rear of the wings that required several applications of putty. The tail planes butt fit with only slight gaps. Once the airframe was complete, I attached the brass parts to it. Two plates by the wheel wells and a brass bit in the tail, for which I had t cut a notch. The landing gear has a brass piece that fits at the top of the gear. If I had to do this again, I would omit this piece as it caused the gear attachment point to stand proud of the fuselage instead of smoothly fairing in.
After all the undercarriage pieces were attached, the canopy was fit and masked. The airframe was then primered and then painted white. Once that was dry, Testor's Aluminum Metallizer was sprayed on the entire aircraft. When that was dry, I used a photo as a reference and attached Chrome Bare Metal Foil to several sections of the airframe and then sealed it with Future.
The resulting kit is very pleasing and the variations in panels adds a lot to it. This kit is recommended to those that have built short run kits before and are not afraid of having to do some modeling to get a good kit as this is not a 'shake and bake' kit.
Below is a blow by blow account of the kit as I was building it.
26 Jan, '97
This is the first 1/48 kit I have built from the Czech Republic. When opening the box, you find one instruction sheet, one fret of brass etched bits, one tree of 25 light gray plastic parts and one very clear injected (!) canopy. No decals as this aircraft did not carry any markings. Initial dry fit looks good. There are a number of large injector stubs that must be removed, but it looks like a fast build (at least for me). Anyone know what color the interior of this is supposed to be? The instructions say RLM 66, but I'm just not sure.
2 Feb, '97
I have started construction. This has thus far consisted of assembling the wings, gluing the wheel halves together, and putting a couple of things in the fuselage such as the interior floor, rear wall, front intake block, and the exhaust. The parts fit together well enough for this kind of kit although the wings required putty on the front and rear of the wings. The interior parts fit well except the intake block which was too big and needed reduced in diameter. Not a big problem and easily done. I have decided to do the interior in RLM 02 vice the RLM 66 as stated in the instructions as it just seems more likely to have been this color in 1939. More later.
9 Feb, - 8 Sept'97
No additional work---it's been slow on the model building front.
9 Sept '97
Well, finally got back into it after a long, long break. Here's what I have
found. First of all, the really nice photoetched rudder pedals are way to large
for the interior. Even cutting them back made no difference. Into the parts bin
they go. You cannot see them through the canopy anyway. The interior consoles
fit reasonably well although it is a very tight squeeze for the seat to fit
between them. These were painted black as was the control stick. The seat itself
is aluminum.
Now for the fuselage itself. After fitting in the exhaust piece, I find that the
fuselage is less than perfectly straight. Gluing in sections seems to take care
of that. I needed to slather on the putty and that is drying. I have also added
the brass etched bit to the undercarriage.
13 Sept
Well, it is coming along pretty well. After multiple puttying, the fuselage
is pretty much complete. I have cut the slot in the upper tail for the brass bit
that fits there and have managed to put in the brass etched seatbelts. The
canopy is quite thick and after a bit of test fitting and filing, has been
cemented into place. I have also glued on the wings and horizontal stabilizers.
The wings need quite a bit of putty to get a smooth fit. I had to sand down the
lower fuselage wing root to get the wings to fit as they stuck out way too far.
The landing gear have also been fit. If I had to do it again, I would only
attach one side of the brass etched part for the gear as the gear must be sanded
down a lot to fit onto the fuselage. There is no real positive attachment point
for them. I took a stab at it and it looks presentable, but not really that
good. No shows for this kit. Anyway, it is basically complete and has been
primered and the first coat of white paint applied.
20 Sept
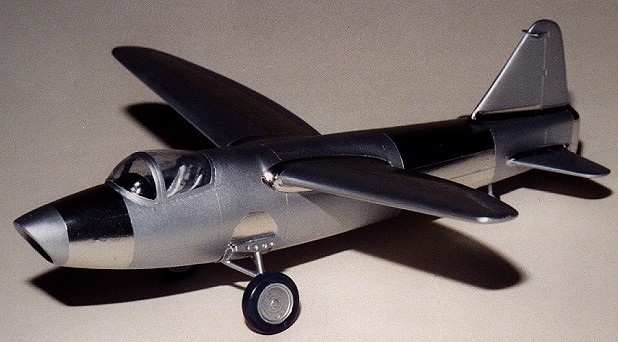
It is done. I painted it in overall aluminum using Testor's Metallizer. Then,
using a photo as reference, I applied chrome Bare Metal Foil to a number of
sections. Then a final overcoat of Future floor way to seal the foil. It really
looks quite good considering what I started with.
Like any short run kit it has its pluses and minuses. However, it does give a
decent representation of the first turbine-powered aircraft.
Copyright ModelingMadness.com. All rights reserved. No reproduction in part or in whole without express permission from the editor.