Planet Models 1/72 Heinkel He-118v1
| KIT #: | 109 |
| PRICE: | $47.50 MSRP |
| DECALS: | One option |
| REVIEWER: | Scott Van Aken |
| NOTES: | Resin with vacuformed canopy |
A competitor to the Ju 87, the He 118 proved to be a capable aircraft. However, Junkers was awarded the contract. The V3 prototype was destroyed in an accident in June 1936. V4 and V5 went to the Japanese Army and Navy, respectively. The Japanese Navy's D4Y Suisui is thought to have been loosely based on the 118 as there are a number of similarities between the t wo. The He 118 V2(1294) made it's mark in history however by being the first aircraft to fly with a turbojet engine powering it, the He S 3a, if only briefly, with the first flight occurring in the summer of 1938. In the buildup to the flight of the He 178, the He 118 was flown on turbojet power alone, it's piston engine being cut off briefly in flight. This would make the He-118v2 the first aircraft to fly solely on turbojet power.
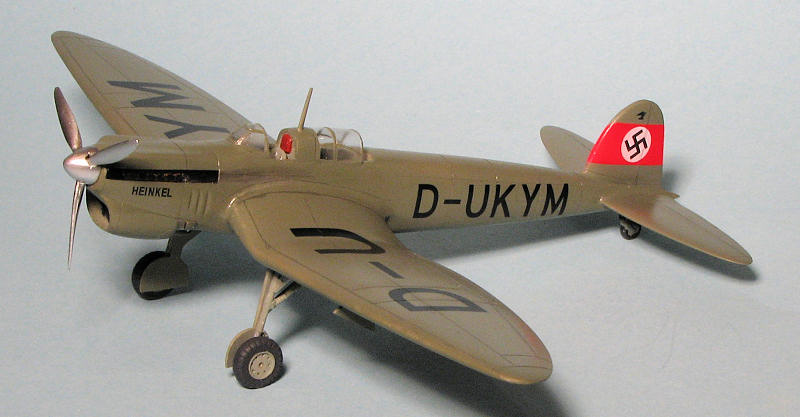
This kit is the original prototype which differed from the other planes in that it was powered by a Rolls Royce Buzzard engine as the DB 600 was not yet available. It also has a shorter fin than the later variants. Despite being superior to Ju-87, the He-118 was not chosen as it could only reach a maximum dive angle of 50 degrees. It didn't help that Ernst Udet's inept piloting crashed the prototype, which basically gave the competition to Junkers.
In the world of resin kits, Planet Models has to be up at the top of the pile. They not only offer interesting kits, but the quality of the molding is superb. They also know how to package thins to help prevent damage. You can see how this kit has been done from the image to the left. There is a teeny amount of flash on a few parts and most of the edges of things are slightly ragged, requiring 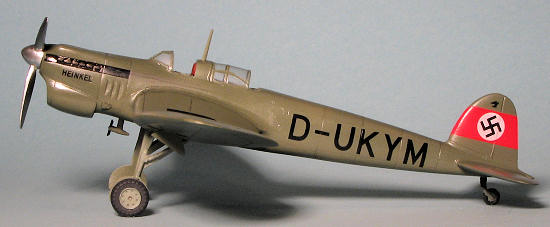 a brief swipe of sandpaper to remove. There are no air bubbles, no misshapen parts, no short shots. In fact, the only glitch on mine is that one of the fuselage halves broke loose from the pour stub and snapped off the extreme tail. It will be easy to fix. My only real concern is again, landing gear. These are resin and with a rather hefty chunk of resin to hold up (as in the solid, single-piece wing), I fear that they will start to sag after a time.
With only 32 parts, this isn't exactly going to be a difficult kit to build. It has a most complete interior, which sits atop a section in between the wings. There is framing detail on the side walls of the fuselage as well. Typically, two sets of vac canopies is provided.
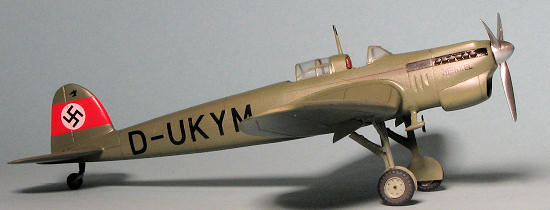
Instructions are a single sheet with two construction steps on one side, a history, parts breakdown, and painting guide on the other. The lone prototype is in overall RLM 63 with a red tail band. Actually, I believe the plane may well be in Lufthansa pearl grey vice RLM 63, which is a rather dark shade. However, there is no real way to tell from the few extant photos so perhaps RLM 63 it is. Decals are very well printed and appear to be properly thin. I've never had any troubles with the decals in Planet Models kits.
I've had this kit in the stash for several years and many times had thought of building it but always put it back and moved to something else. You know how it is. Well, the recent group build on resin kits and conversions had me reaching for it again and this time, it stayed out of the stash and after re-acquainting myself with the bits, I started opening up the sections of polybag and started into construction.
The first thing to do is to remove the large pour stubs from the fuselage. In the process of doing this, I broke off the tail cone of one side. Not a great way to start a kit, but there it is. This was followed by some careful application of a sanding stick to remove 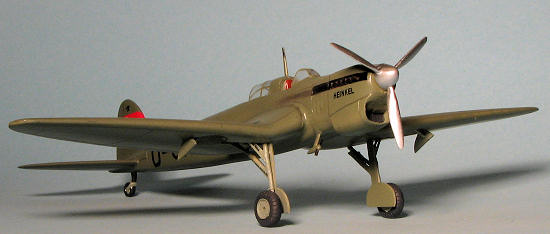 the bits still left and to get all the little bits from the mating surfaces. I generally paint right on the bare resin, however, if you are going to use acrylics, you may want to have a primer, especially if you want to do any brush painting. Just a bit of a head's up.
With the majority of the bits removed from the stubs, I started assembling the interior. Be sure to remove the long transverse rod along with the control stick. I forgot. I'd also suggest waiting until the fuselage halves are together before installing the partition between the front and rear sections of the cockpit. Let my goofs be guidance in this respect. Gluing on the seats, stick and rudder pedals was no problem. The interior was painted RLM 02 using Agama paints. I really like this brand and it is a shame it isn't generally available in the US. I used the enamel line for this build. The radiator was glued in place after the intake flash and seams were cleaned up. I also installed the instrument panel. Again, it would be wise to leave this off until after the halves are together. It will be easy to install from underneath. I did some detail work on the nicely molded in belts for the seats and set the wing aside to dry.
I then started gluing the fuselage halves. These are very flexible thanks to the large open space for the cockpit. I used super glue, of course, and glued it in sections being sure each was dry before moving on. I started up front with the engine section, then when dry, did the fin, all the time making sure that things stayed aligned while the glue set. The last bit was the section from the rear cockpit to the fin. I had to do some fuselage flexing left or right during the last two steps to assure myself that the parts stayed lined up. I then added more superglue to help fill gaps and did some sanding on the wing molding seams before returning to the fuselage to sand down the super glue and rescribe panel lines. 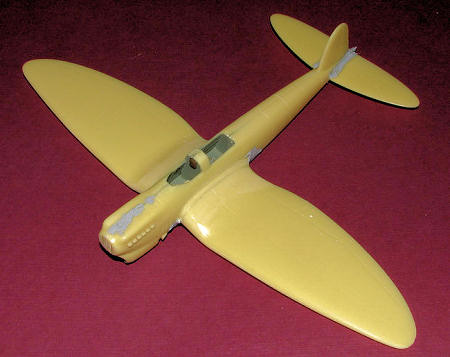
Then it was time to mate the wing and fuselage. I found the fuselage was a tad too wide so did some careful sanding and scraping on the fuselage section to get a good fit. The upper wing roots were an excellent fit needing no filler. Of course, the rest of the seams needed help and I used filler on these. Meanwhile the tailplanes were removed from the sprues and glued in place, with the usual filler required.
After the usual couple of rounds of putty (well, it is usual for me), I was ready for the rest of the bits to be attached. First I had to remove them from the pour stubs. I found a pair of scissors was handy for some of the larger flash areas on the landing gear doors and landing gear. The main gear and tail wheel were cemented in place. I found the main gear to be a bit wobbly, even after the retraction strut was cemented in place. I fear that with time, the gear will deform under the weight of the aircraft. I cut out the transparencies and masked them. It would have been easier to do this prior to cutting them from the backing. After some trimming on the airframe to get the rear one to fit properly, these were attached with clear paint. I use Vallejo's Game Varnish brand for this as I find it holds quite well. I then stuffed tissue in the openings and headed for the paint shop.
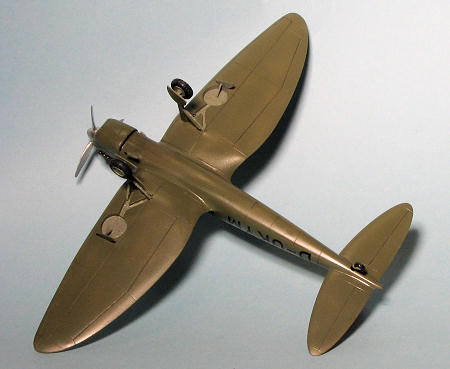
Here was a bit of a quandary. The box art shows what looks to be unpainted aluminum, and the instructions show it to be in RLM 63. I chose the RLM 63 route as it would be consistent with what I've read about prototypes. I guess one could use RLM 02 as well if one wants something lighter. For this, I used AGAMA paint from their enamel line. This is very good paint and I discovered while doing touchups that even brush painted, it matches the sprayed on color. I should mention that the fin band was painted white, then red and masked before the RLM 63 was applied.
With the main color dry, I did the usual Future clear coat in preparation for decals. The decals are quite thin and so one needs to take care not to tear the large ones. The two-piece swastika worked well, though I found the white circle to be semi-translucent and unable to hold back the intense red color. After applying the last decal, I noticed I had forgotten to paint the area around the exhausts in black. Before attempting to paint this, I applied the overcoat to the airframe using a semi-gloss clear. I figured they were showing this plane to the money people and so wanted to get all the speed out of it they could so would have probably kept it clean and shiny. Plus the overcoat would allow me to mask over the 'Heinkel' decal without ripping it up. Worked like a charm.
 Now that the airframe was pretty well painted and decaled, I had to add the final bits. This was the wheels (which are just butt joins on the end of the axle), main gear doors, the wind generator, radio mast and the prop. The prop and spinner were assembled, the seam filled and sanded between the upper and lower spinner halves and then painted with Alclad II Aluminum. I sprayed some chrome over this to add to the shine. A hole was drilled in the nose with a #41 drill bit to accept the stub on the back of the prop. This was then tacked in place with super glue. I brush painted the mast, wind generator and some of the areas that needed touch up, sprayed on some more semi-gloss clear and that was about it for the build. The last steps were to remove the masking and add a touch of exhaust stain with pastels. I then went over the panel lines with a standard pencil.
It was generally an enjoyable build for a resin kit. There were no major problems and thanks to the high standard of quality control, I didn't have to fix any molding issues prior to the start of the build. This is not a small aircraft, being about the same size as an He-70. It is a kit I have no trouble recommending to you if you have had some experience working with resin.
 February 2010
Copyright Modeling Madness.com. All rights reserved. No
reproduction in part or in whole without expree permission from the editor.
If you would like your product reviewed fairly and fairly quickly, please contact the editor or see other details in the Note toContributors.
Back to the Main Page
Back to the Review Index Page
2022