Pavla 1/72 Ki-30 'Ann'
| KIT # | 72016 |
| PRICE: | $15.98 |
| DECALS: | Three aircraft: See review |
| REVIEW : | |
| NOTES: | Short run with photo etch fret and vac canopy |
| HISTORY & THE KIT |

I'll take the lazy way out and refer you to the
| CONSTRUCTION |
 Construction with this kit begins with the wings. Yep, decidedto start off somewhere different on this one. Since this is a short run kit, Istarted off by cutting the wings from the sprues and leaving a bit of a stub atthe attachment points. I do this as often the sprue will run into the partitself and if you cut them off flush, you often take a small chunk out of thepart. The nub can easily be sanded off. Like most short run kits, this onedoesn't have very sharp trailing edges. Your choices are to do a lot of sandingor just leave it as is. I took the lazy way out. The fit really isn't bad atall, especially after the mating surfaces have been sanded as smooth as you canget it. I did end up clamping the parts as the wing has a bit of a gull in itand so needed it.
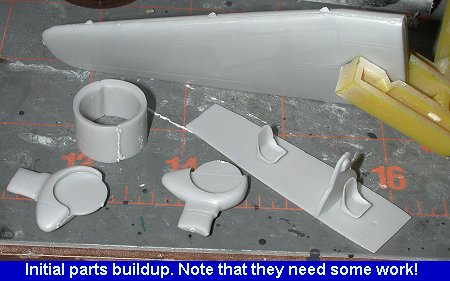
At this time, I also glued the wheel pants together as well asthe engine cowling halves. The interior bits were also glued together and allthese were set aside to dry before the next step. Once dry, the various seamswere filled. And all the bits that came in halves had rather large seams.
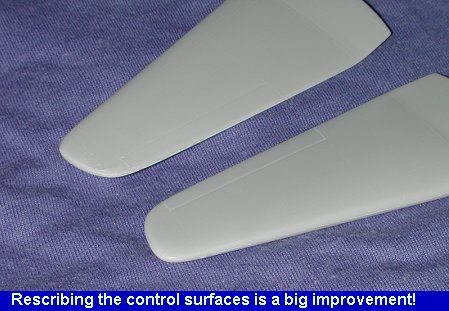 Once those werefilled and cleaned up, I took another look at the wings. The control surfacelines on this kit are about the same size as the rest of the engraved lines.They really need to be deepened. Taking my scriber, I ran it across the controlsurface lines a few times to deepen them. The result is quite an improvement.
Thenthe interior had the instrument panel installed as well as the control stick.The interior and fuselage interior were then painted Misubishi Interior green,an Aeromaster Acrylic color.
Meanwhile, the engine was paintedand installed in the cowling. This took a bit of creative carving to get it tosit far enough back so that it didn't jut out past the front of the cowling. Thecowling front also needed some cleanup and work to properly fit. All in a normalday's work for a short run kit.
Then the interior was completed.This included the installation of the etched brass instrument panel. To nosurprise, it was too  large. Ieventually had to cut the instrument panel to fit to the top of the fuselage.Fitting the interior in was a fun job as well as it was a bit too narrow for thefuselage. I eventually glued in some pieces of plastic on the sides for theinterior to sit on. The fuselage halves were then glued together. The seams werefilled and sanded smooth.
The next step was to install the flyingsurfaces. To make sure that they were all square to each other, they were allglued on at the same time. Fit wasn't bad. There were gaps at the wing/fusealgejoin and the fin/rudder didn't fit all the way down to the fuselage in the back,but this was to be expected. That is what filler is for! The wings were also abit thinner than the wing root, but again, filler to the rescue!
Next step was to add the intakes on the top andbottom of the engine. Then the tail wheel was added to a hole drilled in thelower rear fuselage. Another hole was drilled in the leading edge of the wingfor the gun barrel, which, like the exhaust ports, will be made from stretchedsprue/tubing.
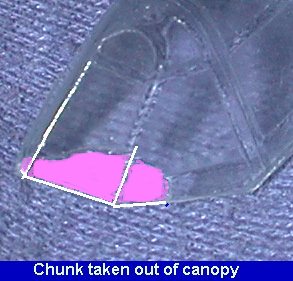 Ithen trimmed the canopy and carefully test fit it a number of times. Much to mydismay, when I used clippers to cut off a bit from the front of the canopy, ittook a huge chunk out of the canopy and the piece went flying off, never to beseen again. The lesson here is not to use clippers on clear plastic. This is why I wish all companies would put in a second vac canopy! Areplacement was requested from Pavla. Eventually, my request was answered and Ireceived three replacement canopies, one of which I again cracked during removalfrom the backing. It seems that the clear that Pavla uses is more brittle than some others.
Whilewaiting for the new canopy, I then built up the prop, not being able to find a substitute inmy Aeroclub collection. The hub was cleaned up and the individual blades addedto it. I really don't like this way of doing props and wish they were one piece.The wheels were then attached to the main gear and any gaps filled. It was nowon to the paint shop.
| PAINT & DECALS |
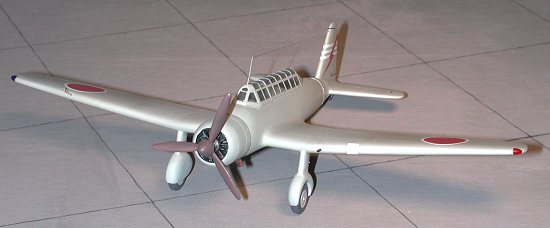
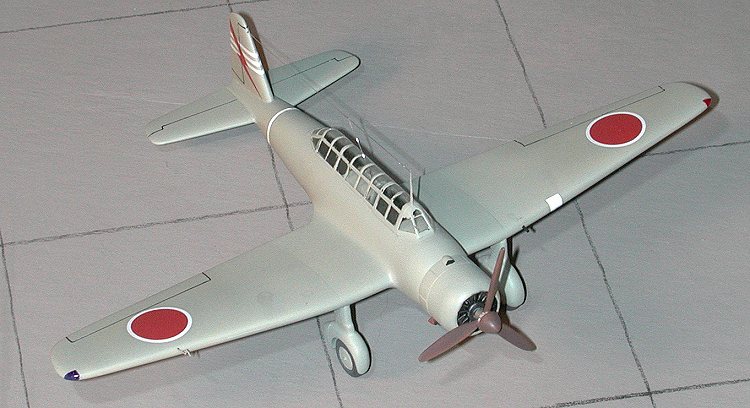
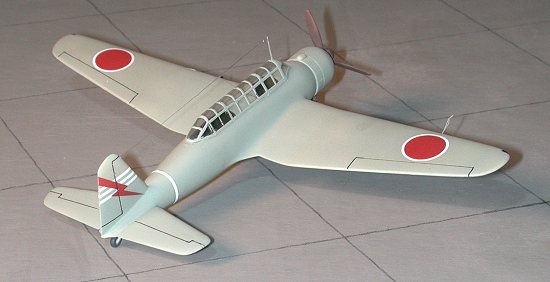 Taking the lazy way out, I painted the plane in overall JAAFgreen-grey. Actually, most of these planes were painted in this color. It isn'tlike there was really any air opposition to them so camouflage wasn't required.I used an Aeromaster Acrylic for this color. When it was dry, I clear glossedthe areas that would take decals. This was basically the wing ends and the tailof the plane. No fuselage Hinomarus were used on JAAF planes at this time.
ThePavla decals worked quite well. They are thin, but go on well and reacted wellto Microscale setting solution. I found the tail arrows that I used to be a bittoo long and I did manage to tear one. However, it was easily repaired by usinga sliver or two from one of the other markings on the sheet. I was unable to usethe rear fuselage band as it just refused to work properly for me. It is astraight piece and, as you know, for fuselages, the decal needs to follow acurve to fit halfway well. So I went and tried a piece from a Scalemaster stripepiece. It was straight as well, but the decal wasn't so fragile so fit fairlywell.
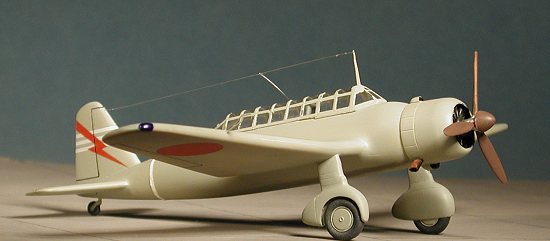
 At this time, there was a lapse of several weeks whileawaiting a replacement canopy. Once it arrived, it was cut down and glued inplace. Oddly, the canopy seems too large. It is a bit too wide and a bit toolong. When fitting the windscreen right up to the front of the cockpit opening,the aft part is way too far back. If aligned by the rear section, the front istoo far forward. I found a happy medium and used superglue to attach it. Thenthe relatively tedious job of making the canopy was done. A few etched brassbits were installed and the exhaust pipes made from pieces of Contrail Tubing.Then the new bits were painted and when dry an overall matte clear coat wasapplied. The engine was painted flat black and dry brushed with steel to bringout detail. The exhausts were then painted with Rustall and some exhaust stainswere made using pastels.
Once all that was done, the canopy wasunmasked and the prop, which had been painted prop color was installed after ahole was drilled into the engine front for it. Then the wing tip lights werepainted, a piece of white decal used to simulate the landing light and anantenna made from stretched sprue. That was the last step and my 'Ann' was done.
| CONCLUSIONS |
 The kit wasn't the nightmare I was expecting at all. In fact,considering how limited run kits usually are, this one was one of the easierkits. Sure, it has some glitches and it isn't perfect. That is the nature of thebeast. When they start getting really good, they are no longer limited run kits!You can only look at Eduard to see what I mean.
The key is thatthey build into what they are supposed to be. They are not impossible builds andthe results are satisfying. That is what a kit is supposed to be. Recommendedfor all who think they can handle the fit problems and are able to fabricatesome of the needed parts.
| REFERENCES |
Model Art #533, Camouflage and Markings of the IJA Bombers. Exceptfor the title, the book is entirely in Japanese.
Review kit courtesy of me and my wallet!
If you would like your product reviewed fairly and fairly quickly by asite that has over 2,000 visits a day, please contactme or see other details in the