Revell 1/72 P-26 'Peashooter'
| KIT: | Revell 1/72 P-26 'Peashooter' |
| KIT #: | ? |
| PRICE: | $0.99 when new |
| DECALS: | One Option |
| REVIEWER: | Scott Van Aken |
| NOTES: |
| HISTORY |
The Boeing-funded project to produce the Boeing Model 248 began in September 1931, with the Army Air Corps supplying engines and instruments. The design included an open cockpit, fixed landing gear and externally braced wings, the last such design procured by the USAAC as a fighter plane. It also saw the introduction of flaps to reduce speeds for landings. The Army Air Corps contracted for three prototypes, designated XP-936, with the first flight on 20 March 1932.
 The Boeing XP-936 had a landing problem. Sometimes when landing it would flip forward and because of the short nose it would roll onto its back. This injured many pilots until the unarmored back canopy was replaced with an armored headrest. An additional 25 aircraft were completed as P-26Bs, with Pratt & Whitney R-1340-33 Wasp engines, and 23 P-26Cs had minor changes to carburetion and the fuel system. Both Spain (one fighter) and China (11 fighters) ordered the Model 281 export version of the P-26C in 1936.
The diminutive "Peashooter" as it became affectionately known by service pilots, was faster than previous American combat aircraft, but it was also an anachronism. Although the P-26 introduced a modern monoplane design, worldwide fighter aircraft developments soon outstripped the P-26. The Messerschmitt Bf 109 which had its maiden flight in 1935 was much more representative of contemporary monoplane fighter designs. However, the P-26 was easy to fly and remained in active service for many years until the United States entered World War II.
Two authentic survivors are known to exist. One that has been returned to flying condition with Planes of Fame and the other in the National Air and Space Museum. The one at the USAF Museum is a replica and one other one is slated to take to the air soon.
| THE KIT |
 One thing about Revell kits of this generation, they are not at all complex. In fact, Revell was kind enough to have the holes for the rigging pre-drilled to help us out. Of course, they are a bit large as they were designed for thread, not thin wire or stretched sprue. The cockpit is Spartan to the extreme as it is supposed to be filled by a pilot figure. Detailing is via a mass of rivets, which were considered to be the way to tell the accuracy of a kit. How things have changed. A small decal sheet and easy to read instructions are included. I forget the unit that was on the markings as it has been over 20 years since I built this kit.
| CONSTRUCTION |
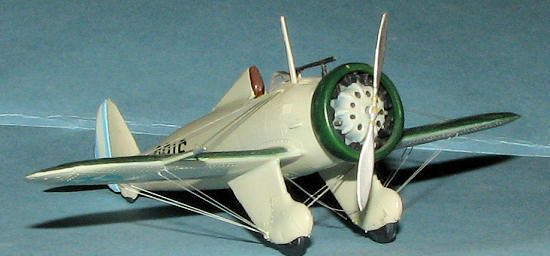 I can tell you that construction of this little beast is pretty straight-forward. I did paint the interior with Interior Green as I knew no better. Probably the most difficult part of construction was keeping the landing gear straight. I was somewhat able to use filler so no major seam problems. The tail planes are single pieces that easily slotted into the fin. Not much filler was needed on the wings, which also slot into the fuselage sides. The engine cowl ring is not as well formed as we'd probably like and is really far too thick and the wrong shape. Enthusiasts will want to sand the snot out of it to bring it more into line. Of course, if made totally accurate, there won't be any place to glue the engine.
Rigging was done with stretched sprue and for the most part, has survived many moves, though the stuff between the wheels had seen better days. This rigging was done after the plane was painted.
| COLORS & MARKINGS |
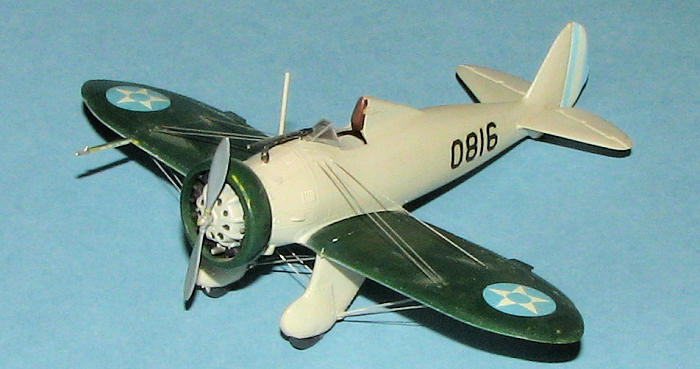
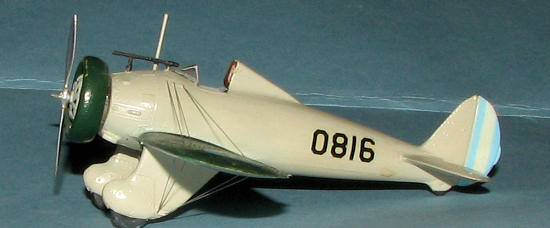
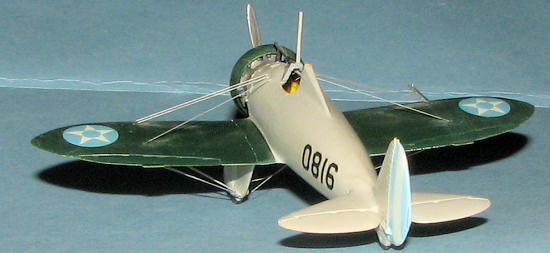 Back in days of yore, I was interested in doing as many foreign countries as I could for my 1/72 collection. No better choice for Guatemala than the P-26, as that is where the one at Planes of Fame was found (at least, I think it was). Decals were not a problem as this plane apparently only had insignia and tail stripes. ESCI did several insignia sheets and I used one of those.
The color information came from a Profile booklet on the P-26. I'm sure it is grossly inaccurate, but it did show a light grey plane with a green upper wing and green cowling. No FS numbers, no paint reference so I grabbed what looked about right and sprayed it on. At the time I was using Gunze acrylics almost exclusively so I'm sure the paints were from that range.
In addition to the ESCI decals for the wings, I found some blue stripes that were about the right shade and put those on a white rudder. The fuselage numbers came from an aftermarket numbers sheet and seem to be the proper font.
| FINAL CONSTRUCTION |
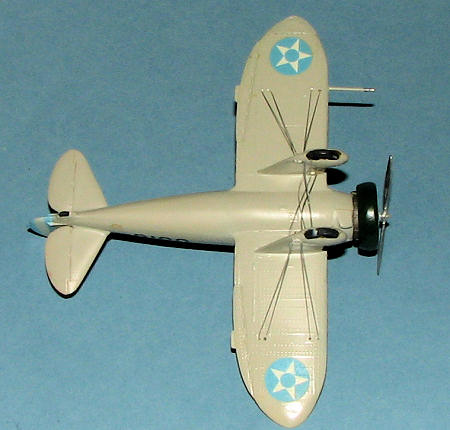 This would be where the rigging stuff was done. I also attached the clear windscreen at this time, as well as the gun sight and the prop. The prop was painted with Testors Metallizer. Touch up was needed for the leather head rest. You'll probably notice that there are no exhaust stacks on the kit, something that was conveniently left off when the kit was molded. Face it, when this kit was designed, things like that were not considered that important. Over the years, a considerable amount of dust had accumulated. I cleaned as much as I dare without breaking the rigging so my apologies for my lack of proper housekeeping!
| CONCLUSIONS |
OK, so not state of the art today, and definitely surpassed in all categories except ease of construction by the Pavla kit. Still, it is something one can find without too much trouble, it won't be $35.00 and is something that you can still make into a nice model for your shelf.
| REFERENCES |
June 2008 If you would like your product reviewed fairly and fairly quickly, please contact the editor or see other details in the