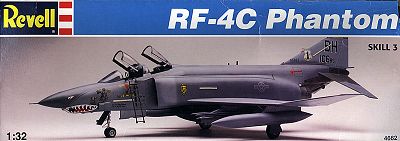
Revell
1/32 RF-4C Phantom II
Kit Number: 4662
Price: $32.00
Decals: One version, 106TRS Desert Storm
Date of Review: 10 April 1998
Review and Photos by: Scott Van Aken
The F-4 Phantom is probably the most famous Western aircraft of the 1960's
and 1970's. Built in huge numbers for a modern aircraft (5054), the
F-4 is still in current (1998) front-line inventory in Japan, Germany, Turkey,
Greece, Spain, Israel, and Egypt. In the US, the Phantom was used by the USAF,
USN and USMC in large numbers, the final F-4Es finally retiring from active
service with the 20 FS in late 1997.
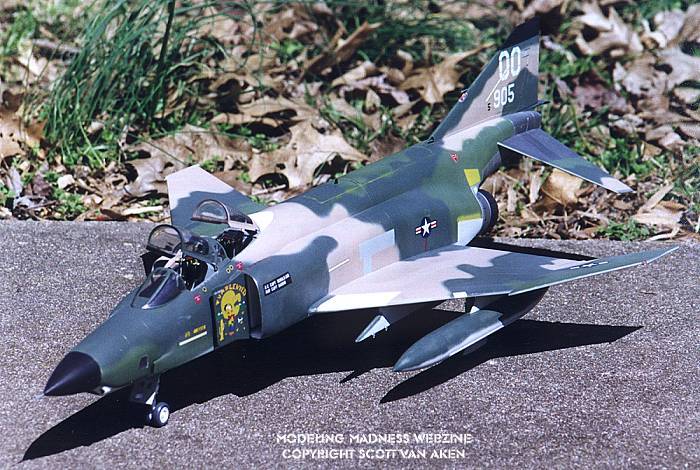
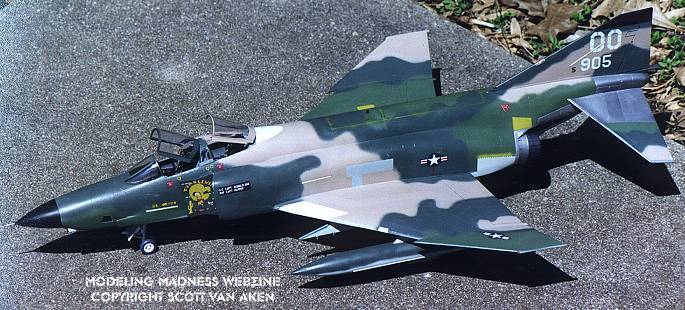
Revell's kit of the RF-4C has been eagerly awaited by the modeling fraternity and is kitted in an F-4F version as well. A result of this is that there are a number of common parts to meet the requirements of both types. Additional pieces are added to make the version in the kit. This means that the fuselage is broken down into several sections to accommodate the recce nose of the RF-4. To Revell's credit, the kit fits very well and needs just basic construction skills to make a good model.
All the parts are finely engraved and the cockpit is well appointed with raised detail for the instruments. There are cameras provided for the nose section, and while they are good as they come, additional work is required to make them truly representative. This is true of much of the aircraft. While not up to the quality of the recently released Tamiya F-4s in this scale, the price is much, much less and gives good value for the money. The cockpit needs a good detail set and replacement seats as those in the kit are not like any I have seen in an F-4. All the interior parts, including rudder pedals and throttles were installed and painted. You need a cockpit reference such as Detail and Scale's book as I found that the throttle handles in the back seat were backwards. There were other glitches like this that I found during construction. I did not replace any parts, building this kit as it came in the box. Having said that, I did make a few small adjustments as I was building a Vietnam era RF-4C so had to remove several items added later in its life.
Assembly of the nose section with the cameras is a bit tricky but patience will win out in the end. I did not install any of the camera windows until after the kit was painted. The windows fit quite well, and I used epoxy to hold them in place. I suggest dry fitting them as I found the side windows fit better in the opposite holes. I then assembled the wings and when dry, fit them to the aft portion of the fuselage. One thing I found missing from the kit were the chaff/flare doors that all RF-4s have. This is a problem with using generic kit parts. Those will have to be scribed on. Since I was doing a Vietnam era RF-4, I had to file off the ARN-101 antenna mount and flatten the sensor antennas on the tail cone. The engine front representations are ok, but really need complete intake trunking to look realistic.
Once the wing and aft fuselage were glued together, it was time to attach the nose section. This was done with minimum fuss although I did have to clamp together the large sections to ensure there was minimum need to file and putty. I did need quite a bit between the cockpit section and the rest of the fuselage. Attaching the intakes also required the use of putty, in fact, quite a bit as they did not fit well at all. Looking back, some of the problems could have been created by me, but beware that the need for precision in assembling the main parts is needed.
Once the airframe was together it was time for preliminary painting. All
the wheel wells, inside gear doors and landing gear were painted white. The
inside of the speedbrake was painted red with the corresponding cavity painted
chromate green as shown in Verlinden's Lock On book. When assembling the
main wheels, ensure that you put in a blanking plate as it was not possible
to see through the wheel. Also, you need to drill a hole in the hub as the
instructions would have you install them backwards. It is OK for the
hole to be there on the brake side. Make sure the wheels are really
grungy as the brakes made lots of dust and unless brand new, were not pristine and white. The rest of the aircraft was painted in SEA colors of two greens
and tan upper with light grey lower. I used Testor's Model Master Enamels
for all colors.
Since this was an early RF-4C, I also had to backdate the horizontal stabilizers
by removing the triangular reinforcement plate. It just took a lot of sanding
and rescribing. To duplicate the metal parts of the aft section of
the RF-4C, Testor's Metallizers in various shades were used. In addition
to the regular paint, I wanted to do a scroungy looking RF-4 that are on
a nice set of Cutting Edge Decals depicting an aircraft of the 11th TRS in
1969. Since I had a photo of the plane, I painted various panels
white or ADC grey or chromate yellow. I also lightly sprayed chromate
yellow along several panel lines and then used old 600 grit sandpaper to
sand off most of the yellow leaving only the rivets and panel lines in that
color. Additionally, several areas were repainted using darker versions
of the initial paint to show overpainting.
Next all the transparencies were install using epoxy and the final touch-up of paint was added before decaling. The decals fit well, but some were not undercoated with white and were s bit translucent. Also, the yellow in the 'Tumbleweed' splitter art should be 30219 tan as shown in the photo. Since I was using a donated decal sheet that had already been used, I needed to scrounge a few from the kit sheet and other sources. The kit decals (flare chute warning triangles) silvered on me despite undercoating with Future.
Once the decals were applied, final assembly was done by putting on all the rest of the antennas, clear camera windows (which just snapped in place), pylons, fuel tanks and the canopies. The canopy support braces are too short and need replacing.
Overall, it is a very big kit. In fact, it's size caused some handling problems when applying the final bits! When I wrote this articles, I hadn't built a 1/32 aircraft in well over 15 years and am really quite pleased with the result, despite the 8 month build time. Only problem now, it where to put it. I know of people who have spent many times the kit price accurizing this model with aftermarket parts. However, it is not absolutely necessary to spend extra money to repair most of the glitches in the kit. Highly recommended, especially to the financially challenged who want a large scale RF-4C.
As a note, the photo on which this scheme is based was taken at Hill AFB while the plane was undergoing IRAN (Inspect And Repair as Needed). Hence the ADC grey panels and primer.
Copyright ModelingMadness.com. All rights reserved. No reproduction without express permission.
(2014) One of these days I should get some better photos taken.
Back to Reviews Page
2021