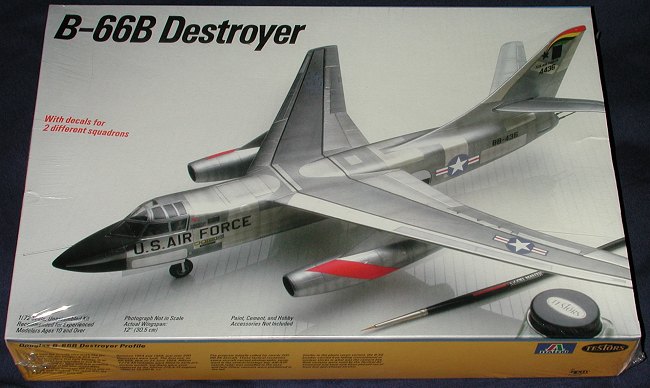
Testors/Italieri 1/72 B-66B Destroyer
| KIT # | 677 |
| PRICE: | $10.00, in the mid-1980s |
| DECALS: | Two aircraft |
| REVIEW : | |
| NOTES: |
| HISTORY |
Though initially designed as a USAF version of the A3DSkywarrior to replace the B-26 Invader, the resulting aircraft turned into something quite different. Though of a similar look to the A3D, the B-66 has only about 5% commonality in parts. This is due to the different requirements that the USAF had in their aircraft. For one thing, the B-66 has ejection seats that the A3D does not have. It also uses different engines; J-71s vice the J-57sof the Skywarrior. The wing also has a different planform, especially between the engines and fuselage. All naval arresting gear and folding wings/tails were removed as well. The end result was a cousin to the Skywarrior.
 Though developed asa medium bomber, like the A-3, the B-66 saw much of its actual use as an ECM platform. A very versatile aircraft, like the A-3, the B-66 was also used as
a photo reconnaissance aircraft, though it never saw modification to a tanker
aircraft. Unlike the A-3, the B-66 was quickly withdrawn from service after the
Vietnam war. The major reason for this was due to high maintenance and airframe
fatigue problems. When you make an aircraft for the Navy, it has to be strong to
be able to handle the stresses of carrier landings and takeoffs. The USAF doesn't require this kind of toughness so their aircraft generally have
shorter life span. This is what happened to the B-66 None of them lasted long
enough after Vietnam to make it into ANG or Reserve units. Though the A-3 is
still flying as of this writing, the B-66 has long been seen only in museums.
Though developed asa medium bomber, like the A-3, the B-66 saw much of its actual use as an ECM platform. A very versatile aircraft, like the A-3, the B-66 was also used as
a photo reconnaissance aircraft, though it never saw modification to a tanker
aircraft. Unlike the A-3, the B-66 was quickly withdrawn from service after the
Vietnam war. The major reason for this was due to high maintenance and airframe
fatigue problems. When you make an aircraft for the Navy, it has to be strong to
be able to handle the stresses of carrier landings and takeoffs. The USAF doesn't require this kind of toughness so their aircraft generally have
shorter life span. This is what happened to the B-66 None of them lasted long
enough after Vietnam to make it into ANG or Reserve units. Though the A-3 is
still flying as of this writing, the B-66 has long been seen only in museums.
| THE KIT |
This kit is a Testors boxing of the Italeri kit. The major difference between the two other than the box and instruction sheet is the decal sheet. Unlike the rather matte decals that come with Italeri kits, the Testors boxing has Scalemaster sheets of higher quality. The plastic in both kits is exactly the same. There are no optional parts as the B-66B is a relatively clean aircraft. Detailing is engraved panel lines, which are very well done. Most of the various antennas are molded into the fuselage, so there is no need to fuss with gluing those in place. Frankly, I have always been amazed that this kit has not done better. There are no aftermarket sheets that I know of, and no resin cockpit upgrades; only a couple of conversion sets to various RB/EB-66variants.
| CONSTRUCTION |
 Construction
begins, naturally enough with the cockpit. This area is pretty complete and uses
decals for the instruments. Overall color is an interior green with OD
seat cushions and black instrument panels. While all the various gluing and
painting of the interior was done, the inside of the fuselage was painted
interior green in the cockpit area. Engine half interiors and the compressor
faces were painted aluminum. Actually, any other bits that need aluminum paint
were also done at this time (which is most of the kit). The aluminum makes it
easier to see mold seams and such so that clean-up of these parts is more
complete.
Construction
begins, naturally enough with the cockpit. This area is pretty complete and uses
decals for the instruments. Overall color is an interior green with OD
seat cushions and black instrument panels. While all the various gluing and
painting of the interior was done, the inside of the fuselage was painted
interior green in the cockpit area. Engine half interiors and the compressor
faces were painted aluminum. Actually, any other bits that need aluminum paint
were also done at this time (which is most of the kit). The aluminum makes it
easier to see mold seams and such so that clean-up of these parts is more
complete.
The wings, tailplanes and engine nacelles were then glued together and the mating surfaces cleaned up. Filler was used on some of the seams to smooth things out. Back at the fuselage, the interior was glued in as was a rather hefty nose weight. I like to use fishing sinkers or you can go to local tire store and rob the weight trash bucket for the tape on types of tire weight. The folks there will usually be glad to allow you to grab what you need. A ten minute stopover will often glean enough lead weight to last you for years!!
 Once that
was dry, the small windows were glued in and the fuselage was glued together.
The now completed engine nacelles were then painted overall aluminum and then
areas near the exhaust were given other metallic shades. For all of these metallics,
I used Testors Metallizers. The fuselage required some filler in several areas
as I had thought it would. When dry, and smoothed out, the wings were attached.
I had made sure that the pylons fit well prior to this as getting to any seams
on the inside next to the fuselage will be very difficult if not impossible. The
fit of the wings was good, though I did have seams that needed filling. This kit
has the wings attach to the side rather than as a full span assembly. Makes it
easier to mold, but requires some care on the builder's part to make sure that
the anhedral is the same for both of them.
Once that
was dry, the small windows were glued in and the fuselage was glued together.
The now completed engine nacelles were then painted overall aluminum and then
areas near the exhaust were given other metallic shades. For all of these metallics,
I used Testors Metallizers. The fuselage required some filler in several areas
as I had thought it would. When dry, and smoothed out, the wings were attached.
I had made sure that the pylons fit well prior to this as getting to any seams
on the inside next to the fuselage will be very difficult if not impossible. The
fit of the wings was good, though I did have seams that needed filling. This kit
has the wings attach to the side rather than as a full span assembly. Makes it
easier to mold, but requires some care on the builder's part to make sure that
the anhedral is the same for both of them.
Once the wings wereon, the tailplanes were attached. These are also separate assemblies and care is also needed to assure the proper dihedral. When that was done the cockpit canopy was glued in place. This fit very well indeed. The clear bits were now masked. At the time I was using nothing but Scotch Low Tack Tape. There are lots of flat panels which makes using this kind of tape easy. The landing gear were then glued in place and the kit was off to the paint shop.
| PAINT & DECALS |
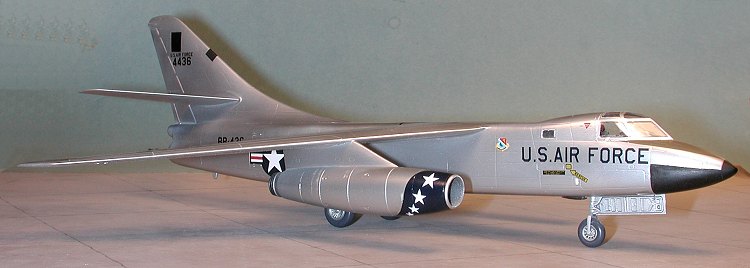
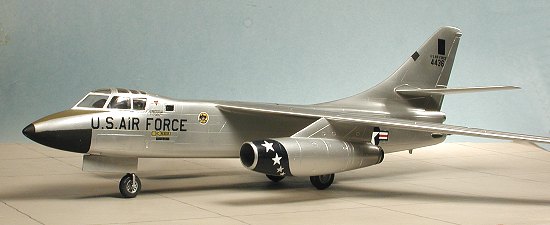
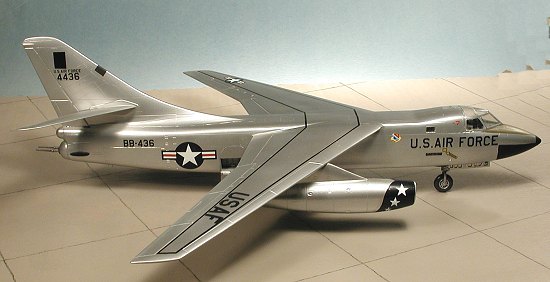
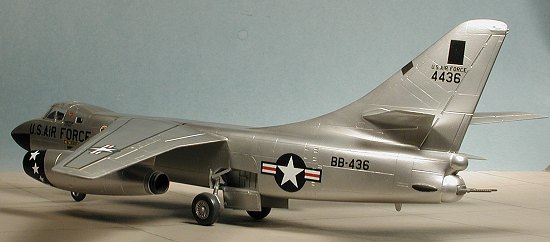 Painting the B-66is really quite easy. Aluminum everywhere! I can easily say that I went
through almost a bottle of Aluminum Metallizer on this one! Once the paint wasdry, I masked off the lower radome and the antenna panels on the tail.
These were painted flat black. The anti-glare panel was painted olive drab once
the surrounding area was also masked to prevent overspray problems. The nose and fuselage antennas were hand painted with flat black.
Painting the B-66is really quite easy. Aluminum everywhere! I can easily say that I went
through almost a bottle of Aluminum Metallizer on this one! Once the paint wasdry, I masked off the lower radome and the antenna panels on the tail.
These were painted flat black. The anti-glare panel was painted olive drab once
the surrounding area was also masked to prevent overspray problems. The nose and fuselage antennas were hand painted with flat black.
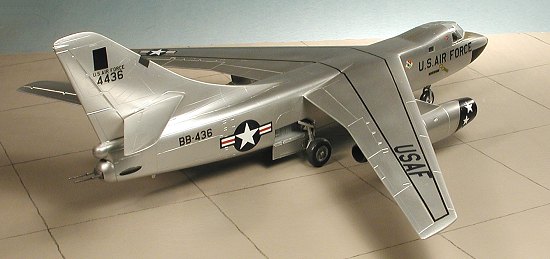
Now that most of the kit was painted, it was time for the decals. Brilliantly painted is not a term one would use for any B-66 unit. However, they were not without color. The kit decals are quite nice and superior (in my opinion) to what you'd get in the Italeri boxing. There are markings for two USAFE RB-66s.The first is an RB-66B of the 42 TRS/10 TRW based at RAF Chelvston in 1960. Ithas a nice 'comet' design on the tail and a large red stripe on the engines. The boxtop kit. Naturally, that is the one I wanted to do. I put on all the common markings first. These went on well using Microsol. The last parts of the sheet I used were the colorful unit markings. I put on the tail markings first and used some Solvaset to help them conform to the fin tip. Well, one of them slipped and I was too late in trying to move it. I destroyed the decal.
Inow had three choices. One: buy another kit for the decal sheet. Two: write to Testors and wait a month for the new sheet to arrive. Three: use the other markings in the box. I chose the third option and used the blue engine markings for the 19 TRS/66 TRW RB-66B based at Spangdalem, Germany in 1959. These markings went on quite well and though I used a touch of Solvaset, no disasters. The only glitch is that the tail serial and buzz number are not correct for the66TRW bird, but no big deal.
| FINAL CONSTRUCTION |
Last bits needed to be attached at this point. These included the wheels,
gear doors, tail guns and refueling probe. Somewhere in the process of
construction, the refueling probe had disappeared. I'd blame cats, but since I didn't have
any at the time, I can only assume that the parts imps had snuck into the box
and made off with this bit. The last step was the removal of the masking from
the clear bits. To my delight, I didn't mess up any of the panels! (happy,
happy, joy, joy!) 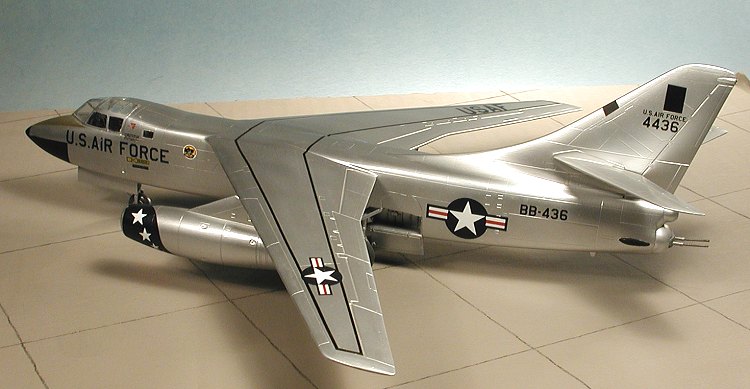
| CONCLUSIONS |
This really is a superb kit. I'm sure that the ECM version is equally fun to build. There were no real problems, the parts fit well and the resulting kit looks very nice on the shelf. If you have any interest in the type, I can highly recommend this one to you.
March 2001
Copyright ModelingMadness.com. All rights reserved.
Review kit courtesy of me and my wallet!
If you would like your product reviewed fairly and fairly quickly, please contact the editor or see other details in the