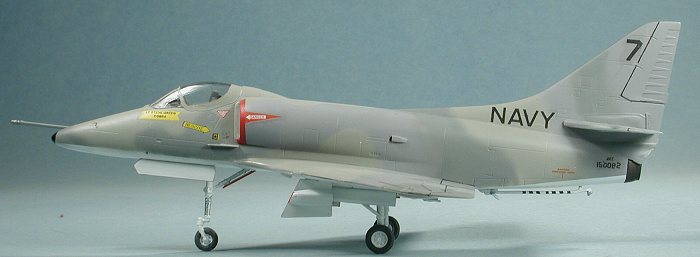
ESCI 1/72 A-4F Skyhawk
|
KIT # |
9003 |
|
PRICE: |
a few bucks at swap meets |
|
DECALS: |
Three aggressor aircraft |
|
REVIEW : |
|
|
NOTES: |
|
|
HISTORY |
Heinemann's Hot Rod is an apt description for the diminutive Skyhawk. Though initially flying in 1954, the A-4 had 40 years of service with the USN and is still flying with several air arms around the world. The combination of small size and the ability to carry a respectable ordnance load are what make the Skyhawk such a sterling performer. An interesting side note is that it was the first operational US Naval aircraft since the F4F-3 that did not have wings that folded or swept back for carrier storage. Since then, only the AV-8, an aircraft of similar payload abilities, has enjoyed that status.
|
THE KIT |
I'm not sure if ESCI downsized the 1/48 kit to get this little jewel or if it was the other way around. Regardless, it is a fairly simple and uncomplicated kit. Purists will shy away from this model and head for the well more expensive and more detailed Fujimi kit, but for those who want a relatively hassle-free build, then they should take a look at the ESCI kit.
This particular kit is molded in silver plastic, but I have seen them in medium grey, dark blue, and tan as well. Overall detailing is an odd mix of engraved and raised panel lines. The fuselage is engraved but the wings and stabilizers are raised detail. Guess two different groups were working on the kit! There is good wheel well detail and that cockpit is complete enough with a tub, seat, stick and instrument panel. Decals are used for the instruments and side consoles. There is no detail behind the seat, but that isn't a problem as the canopy is one piece and cannot be displayed open.
 This is the aggressor kit so there are no weapons pylons, no weapons, and no
drop tanks. What you do get is the avionics hump and guns, two things that most
aggressor aircraft didn't have. In fact, unless you have another kit to rob
from, you have to use the avionics hump as the normal fin fillet isn't provided!
You'll also have to fill in the gun area a no plug is provided. Gear doors are
provided in the closed position and you need to cut them. I have always found
this a trifle odd as 99% of people will build these kits gear down. Why is it
that this is done? Cheaper production costs?
This is the aggressor kit so there are no weapons pylons, no weapons, and no
drop tanks. What you do get is the avionics hump and guns, two things that most
aggressor aircraft didn't have. In fact, unless you have another kit to rob
from, you have to use the avionics hump as the normal fin fillet isn't provided!
You'll also have to fill in the gun area a no plug is provided. Gear doors are
provided in the closed position and you need to cut them. I have always found
this a trifle odd as 99% of people will build these kits gear down. Why is it
that this is done? Cheaper production costs?
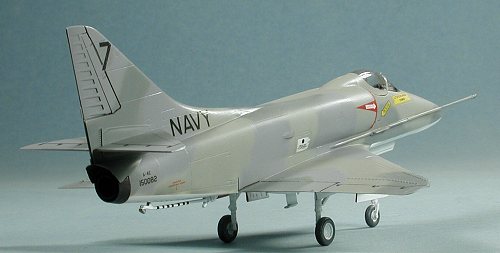
Decals are provided for three aircraft, all in various interesting paint schemes. One from VF-101 det Key West, one from Top Gun, and one from a 'Training aggressor' unit, whatever that is. Colors are given with FS numbers where it is appropriate.
Just to add some credibility to the kit, there is a photo of the VF-101 plane in the reference and it does have the avionics hump on it. I'll also mention at this time that most of the A-4s also had the radar warning antennas removed from under the nose and atop the exhaust 'sugar scoop'. However this was not universal and you really need a photo of the plane in question to see if this was done or not.
|
CONSTRUCTION |
On this one, I started with the wings and cockpit. The kit has no separate slats or flaps so if you want those dropped, you'll have to do some work. I left things as they were and opened no wing holes. Aggressor planes don't use the wing pylons, though they occasionally do have a centerline drop tank. One is not provided in the kit. The cockpit is a simple affair that sits atop the nose wheel well. The bang seat is made up of four parts and really is too skinny. There is no aftermarket seat that I know of and if there was, it wouldn't fit in the cockpit. The interior bits were all painted dark gull grey using Testors enamels.
 Back at the wing, it was glued together
and any filling and sanding done. For some reason, the silver plastic proved to
be rather brittle and cracked several times under my gentle ministrations! The
cockpit (sans seat) was glued into the nose section. Some weight was glued in to
prevent tail sitting and the fuselage halves glued together. Naturally, some
filler was needed and I managed to trash the antennas that were molded to one
fuselage half.
Back at the wing, it was glued together
and any filling and sanding done. For some reason, the silver plastic proved to
be rather brittle and cracked several times under my gentle ministrations! The
cockpit (sans seat) was glued into the nose section. Some weight was glued in to
prevent tail sitting and the fuselage halves glued together. Naturally, some
filler was needed and I managed to trash the antennas that were molded to one
fuselage half.
I then glued the wing. The wing proved to be slightly too narrow for the fuselage and cracked when I spread it to be glued. It is the darn brittle plastic. I don't remember either problem with previous ESCI A-4 kits. Application of a hot glue (like Ambroid's Pro Weld) was enough to melt any fit problems away while putty took care of the cracked wing.
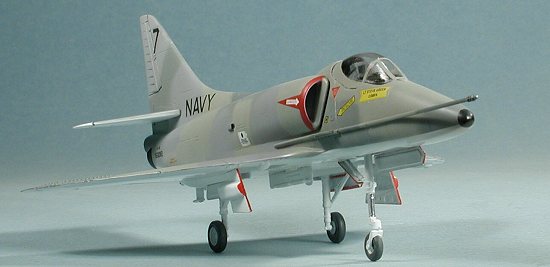
At this time the fin fillet was glued in place and I looked thorough the reference to see if the Skyhawk I was doing was shown. A similar one was and it was void of the nose and tail antennas so those items were cut/sanded off. I also took some Contrail rod and glued it where the guns would normally go. This was later smoothed down to fill in the area where the gun barrels would normally be found.

After a few filler/sanding sessions, the tail planes and the little fuel dump pylon on the underside were glued on. Though devoid of guns, the blast deflectors remained on most of these aircraft so those were glued in place. Then the seat was installed and the canopy glued in place. This gave me a pretty complete airframe. Once the canopy was masked, it was off to have some paint applied.
|
PAINTING |
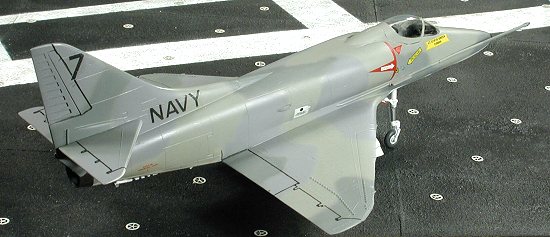
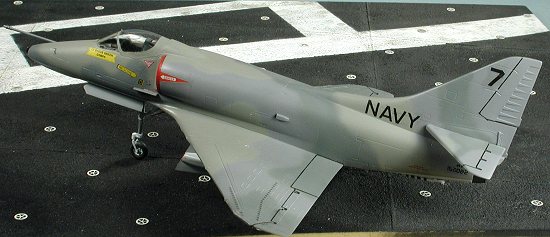
I wanted to do a very early aggressor scheme from Top Gun. These planes basically had just the upper surfaces repainted. Wrap around schemes were not seen on these first aircraft. This meant that the undersides were semi-gloss white. I used Floquil Reefer White, which is a flat, for its excellent coverage. At this time I also painted the area around the intakes and when dry, the intake area was painted red. This was later masked off.
 Aggressor schemes are a fave of mine because they changed so often and involved
some interesting colors. This particular aircraft was painted in FS 36307, 36231
and 35237, generally following the pattern as shown in the kit direction. It
took several days to apply this paint. The 36307 and 36231 were ModelMaster
enamels and the 35237 was a Gunze acrylic.
Aggressor schemes are a fave of mine because they changed so often and involved
some interesting colors. This particular aircraft was painted in FS 36307, 36231
and 35237, generally following the pattern as shown in the kit direction. It
took several days to apply this paint. The 36307 and 36231 were ModelMaster
enamels and the 35237 was a Gunze acrylic.
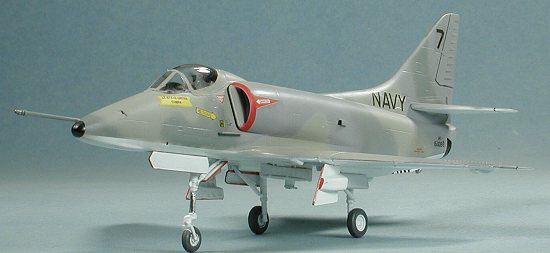
Once all those were on, I realized I'd forgotten the refueling probe. Now by this time, most A-4s had been retrofitted with the curved probe, but the one in my spares box had broken so I used the kit supplied straight version. Then it was painted and when dry, the upper surfaces masked and the overspray on the bottom was touched up. Before doing this, a central pylon was also glued in place. These planes almost never flew with any wing pylons and if using a fuel tank, it was carried under the belly. Even though the tank is not supplied, it was not uncommon for the pylon to be there.
|
MORE GLUING |
 With the colors basically on the plane, it was time to have some
more bits glued on. I had forgotten the tail hook as well so painted that white
prior to removing it from the sprue. When I did cut it off, it snapped in half.
It is this silver plastic that caused all the problems as it is brittle. It
wasn't finished giving me problems as I also managed to break one of the main
gear support struts removing it from the tree.
With the colors basically on the plane, it was time to have some
more bits glued on. I had forgotten the tail hook as well so painted that white
prior to removing it from the sprue. When I did cut it off, it snapped in half.
It is this silver plastic that caused all the problems as it is brittle. It
wasn't finished giving me problems as I also managed to break one of the main
gear support struts removing it from the tree.
After fussing with the tail hook and getting some semblance of normality, the landing gear were glued in place. The nose gear has the wheel integrally molded to the strut assembly so careful painting in needed. With all the landing gear and wheels installed, the kit was taken back to the spray booth to have some clear gloss acrylic (Future) sprayed on in anticipation of decals.
|
DECALS |
 To say that the decaling process was a disaster would be a rather fair
assessment of the situation. If you recall, I coated the decals to prevent them
from falling apart. While this did keep the decals together, it was not totally
successful. Thankfully, this kit has minimal decals. Those few that were
absolutely required from the sheet were used. The others came from a Microscale
sheet that has to be at least 10 years older than the kit decals. They worked
just fine and really saved my butt on this one. However, those kit decals I did
use did not work well and resulted in some rather screwed up looking decals if
you look close enough. An interesting bit of info is that Fighter Weapons School
(Top Gun) aggressors apparently did not use national insignia at the time of
this aircraft. Other USN aggressor units
did have them. With the decals finally on, the kit was given a coat of clear
matte on the upper surface (the under surface was still gloss white).
To say that the decaling process was a disaster would be a rather fair
assessment of the situation. If you recall, I coated the decals to prevent them
from falling apart. While this did keep the decals together, it was not totally
successful. Thankfully, this kit has minimal decals. Those few that were
absolutely required from the sheet were used. The others came from a Microscale
sheet that has to be at least 10 years older than the kit decals. They worked
just fine and really saved my butt on this one. However, those kit decals I did
use did not work well and resulted in some rather screwed up looking decals if
you look close enough. An interesting bit of info is that Fighter Weapons School
(Top Gun) aggressors apparently did not use national insignia at the time of
this aircraft. Other USN aggressor units
did have them. With the decals finally on, the kit was given a coat of clear
matte on the upper surface (the under surface was still gloss white).
|
THE FINAL BITS |
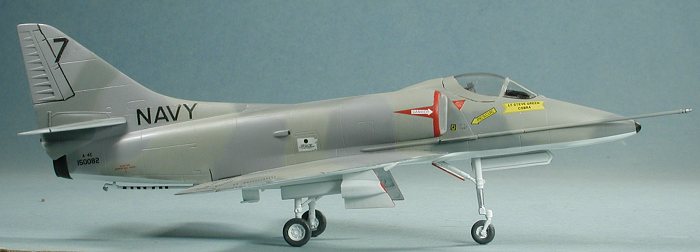
 Last bits were the gluing on of
the gear doors and tail hook. The exhaust section was painted Burnt Iron and
glued in place. I used a Rapidograph pen to draw on the hook warning stripes as
well as the black nose. It was also used to accent the control surfaces and do
the black for the small intakes. During all this I broke off the upper antenna
which went flying off somewhere. It was left off. With the masking taken off the
canopy, the extent of the scratches on it were painfully obvious. Some Future
was brushed on and it really helps to improve the look. Some final touchup
painting and the kit was done.
Last bits were the gluing on of
the gear doors and tail hook. The exhaust section was painted Burnt Iron and
glued in place. I used a Rapidograph pen to draw on the hook warning stripes as
well as the black nose. It was also used to accent the control surfaces and do
the black for the small intakes. During all this I broke off the upper antenna
which went flying off somewhere. It was left off. With the masking taken off the
canopy, the extent of the scratches on it were painfully obvious. Some Future
was brushed on and it really helps to improve the look. Some final touchup
painting and the kit was done.
|
CONCLUSIONS |
This kit did not go together as well as the previous ESCI kits I've done and I don't know why. Guess it was not meant to be or something. Anyway, it does not detract from the fact that this is really a nice kit. Not a shake and bake as modern kits, and not as well detailed as the Fujimi kits. However, it is generally very easy to find and is one that all can enjoy. I'd take the problems I had with the decals seriously and have a set of aftermarket ones ready for when you do yours.
March 2002
|
REFERENCES |
Colors and Markings of the US Navy Adversary Aircraft, Kinsey and Leader 1987
Review kit courtesy of me and my wallet!
If you would like your product reviewed fairly and fairly quickly, please contact the editor or see other details in the Note to Contributors.
Back to Reviews Page
Back to Main Page