KP 1/72 Mig-21MF
KIT: | KP 1/72 Mig-21MF |
KIT # | 21 |
PRICE: | $5.00 |
DECALS: | Several Czech and Hungarian aircraft |
REVIEW BY: | |
NOTES: |
HISTORY |
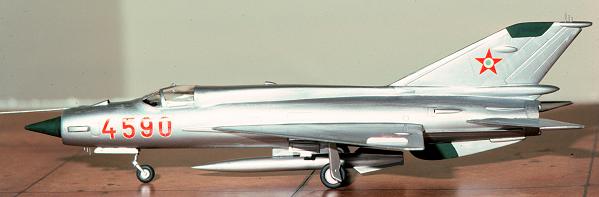
In terms of export sales, the Russian equivalent to the F-4 Phantom has to be the Mig-21. Sold to probably 30+ countries, the Mig-21 was the definitive Soviet aircraft of the 60's, 70's, and 80's. This aircraft is still in frontline service with a large number of countries. It is also still in production in China as the F-7.
Designed as a point interceptor, the Mig-21 sacrificed range for speed. Typical flights are less than an hour in length and are usually much less. All Mig-21s have carried an internal gun, something the Phantom did not have until late in its career. Probably the most used and exported version is the Mig-21MF, the subject of the KP kit.
THE KIT |
Those of you who have never built a KP Mig-21 are really not missing that much. KP was for years the only source for a number of Soviet aircraft in 1/72. Many of their releases have been superceded by better designed and higher priced kit. For years the KP kit retailed at $3.50 and can still be found for $5.00 or less. Definitely the cost cutter when compared to the $25 or more that the Fujimi Mig-21s cost when new.
Like all KP kits, they have superb detail, though it is raised. They are also molded in a rather soft, white plastic. The decal sheet is mostly unusable not because of brittleness or poor registration, but because they are not very opaque. The yellow and red are particularly bad and let any underneath color show through. Finally, another problem with almost all KP kits is that the molds are not very well aligned. This means that all your landing gear and other parts that are supposed to be circular are not and attempts to fix them usually means very weak, undersize parts. In addition, there is little flash, but lots of mold lines to remove!
The kit's instruction sheet is very well done with a lovely set of three views and good color description. While all is written in Czech, the exploded view makes construction relatively simple.
CONSTRUCTION |
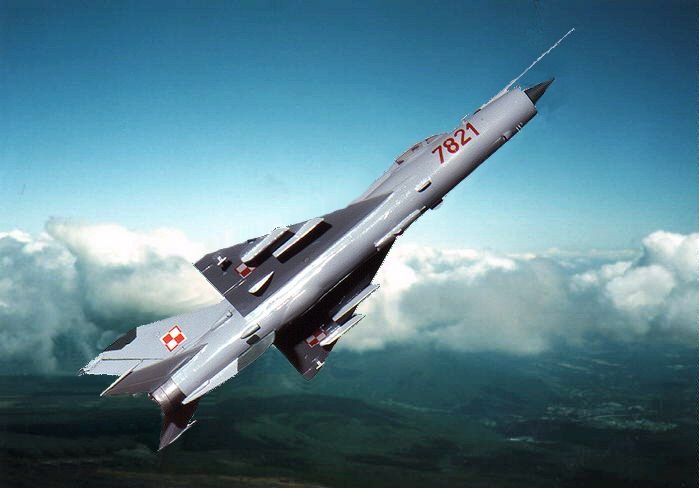
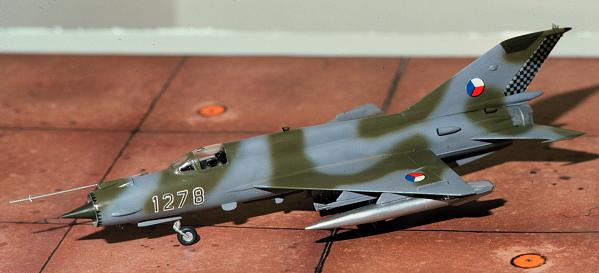
Knowing all the pitfalls, one is now ready for building this beastie. The cockpit is typical with seat, pedals and stick in a tub. However there isn't any clear way of attaching it to the inside of the fuselage. It is simply a matter of making sure it looks right and dry fitting a BUNCH of times. Don't forget some nose weight. Next add in the nose cone and tail cone and close up the fuselage. Attaching the wings and tailplanes are a no brainer and rather simple. I found that some filler is required on almost all the joins. Probably the biggest headache will be the canopy. It really is too small for the hole it has to cover. You can do two things; build up the cockpit area so the canopy can fit or get an aftermarket vac canopy. The Polish Mig at the beginning of the review has one of these installed.
Then you must glue on the numerous intakes. These can cause some problems, but the locations are marked on the fuselage as are the locations for the pitot tube, flash suppressors and the instrument boom. I'd recommend leaving this until last as it can get easily broken, especially if you have filed it down to a round cross-section. Fit of the underwing goodies is again, very easy as there are marks showing where these parts go. Don't forget to add the radio altimeter antennas.
Installing the landing gear is another area that is simple, but will require you to fix the misaligned parts. Hooking up the gear retraction struts can cause a bit of a headache, however, careful dryfitting should cure any problems. Probably the tackiest looking part of the kit are the 'Odds Rods' IFF antennas on the underside of the nose and top of the tail. Replace them if you can. There are four underwing hardpoints as well as a centrally mounted cannon. There are two drop tanks and two Atoll missiles. Oddly the missiles go on the inner pylon and the tanks on the outer. I built only one kit using this configuration as it just looks rather strange, and besides, the drop tanks are oval and not round. If you wish, you may use one of them as a centerline tank.
PAINT & DECALS |
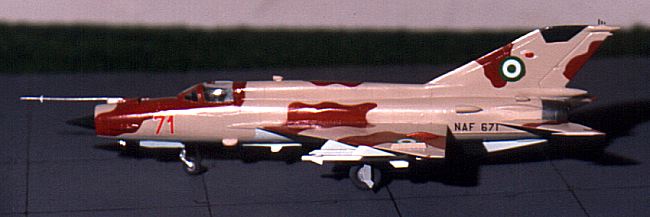
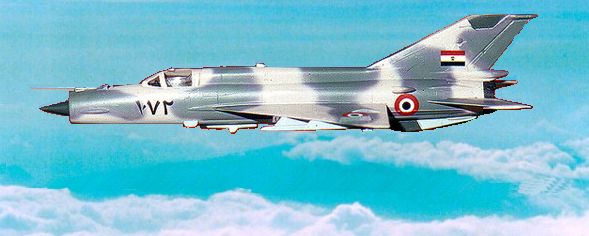
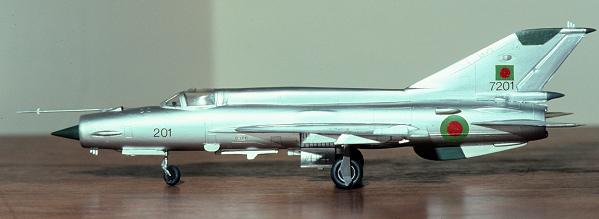
The kit supplies markings for several Czech aircraft as well as a Hungarian version. Frankly, I have used the kit decals twice; once for a Czech version and tho other the Hungarian shown above, but was not pleased with them. They are not very opaque and even the black was a bit weak. There are lots of aftermarket decals available for the Mig-21 in 1/72 and I'd recommend using one of those. If not, you can always make your own as I did with the Nigerian and Bangladesh versions.
In addition to the wide selection of decals, Mig-21s were painted in an equally wide variety of camouflage schemes as well as being in natural metal. All of them, however, had the dielectric panels and nose cone painted a green color. I used a mixture of paints to get what looked to me the best.
CONCLUSIONS |
While not the best Mig-21MF in 1/72, for a very long time it was the ONLY Mig-21MF in this scale. It has been surpassed in quality by the Fujimi Mig-21 series and others. I can still recommend this kit as it is a relatively easy build that requires you to use some of those modeling skills to complete.
If you would like your product reviewed fairly and fairly quickly, please contact the editor or see other details in the