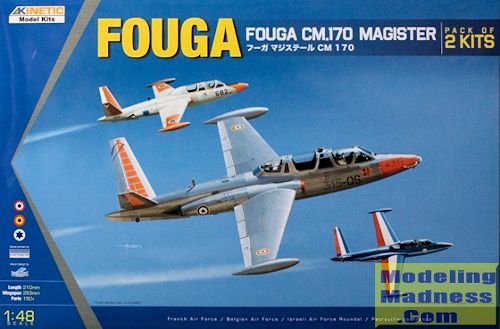
Kinetic 1/48 CM.170 Magister
| KIT #: | K 48051 |
| PRICE: | £26.66 plus shipping |
| DECALS: | Five options |
| REVIEWER: | Scott Van Aken |
| NOTES: | Two kits in the box |
| HISTORY |
In 1948, Fouga designed a jet-powered primary trainer called CM.130 for the French Air Force (Armée de l'Air, AdA) to replace piston-engined Morane-Saulnier MS.475 aircraft. When AdA found the aircraft lacking in power from the two Turbomeca Palas turbojets, Fouga enlarged the basic design and used the more powerful Turbomeca Marboré engine. The distinctive V-tail of the new CM.170 Magister originated on the CM.8 (Aka Castel-Mauboussin 8) glider Fouga was using to experiment with jet engines. In December 1950, AdA ordered three prototypes, with the first aircraft flying on 23 July 1952. A pre-production batch of 10 were ordered in June 1953 followed by the first production order for 95 aircraft on 13 January 1954. Fouga built a new assembly plant at Toulouse-Blagnac to produce the aircraft. The aircraft entered service with AdA in 1956.
The Fouga Magister 170R was designed in 1949 by Robert Castello and Pierre Mauboussin. The first prototype flew on 23 July 1952 and the first one sold to AdA flew for the first time in February 1956.
Due to different industrial mergers, the aircraft has been known as the "Fouga CM.170 Magister", "Potez (Fouga) CM.170 Magister", Sud Aviation(Fouga) CM.170 Magister" and "Aérospatiale (Fouga) CM.170 Magister" depending on where and when they were built.
The French Navy's Aéronavale adopted a derivative of the Magister, the CM.175 Zéphyr, as a basic trainer for deck-landing training and carrier operations. These were preceded by two "proof of concept" prototypes designated the CM.170M Magister, which made their first flights in 1956/57.
An improved version of the Magister designated the CM.170-2 Magister was produced from 1960. It used a more powerful Turbomeca Marboré IV engine. Production of the Magister stopped in France in 1962 but it continued to be built in Finland up to 1967.
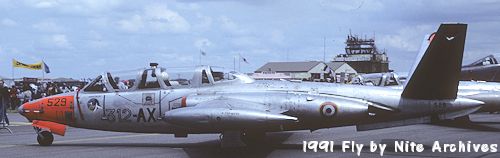 The development of the aircraft came to an end when the French Air Force selected the Alpha Jet as their new jet trainer. The Magister soldiered on in training units while being replaced by the Alpha Jets. Even after that, many were used as station hacks or to provide flight time in other squadrons. As you can see from the photo, the Magister was still with training units in 1991.
After retirement, a number of Magisters were bought by private-owner pilots in the USA and are operated in the experimental category.
| THE KIT |
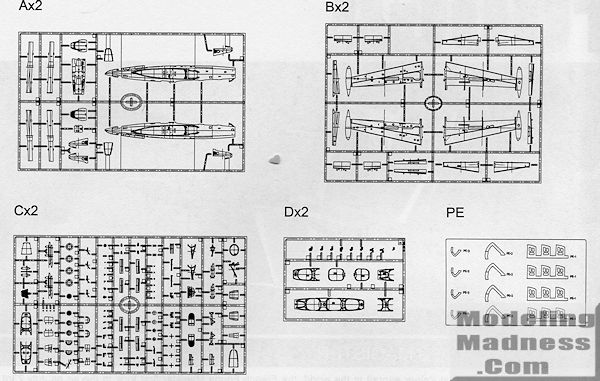 Kinetic kits are very much in line with other major Chinese kit manufacturers in terms of the external detailing and the need to build their kits with some care. There are two kits in this box as the airplane is relatively basic, and unlike many jet kits, there is not a ton of stuff to hang under the wing. Doing a double boxing also provides the buyer with the impression of value for the money. There is a lot of aftermarket available for this kit from Wingman, who have boxed this kit with a mass of resin, photo etch and other aftermarket goodies.
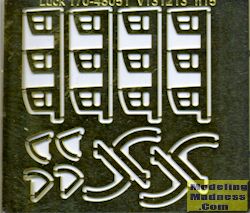 The kit does come with a photo etch fret. To my mind, this is not really all that useful. On the fret are elevator hinges, aileron trim tab hinges and extended wing air brakes/spoilers. The hinges have rather large recesses in the parts into which they fit, so this should help in placing them. I'd rather see these done in plastic. The wing air brakes/spoilers were rarely deployed on the ground. What would have been more useful would have been seat harnesses, which are not provided.
The cockpit consists of a tub with alternate rear bulkheads, instrument panels, rudder pedals, constrol stick and a pair of seats. These are not ejection seats so are padded. A periscope is provided for the back seat. In the nose a framework is provided for the nose gear just like on the actual plane. There is an upper nose section into which you can glue two machine gun barrels. Though not indicated, a 'no gun' piece is provided and would probably be more appropriate for the French and Belgian options as most Magisters were not armed. If you want the nose VHF nav antennas you'll need to open those holes. There is no room for weight in the nose so any you wish to use will need to go under the cockpit. No indication of weight is provided by the instructions, but I'll bet you'll need it.
One gets full intake and exhaust trunking with intake and exhaust compressor faces that are actually about a scale two feet apart making for a very short engine. All of the various intakes and vents will need to be added to the outside of the fuselage. There are also separate intake and exhaust bits to add once the engine piping has been added to each half. A radio compartment is provided for behind the instructor's seat.
The wing is in an upper and lower half with wheel well detail in the upper piece. There are inserts in the top and bottom wing to allow you to have the wing spoilers deployed or not. The tip tanks are molded in place. Separate ailerons and flaps are provided. You are also given wing pylons and the ability to carry unguided rockets. It is up to you to decide which of the markings options you are building actually need these items. Most trainers had no pylons and some had no nose guns. Despite having no stand, a wheels up option is provided for the main gear. Note that there are two canopy options provided. One is for a one-piece canopy and the other is for separate sections to allow you to display the canopies open. Hinge mechanisms are provided for the open option. Note also that you can have a solid rear canopy section and there are two different designs of this provided. This means that if you choose this option, you'll need to install the 'solid' aft bulkhead back in the first step. I believe the Israeli option was like this, but check your references to see which one actually had the solid backlight.
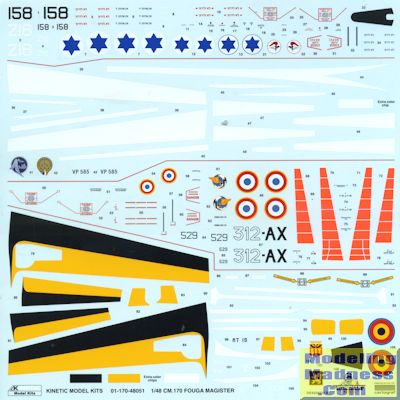 The instructions are well done though as I mentioned, do not differentiate which marking option (if any) use optional parts. It does offer mulitple paint options and there are five markings options. Two are French. One is of the aircraft in the photo which is in unpainted metal with daglo bits. You'll have to paint the nose markings. Interestingly, the plane on the box art is not the one provided on the decal sheet. The other is a Patrouille de France plane from when they were flying Magisters. Two other markings are Israeli, one in silver with international orange markings and the other in a camoulflage scheme. The final option is a Belgian plane that was with their flight display team. This one is overall red. The large decal sheet is very nicely printed and has large areas already provided which should help alleviate some of the masking that would otherwise be required for some of the more complex schemes. These are printed by Cartograf so should be properly opaque.
| CONCLUSIONS |
You have to give Kinetic a thumb up for producing this kit. There are many of us who like trainers and prior to this there has only been the rather horrendous short run kit by FM to fill the bill. It would have been nice if more research had been done by Kinetic in terms of what bits are used by what markings option
| REFERENCES |
http://en.wikipedia.org/wiki/Fouga_CM.170_Magister 2015 Thanks to me for sharing this one with you. If you would like your product reviewed fairly and fairly quickly, please contactthe editor or see other details in the