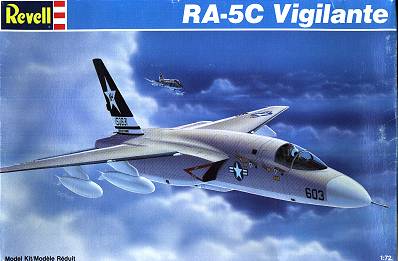
Revell 1/72 RA-5C Vigilante
Kit Number: 4367
Price: $7.50
Decals: One version, VAH-7, USS Kitty Hawk
Date of Review: 10 Feb, 1998
Review and Photos by: Scott Van Aken
The RA-5C Vigilante, was designed by North American to be a nuclear strike aircraft. The bomb was held in a unique bomb bay that ran between the engines. The weapon was to be ejected aft of the speeding aircraft to give the crew time to escape the blast. The A-5 was capable of very high speeds so that the bomb could be dropped at relatively low altitude and still ensure crew survivability. As often happens, the aircraft was adopted to the recce platform which necessitated the addition of cameras and other sensors along the bottom of the aircraft in a canoe. In addition, fuel capacity was increased by using the now empty bomb bay between the engines for fuel as well as building up a fuselage hump for increased capacity. In this role was born the RA-5C.
 The aircraft was used extensively by the Navy in Vietnam. So successful
was the aircraft, that the production line was reopened to manufacture additional
aircraft as attrition replacements. As one would think, an aircraft
of this sophistication was very maintenance intensive requiring over a hundred
hours of maintenance time for each flight hour. The Viggie was retired
in the mid 1970's and not replaced, the Navy deciding to use Marine RF-4Bs
for reconnaissance instead.
The aircraft was used extensively by the Navy in Vietnam. So successful
was the aircraft, that the production line was reopened to manufacture additional
aircraft as attrition replacements. As one would think, an aircraft
of this sophistication was very maintenance intensive requiring over a hundred
hours of maintenance time for each flight hour. The Viggie was retired
in the mid 1970's and not replaced, the Navy deciding to use Marine RF-4Bs
for reconnaissance instead.
The Revell kit is a Korean knock-off of the elderly Hasegawa RA-5C kit. When released in the late 1980s, the kit boasted engraved panel lines and an excellent Scalemaster decal sheet. That is about all that is really better about this kit. The building of this particular model was a litany in all that is wrong with inexpensive copy-cat kits like this.
Made of relatively hard medium grey plastic, the first thing one notices about the kit is that there are a number of imperfections in the plastic. There are a myriad of small dark bits indicating the use of a mixture of plastics, probably second-hand and remelted. The engraving is quite well done and does match somewhat from side to side, however a lot of it goes away under the need for a lot of sandpaper, filler and file work.
While there was no flash to speak of, all the landing gear parts had a large mold mismatch and should be replaced. The wheels were like those on a toy with no detail and large ejector pin marks. Large ejector pin marks were prominent on many pieces. The plastic itself needs thorough cleaning of mold release agent or your paint will not stick well. Of the two main sprues, one was noticeably larger than the other. That meant that the parts that fit the fuselage cut outs, as well as the gear doors, and tailpiece were oversize and needed a great deal of work with a large file to get down to size. So much for fuselage detail. In addition, the clear parts were a bit too big and the nose cone of such an odd shape, that no amount of fitting and filing got it to a decent shape.
The interior is the same as the Hasegawa kit comprising two ejection seat shapes and an instrument panel on which the decal is placed. Fortunately, the rear seat is basically invisible thanks to the small and very distorted transparencies. The front seat is visible, but again, the distorted canopy makes it difficult to see inside. They were painted various shades of dark grey and glued in. I also added some nose weight, but doubt if it was necessary.
Once the large fuselage plugs were installed, filed down, puttied, and sanded (a multi application process), it was time for the wings. They fit rather well with little real fuss. I then installed the landing gear and doors. The large forward sections of the main gear doors are normally closed on the ground and so, after filing them down to size, I installed them in the closed position. Once the landing gear are installed, they are quite sturdy. The nose wheel is part of the gear, I imagine for additional strength. I then installed the underwing pylons and painted the aircraft. Standard Gull Grey upper (FS 16440) and White lower. The tailplanes and rudder were painted separate from the kit to ease handling during painting. I used Testor's Model Master enamels for this. Bare Metal Foil was used for the wing leading edges.
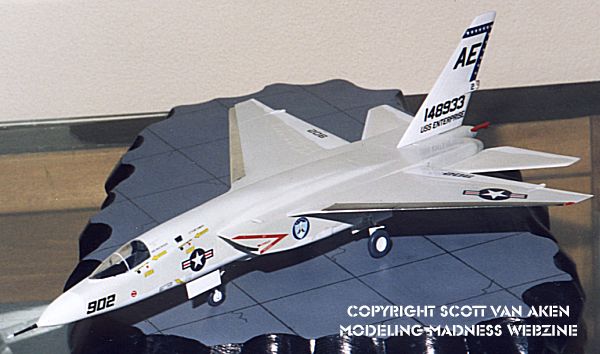 Then it was time for decaling. I used an old (the price printed on
the sheet was $1.75) Microscale sheet for VAH-7 off the Enterprise.
As was common with Microscale sheets, the markings were a bit oversize, but
nothing major. I used some of the kit decals for insignia and other
common bits. They all fit beautifully, snuggling down into what engraved
detail was left with no problems and a bit of Microsol after which the kit
was oversprayed with Future to seal the decals.
Then it was time for decaling. I used an old (the price printed on
the sheet was $1.75) Microscale sheet for VAH-7 off the Enterprise.
As was common with Microscale sheets, the markings were a bit oversize, but
nothing major. I used some of the kit decals for insignia and other
common bits. They all fit beautifully, snuggling down into what engraved
detail was left with no problems and a bit of Microsol after which the kit
was oversprayed with Future to seal the decals.
Final assembly was the installation of rudder (no problems), horizontal stabilizers (needed reshaping on the inside as they were molded at way too acute an angel to fit against the fuselage) and the wing tanks. Imagine my surprise when I found out the tank attachment points were off center by about 5 degrees. This made the tanks point away from the line of flight and required me to cut off the pylon pegs and butt glue them.
Well, this kit is not one I will repeat. Next time, the Hasegawa or Airfix kit. Of course it's construction was not helped by my having dropped the kit twice, breaking the fuel dump and nose probe both times! Eventually had to make a new nose probe from scrap plastic. I was so frustrated with this kit that in the end, I did not paint the door edges red as was common practice with this scheme. Overall, this kit is not recommended. Sure it has engraved panel lines, but the extra amount of work to make a mediocre kit is not worth the hassle.
Copyright ModelingMadness.com. All rights reserved.