| KIT #: | 72104 |
| PRICE: | $12.98 MSRP |
| DECALS: | Three options |
| REVIEWER: | Scott Van Aken |
| NOTES: |
| KIT #: | 72104 |
| PRICE: | $12.98 MSRP |
| DECALS: | Three options |
| REVIEWER: | Scott Van Aken |
| NOTES: |
| HISTORY |
With the huge success of the MiG-21F interceptor, it was realized that a dedicated trainer was needed to transition pilots from the more sedate MiG-17 to the much faster and more difficult to handle MiG-21. Its high landing speed was something that was the major cause for concern as once in the air, the aircraft flew beautifully.
 Based on the MiG-21F-13, the MiG-21
UM was basically the same except for two major areas. One was the addition
of a second cockpit for the instructor. This resulted in a loss of fuel
capacity so a large spine section was added to help return some of the
MiG-21's limited on-board fuel. The other major change was to a broader fin
as was seen on later variants. A bulge in the fuselage side was to allow
the use of larger wheels and tires. The wings were able to handle two
pylons as in later MiG-21 variants, and were often used to hold fuel tanks.
Though the gun was removed from the trainer, it was able to carry air to
air missiles.
Based on the MiG-21F-13, the MiG-21
UM was basically the same except for two major areas. One was the addition
of a second cockpit for the instructor. This resulted in a loss of fuel
capacity so a large spine section was added to help return some of the
MiG-21's limited on-board fuel. The other major change was to a broader fin
as was seen on later variants. A bulge in the fuselage side was to allow
the use of larger wheels and tires. The wings were able to handle two
pylons as in later MiG-21 variants, and were often used to hold fuel tanks.
Though the gun was removed from the trainer, it was able to carry air to
air missiles.
| THE KIT |
It is difficult to review a 1/72 MiG-21 without comparing it to what has come before. In this case, the comparison is with what most consider the best 1/72 MiG-21 kit on the market at the time this preview was written, the one by Fujimi, and the still nice, but older KP kit. Since then there have been a number of nice looking MiG-21s produced by several companies including RV and Zvezda.
I can confidently tell you that this
one is closer to the Fujimi kit than it is the KP version. The grey plastic
is nicely engraved, though perhaps a bit lightly for some builders as I can
see this easily disappearing u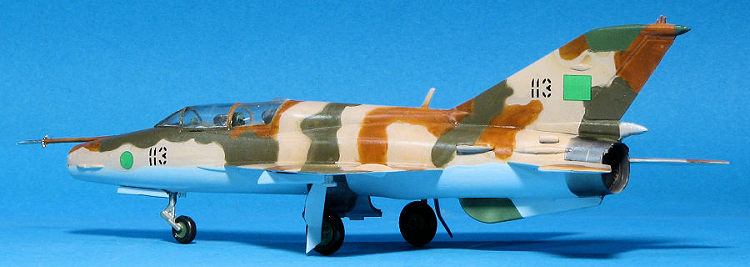 nder any sanding. The sprue attachment points
are generally rather large so care is needed when removing parts. I also
found that most parts had some level of flash or at least thick mold seams
that will need removed. The cockpit consists of a pair of somewhat generic
looking seats with belts faintly molded on them. I'd suggest replacing
these with some resin bits. There are also two control sticks and two
instrument panels. There is no detail on the panels or side consoles, this
being represented by decals.
nder any sanding. The sprue attachment points
are generally rather large so care is needed when removing parts. I also
found that most parts had some level of flash or at least thick mold seams
that will need removed. The cockpit consists of a pair of somewhat generic
looking seats with belts faintly molded on them. I'd suggest replacing
these with some resin bits. There are also two control sticks and two
instrument panels. There is no detail on the panels or side consoles, this
being represented by decals.
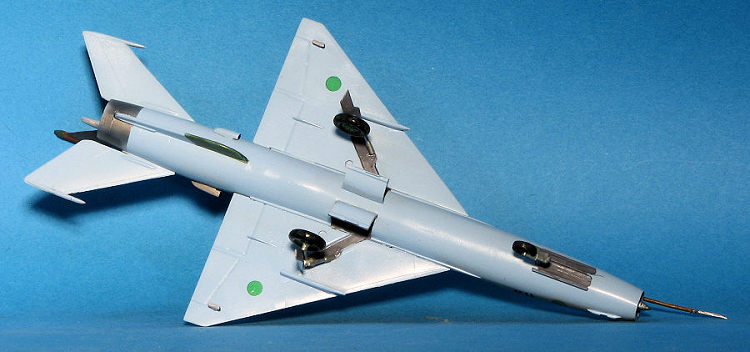
Moving to the fuselage, all the various scoops are separate parts that will need to be added to engraved areas on the fuselage. There are two drop tanks and two missiles provided. The missiles are rather generic looking and would really benefit from replacement. Two even worse looking rocket pods are also provided. Four wing pylons and a centerline pylon are part of the suite as is a gun pod, which I don't believe is used on this variant. The front gear has the wheel/tire molded as one part. The main gear legs are really devoid of any detail at all, though the wheels and wheel wells have some. The clear bits are fairly well molded though they have flash. They are a bit distorted and have some mold flaws. I'd say that the windscreen is too pointed, though you'll probably not be able to find a decent replacement.
The instructions are fairly well done and well drawn. There is no color information provided at all so you are on your own in terms of interior and wheel well colors. The instructions show main gear retraction struts, though none are provided. Nose weight is needed to prevent tail sitting. Markings are provided for three aircraft though none are shown anywhere in the kit or instructions. There is a set of markings for a Russian plane, but no indication as to if it is bare metal or camouflaged. Also included on the sheet are a Finnish AF version and one for the unified Germany Luftwaffe. There is no stencil placement guide even though there are stencils on the sheet. The decals are very matte and have large clear carrier film.
| CONSTRUCTIONNS |
 First step was to construct the cockpit. Instructions are somewhat vague
about how the bulkheads fit, but of one fits it into a fuselage half before
they dry and plunk the seats in there as well, it will be pretty easy to get
this right. The control sticks suffer from mold mismatch so one has to be
careful about thinning them down. Leave the seats out until you are ready to
close the canopy. They are at most general shapes of the seats that should
be there, but they fit and besides, unless you leave the canopies open, you
won't see much. There are decals for the instrument panels and side
consoles. After painting all the interior bits and sidewalls with Testors
Soviet Interior Blue-Green, I glued in the cockpit. There is a shelf on
which it sits. Tape the fuselage halves together while this dries to ensure
it is square. The exhaust compressor face was also glued in at this time as
was the intake cone after it was painted green.
First step was to construct the cockpit. Instructions are somewhat vague
about how the bulkheads fit, but of one fits it into a fuselage half before
they dry and plunk the seats in there as well, it will be pretty easy to get
this right. The control sticks suffer from mold mismatch so one has to be
careful about thinning them down. Leave the seats out until you are ready to
close the canopy. They are at most general shapes of the seats that should
be there, but they fit and besides, unless you leave the canopies open, you
won't see much. There are decals for the instrument panels and side
consoles. After painting all the interior bits and sidewalls with Testors
Soviet Interior Blue-Green, I glued in the cockpit. There is a shelf on
which it sits. Tape the fuselage halves together while this dries to ensure
it is square. The exhaust compressor face was also glued in at this time as
was the intake cone after it was painted green. 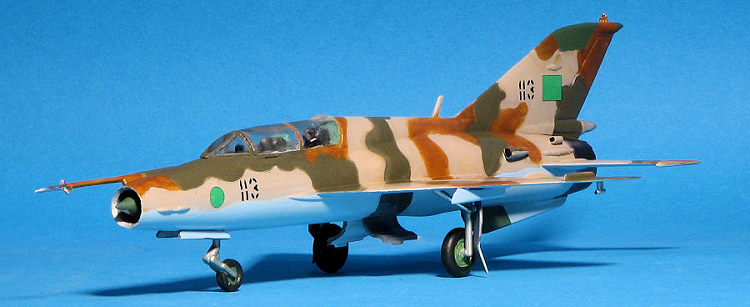 A myriad of scoops have to be attached to the aft fuselage. These need
plenty of early attention to get to where they don't look horrible.
Attachment areas are so lightly engraved that I had to use a 10x loupe to
see where the scoops went. While all this was drying, I filled the outer
wing pylon holes as the UM only has two inner wing pylons. During this, I
painted the seats dark grey using Vallejo acrylics. This stuff does not
stick well to unprimed plastic and it took several coats. The Tamiya khaki I
used for the 'cushions' went on with one coat. These were then installed.
A myriad of scoops have to be attached to the aft fuselage. These need
plenty of early attention to get to where they don't look horrible.
Attachment areas are so lightly engraved that I had to use a 10x loupe to
see where the scoops went. While all this was drying, I filled the outer
wing pylon holes as the UM only has two inner wing pylons. During this, I
painted the seats dark grey using Vallejo acrylics. This stuff does not
stick well to unprimed plastic and it took several coats. The Tamiya khaki I
used for the 'cushions' went on with one coat. These were then installed.
| COLORS & MARKINGS |
 reehand
spray the scheme. In hindsight, masking would have resulted in a much
nicer looking scheme as I had to go back over and hand paint about all
the upper surface scheme.
reehand
spray the scheme. In hindsight, masking would have resulted in a much
nicer looking scheme as I had to go back over and hand paint about all
the upper surface scheme. 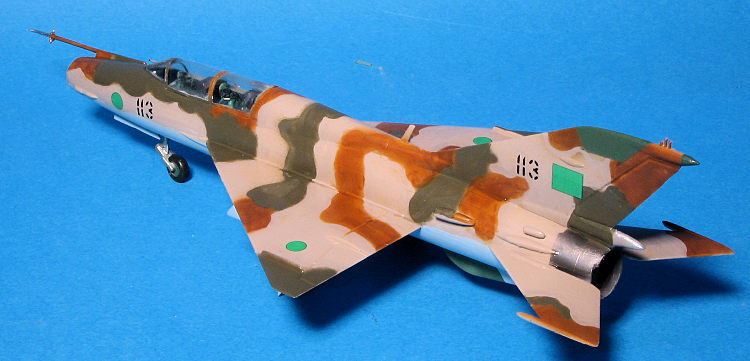 probe
and the shorter probe disappeared sometime during sanding so I guessed
at those. Eventually, I got all the bits on and everything painted. The
airframe was given a gloss coat for the decals.
probe
and the shorter probe disappeared sometime during sanding so I guessed
at those. Eventually, I got all the bits on and everything painted. The
airframe was given a gloss coat for the decals. | CONCLUSIONS |
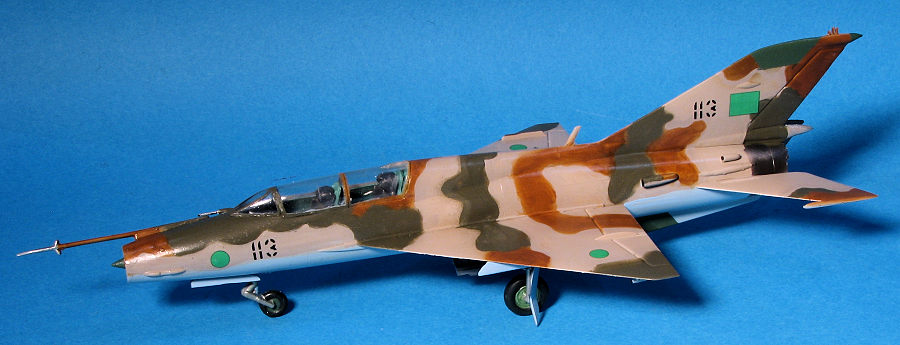
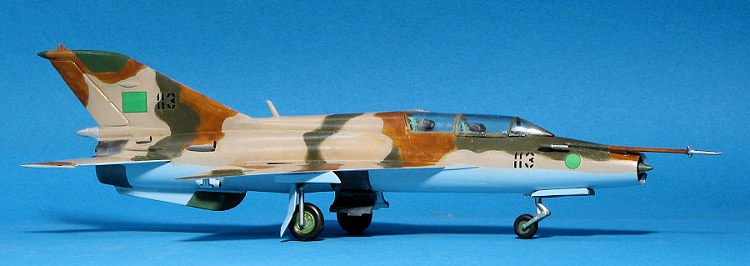
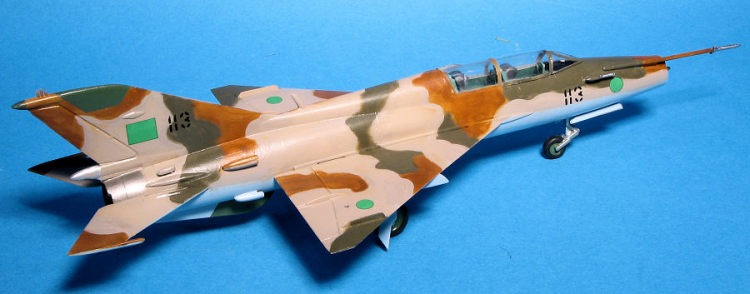
This is yet another 'three footer' as the quality of the parts and my poor skills mean no contests for this one! I'm unaware of any other two seat MiG-21, though would be happy to have a better kit of this type in my collection if there was one. Perhaps it is a bit strange that there are not more 1/72 MiG-21 kits produced by what we would call mainstream model companies. Revell has a very nice F-13, but that seems to be the end of it. Bottom line seems to be if you want a lot of MiG-21s you need to build some short run kits or those of fairly mediocre quality. Want a two seater in this scale? This one seems to be it.
20 July 2017
Copyright ModelingMadness.com
Thanks to KoPro for the decals.
If you would like your product reviewed fairly and fairly quickly, please contact the editor or see other details in the Note to Contributors.