Roden 1/144 C-140A Jetstar
| KIT #: | 316 |
| PRICE: | $24.99 SRP |
| DECALS: | One option |
| REVIEWER: | Scott Van Aken |
| NOTES: | New tool kit |
| HISTORY |
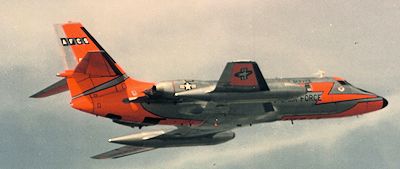 Sixteen JetStars were produced for the United States Air Force. Five C-140A Flight Inspection aircraft to perform airborne testing of airport navigational aids in 1962. They began service during the Vietnam War and remained in service until the early 1990s. The "Flight Check" C-140A were a combat-coded aircraft that could be distinguished from the VIP transport version by their distinctive camouflage paint scheme. The last C-140A to be retired was placed on static display at Scott AFB, Illinois.
 An additional 11 airframes were designated C-140B, although the first of these predated the C-140As when it was delivered in 1961. The C-140Bs were used to transport personnel by the Military Airlift Command. Six of the aircraft were operated as VIP transports by the 89th Military Airlift Wing at Andrews Air Force Base. These VIP aircraft were designated as VC-140Bs. The VIP transport fleet occasionally served as Air Force One during the 1970s and 1980s. Several other countries, such as Germany and Canada, have used military JetStars as transports for their heads of state, heads of government, and other VIPs.
| THE KIT |
 I have to say that one of my favorite biz-jets has always been the Lockheed Jetstar. Just something about it that looks good. I've always hoped someone would kit it and now Roden has done so. I would sort of liked to have seen this in 1/72 but can fully understand why Roden picked 1/144 as they want it to fit in with their airliner kits.
 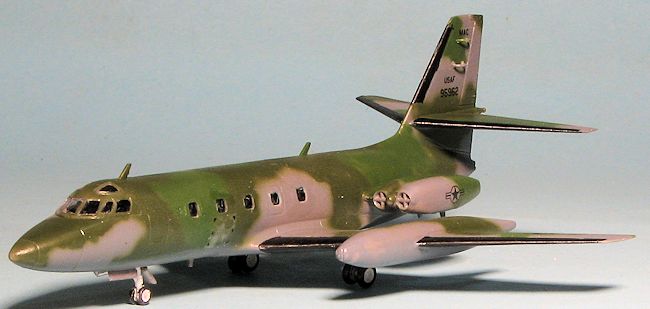 Getting back to this kit. The molding is quite well done and though it has a bunch of nice clear cabin windows and a cockpit transparency, there is nothing to be seen inside. My personal preference would have been for decals for the windows and windscreen on a solid fuselage. However, there are modelers who like to mask windows on their airliners so this is what we have. Some of the parts for antennas and such are really quite small so one will have to take care when it comes to attaching them. There is lots of room in the nose for weight and like any rear engine jet, this one will need that weight.
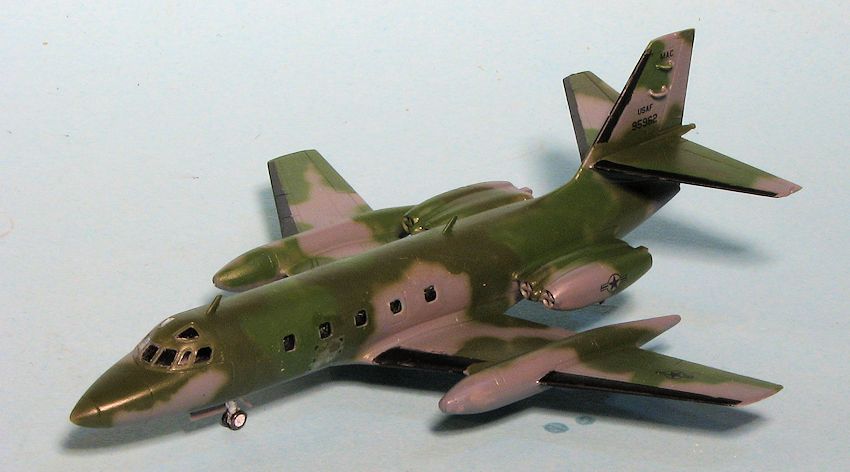
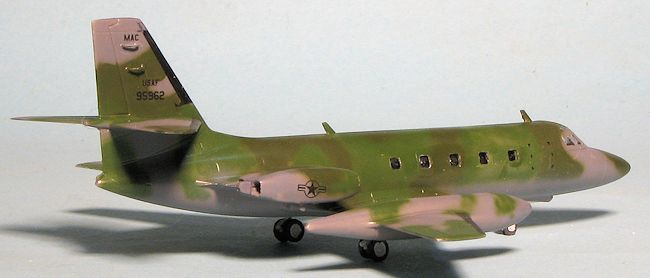
 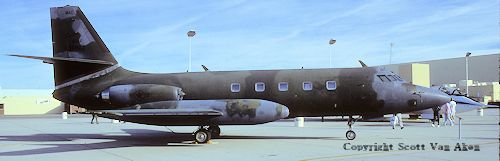 used for most of its life in this camo scheme and in the SEA scheme. MAC was used in the last few years. These planes were retired before MAC became AMC. Interestingly enough, the only time I was able to photograph 962 was at Edwards AFB back in 1990 for their open house and have included that as a help for painting if you want to use it.
| CONSTRUCTION |
For this build, I started by gluing together the few subassemblies. This meant the upper and lower wings halves and the engine pods. I have to say that I did not realize that the C-140 had square engines in it as the pods certainly are flat on the bottom and near flat on the sides. The engine inlet pieces, however, are properly round and so I needed to do the filler and sanding thing to get them to match the engine pods. I also found that the pylon mounting surface on the pod pieces is longer than the area where it fits to the fuselage so reduced the length a bit to provide a more uniform fit.
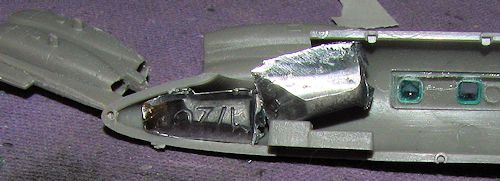 I then installed the cabin windows and masked them with Mr. Masker. One could probably also use one of the various window-making mediums such as white glue to replicate these. Personally, I would have liked to have seen a solid fuselage with decals for windows. I then found room for the nose weight. The instructions recommend 4 grams and I put in about 5 just to be sure. It is a tight fit. The weight will be painted black prior to installing the cockpit transparency.
Next, the fuselage halves were glued together after installing the nose wheel well. Fit is actually quite good. This was followed by the wings. I then attached the tail planes and finally the tank tip lights. 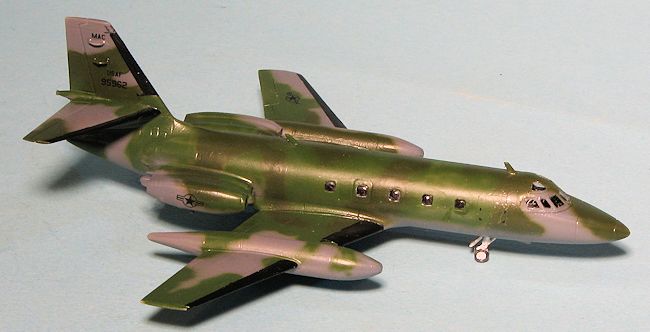 These latter bits do not fit well and needed filler to smooth things out. Keeping the little slit of a light cover clear will be a challenge and I'll probably end up painting it. The cockpit clear bit was masked and installed. Thanks to the somewhat protruding nose weight, I had to cut away the back of the clear bit to provide clearance. Once it place, it was obvious that it was a bit too tall so several applications of filler were applied to remove the step.
| COLORS AND MARKINGS |
 First color to be applied was the gunship grey, FS 36118. I personally think that the grey in a Euro I scheme should be 36081 engine grey, but it looks ok. I used some PollyScale acrylic for this. I then used some Mr. Masker to see if it would be good to use for the camo scheme. It turned out that it stuck like limpets to the paint and would not peel off. Perhaps it would have been best to either apply it very thin or on a gloss surface. Fortunately, application of water was all that was needed to remove it and so I then went the other route and hand airbrushed the scheme using Testors enamels for the FS 34102 and FS 34079. Landing gear and inner gear doors were painted gloss white using Tamiya paint.
| FINAL BITS |
Once everything was painted, I drilled holes for the various antenna. I also started installing wheels on the landing gear. I had a lot of trouble with this as the mounting holes are far larger than the axle stubs. In fact, during all the fiddling around to try to get the wheels on, I ended up breaking landing gear legs. These are really quite flimsy and when metal ones are produced by SAC, I recommend getting them. The gear doors were then attached with the usual drama I experience with 1/144 kits.
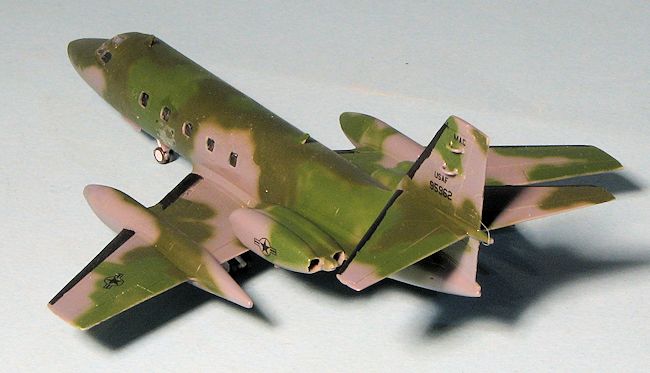
Then a lot of touch up was done as I'd scuffed the paint and had to paint the various antennas once more. It looked terrible as the brushed on paint dried a different hue, however, once a clear gloss was applied, it evened out quite well. I had forgotten to paint on the black leading edges to the flight surfaces and so used a brush to add this feature using Tamiya flat black. The Roden decals lived up to their reputation of being easy to silver and not responding to setting solution. Fortunately, there are not many of them. The instructions do not show any wing insignia, but the plane did carry them. I then applied 'flat Future' to the model to seal in the decals and removed the masking from windows. The liquid mask I used on the cabin windows was a real pain to remove and I ended up scratching many of the transparencies in the effort.
| CONCLUSIONS |
Once again, a kit that looks simple in the box, takes an age to complete. I put some of the blame on myself and some on Roden so it does even out. Were I to do another of these, I'd tape mask all the windows and I'd build it gear up on a stand. I'd also pray for aftermarket decals as Roden still does not produce the sort of quality decals that I'd like to see. As always, I'm fairly pleased with the results, though the steps it took me to get there were sometimes tortuous.
| REFERENCES |
http://en.wikipedia.org My thanks to Squadron Products for the preview kit. Get yours today at this link. February 2014
If you would like your product reviewed fairly and fairly quickly, please contactthe editor or see other details in the