Hobby Boss 1/72 UH-1F Huey
| KIT #: | 87230 |
| PRICE: | $25.00 SRP |
| DECALS: | Two options |
| REVIEWER: | Scott Van Aken |
| NOTES: |
| HISTORY |
Bell Helicopters was the winner of a 1963 United States Air Force competition for a support helicopter for use on its missile bases.
Bell had proposed the UH-1B for the competition but the USAF asked Bell to develop a special version of the "Bravo" in using the General Electric T58 turboshaft as a powerplant. The USAF already had a large inventory of these engines for its fleet of Sikorsky HH-3 Jolly Green Giant rescue helicopters and wanted to have commonality between the types. This engine was capable of 1,250 hp (932 kW) compared to the UH-1B's 1,100 hp (820 kW) T53-L11.
 In response Bell proposed an upgraded version of the UH-1B
with the T58 engine installed. The resulting UH-1F had the shorter cabin of the
"Bravo" Huey, but with the longer tail boom, rotor and transmission of the
UH-1D.
In response Bell proposed an upgraded version of the UH-1B
with the T58 engine installed. The resulting UH-1F had the shorter cabin of the
"Bravo" Huey, but with the longer tail boom, rotor and transmission of the
UH-1D.
Due to the Huey's configuration, Bell installed the T58 engine backwards compared to the HH-3. The Huey's engine is behind the transmission, whereas the HH-3's engines are in front of the transmission. Externally, the only visible differences from UH-1B were the engine exhaust, which exited to the right side of the engine and the longer tail boom.
The UH-1F was introduced into the USAF inventory on 20 February 1964. The USAF took delivery of 119 with production ending in 1967. Many of the aircraft served in southeast Asia with the 20th Special Operations Squadron and some were converted to the armed UH-1P configuration.
 In Italy, Agusta produced a similar model by re-engining the
204B with the 1,225 hp (914 kW) Rolls-Royce Gnome (license-built T58) turboshaft,
but later models used T58s. The AB204B was exported to the military of the
Netherlands, Austria, and Switzerland. It had a rescue hoist located at
the right side of the cabin.
In Italy, Agusta produced a similar model by re-engining the
204B with the 1,225 hp (914 kW) Rolls-Royce Gnome (license-built T58) turboshaft,
but later models used T58s. The AB204B was exported to the military of the
Netherlands, Austria, and Switzerland. It had a rescue hoist located at
the right side of the cabin.
The last UH-1F was retired from the USAF in the early 1980s when it was replaced by the UH-1N. many of these aircraft later served as forest fire fighting aircraft with various US state governments and agencies.
There was a TH-1F trainer also built for the USAF. The first TH-1F was flown in January 1967 and deliveries ran from April to July of that year with 27 completed.
| THE KIT |
Molded
in five sprues with one clear, this is the second F variant to be done in this
scale with Italeri doing it first. The molding is very well done as we have come to
expect from Hobby Boss. There is a full interior that includes the armored seats
and there is a collective control in addition to the cyclic. There is good
detailing the cabin and one has a variety of options that include ammo drums or
seats depending on whether or not you wish your aircraft armed or not.
For armament there are a goodly selection of rocket
 pods or machine guns than
can be added. Of course, if one is doing the strictly SAR version, you won't be
putting any of those on the model. The fuselage does include the grooves on the
lower side into which one will put the braces for the weapons pylons.
pods or machine guns than
can be added. Of course, if one is doing the strictly SAR version, you won't be
putting any of those on the model. The fuselage does include the grooves on the
lower side into which one will put the braces for the weapons pylons.
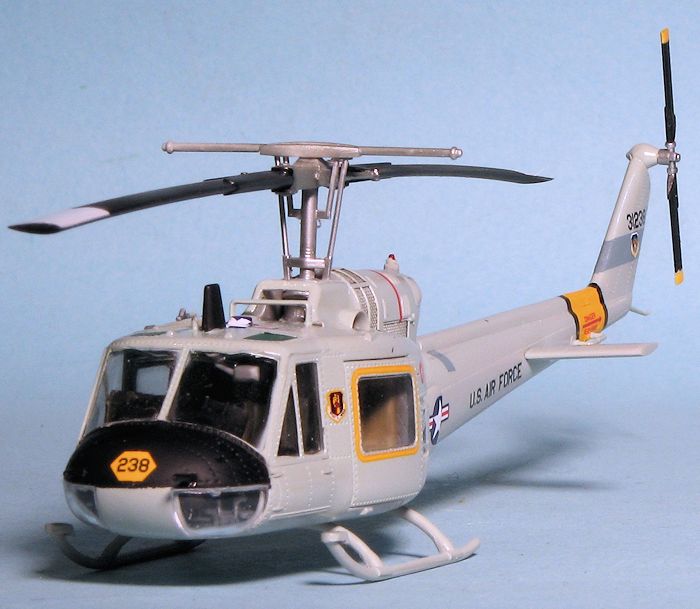
Another armament option is a nose mounted grenade launcher so you can have a pretty heavily armed helo if you wish. There are separate cabin doors, though the instructions shown them as being closed. The clear sprue is very well done so one will be able to see the work done on the interior.
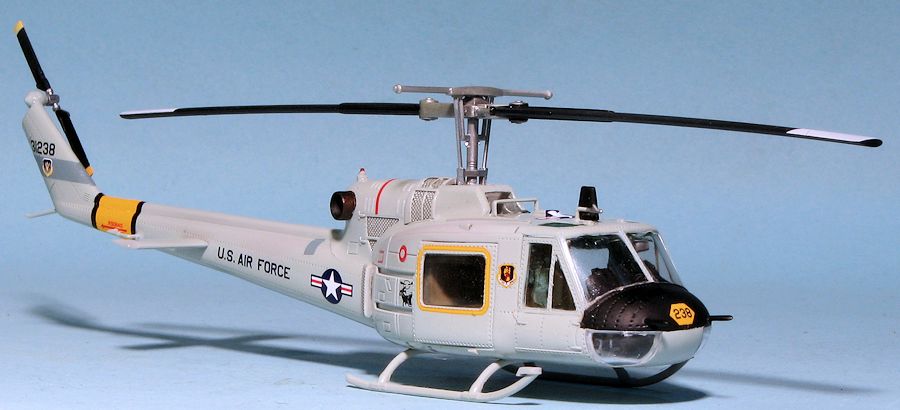
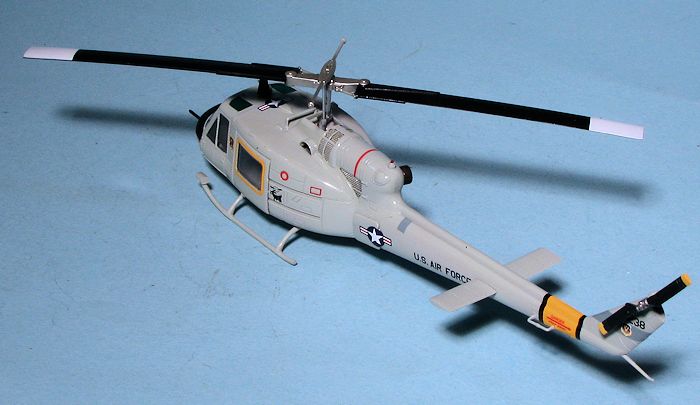
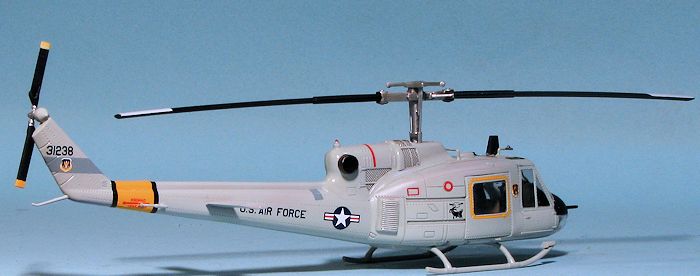
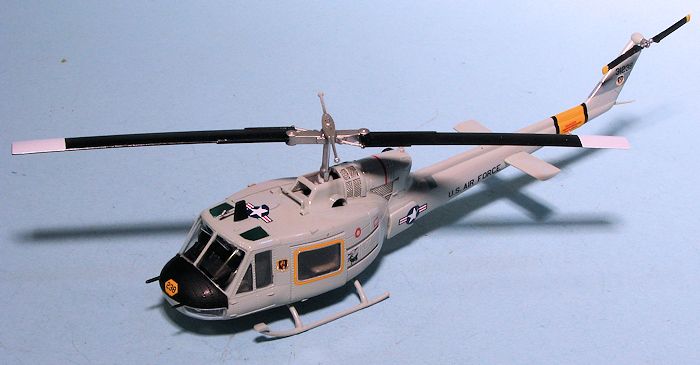
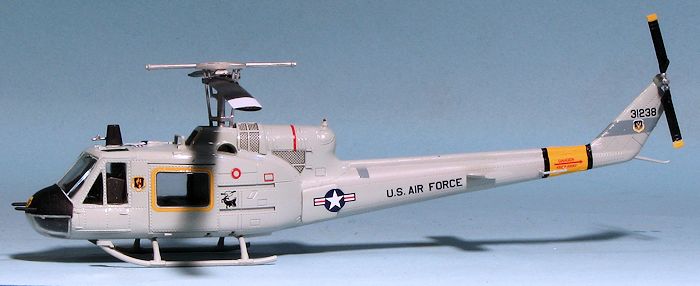
Building instructions are well done with color information using Gunze paints. There will need to be holes drilled for some of the options and those are clearly shown. The full color painting and decal guide offers two versions. One is the box art aircraft in overall ADC grey as flown bythe 37 ARRS at Ellsworth AFB in 1973.The other is in Olive Drab over Grey camouflage and was the bicentennial plane from the 58TTW at Luke AFB in 1976. Decals are well printed and quite colorful.
| CONSTRUCTION |
Inspired by Richard F's recent AH-1S build, I thought it was
time for me to do another helicopter. It has been quite some time since the last
one and I have a few to choose from. I picked the UH-1F version. I've always
liked this variant, as much for the side exhaust as anything. Since both options on the decal sheet are stateside planes,
they would not be armed so you can pretty well stash away one full sprue and
half of 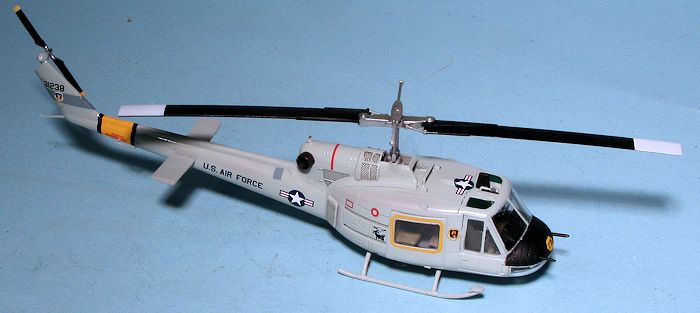 another. This kit is obviously designed to do several early Hueys as the
skinny 'F only' sprue attests. In fact Hobby Boss kits both a B and C version as
well as this one. I am not a Huey expert, but I'll bet they used the same
fuselage halves for all three kits, which means that probably only one has the
proper tail boom. I cannot tell if this is the skinny fin B, wider fin C or the
longer D version. The latter should be the one on this kit.
another. This kit is obviously designed to do several early Hueys as the
skinny 'F only' sprue attests. In fact Hobby Boss kits both a B and C version as
well as this one. I am not a Huey expert, but I'll bet they used the same
fuselage halves for all three kits, which means that probably only one has the
proper tail boom. I cannot tell if this is the skinny fin B, wider fin C or the
longer D version. The latter should be the one on this kit.
Anyway, the first thing I did was to start assembling the interior. I built up the aft cabin pieces and installed the two small nose sections. I then painted all the interior bits with dark gull grey, using Testors enamels and my trusty paint brush. The instructions state 'aircraft grey', but I think that is too light. I then did a bit of detail painting with matte black on the console, nose section and instrument panel anti-glare shield. Note that the instrument panel itself should be grey. While that was drying I glued together the gearbox piece, trapping the rotor shaft piece in it.
I then painted the forward seat OD with khaki cushions. I also painted the cabin seats khaki. The forward cabin seats needed to have holes opened up for them. There are also a couple of holes in the sides of the fuselage that need to be opened up to take parts. Those bits were added once the holes were ready. I also glued the upper engine parts to each side of the fuselage as shown in the instructions.
Hueys are tail heavy and there isn't a lot of places to put weight. I crammed as much as I could in the very front and also filled in the area under the center console. It is probably not enough, but we'll see once it is on the landing gear. The foot pedals, collective and cylic were then installed along with the seats. Now I have to say that I doubt that the armored plating was installed on the two markings options, but there are no alternatives other than some plastic hacking so I left them as they were.
 I then glued the cockpit/cabin assembly into one of the
fuselage halves. I have to say that so far, the fit on this kit has been very
good. The rotor head section was glued in and the other half of the fuselage
cemented into place. I quickly test fit the skids to see if I had enough weight
and was pleased to see that I did as it did not rock back on the boom. I then
masked off the cockpit clear section save for the upper windows. Though the
instructions do not show it, every picture I found of this aircraft showed them
tinted green. I sprayed on some AK Interactive clear green to simulate this.
I then glued the cockpit/cabin assembly into one of the
fuselage halves. I have to say that so far, the fit on this kit has been very
good. The rotor head section was glued in and the other half of the fuselage
cemented into place. I quickly test fit the skids to see if I had enough weight
and was pleased to see that I did as it did not rock back on the boom. I then
masked off the cockpit clear section save for the upper windows. Though the
instructions do not show it, every picture I found of this aircraft showed them
tinted green. I sprayed on some AK Interactive clear green to simulate this.
Next, I painted the upper portion of the landing skid and the cabin doors with FS 16473, ADC Grey. Prepainting these meant I could just install the windows in them without having to mask them. The tailplanes were then glued on and after I dealt with the seams, I started putting on more pieces. This included the landing skids (after gluing on the little caps), the clear bits into the doors, the rear view mirror and the upper antenna on the cockpit canopy pieces and the tail skid. I then glued on the doors and the cockpit clear bit. I left off the VHF navigation antenna (the 'hand holds') as a decal was to go over that area. The small nose probes were installed and then the pitot tube. The HF hoop antenna was glued to in front of the rotor box intake and that pretty well took care of all the bits. I stuffed the rotor area with tissue as well as the lower nose footwell pieces.
| COLORS & MARKINGS |
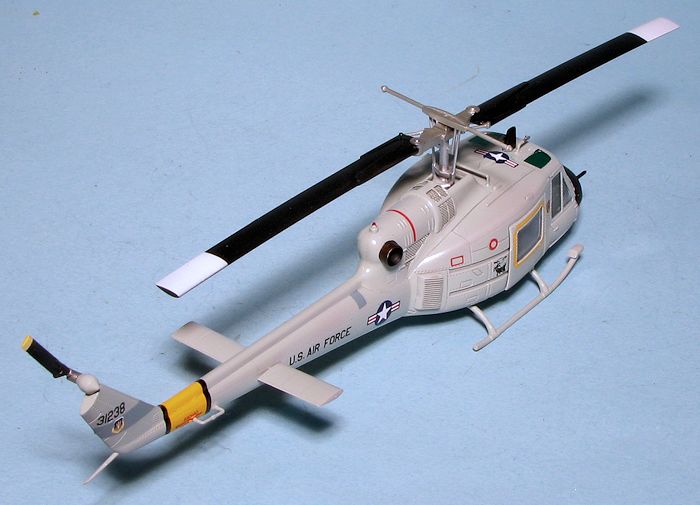 in the instructions, the main rotor blades had large white tips on the upper
side to make them more easily visible by friendly aircraft. This area was
painted on as were the yellow tips of the tail rotor. The decal sheet
includes the tail rotor stripes, but painting looks nicer. I also used a
dark wash on all the engine vent screens to make them a bit more visible.
in the instructions, the main rotor blades had large white tips on the upper
side to make them more easily visible by friendly aircraft. This area was
painted on as were the yellow tips of the tail rotor. The decal sheet
includes the tail rotor stripes, but painting looks nicer. I also used a
dark wash on all the engine vent screens to make them a bit more visible. | CONCLUSIONS |
 This was very much a fun
build marred only by the decal issues mentioned above. Total build time,
including painting was about four days with much of that time spent on painting.
If the rest of the Hobby Boss helo kits are this nice, then they should all be a
joy to build.
This was very much a fun
build marred only by the decal issues mentioned above. Total build time,
including painting was about four days with much of that time spent on painting.
If the rest of the Hobby Boss helo kits are this nice, then they should all be a
joy to build.
| REFERENCES |
http://en.wikipedia.org/wiki/Bell_UH-1_Iroquois
April 2015
If you would like your product reviewed fairly and fairly quickly, please contact the editor or see other details in the Note to Contributors.