Classic Airframes 1/48 TA-4J Skyhawk
| KIT #: | 4147 |
| PRICE: | $55.00 MSRP (you can easily find it for less) |
| DECALS: | Four options |
| REVIEWER: | Scott Van Aken |
| NOTES: | Short run with resin parts. |
| HISTORY |
 The Skyhawk is old enough to be considered an antique with the first plane
flying in June 1954. The first two seat version, theTA-4F, took to the air in
June of 1965. There are still a number of the later models still in service
throughout the world, though in the US, the last ones were retired in 2003.
There were generations of pilots who learned fast jet flying on the TA-4, an
aircraft that not only looks sweet but was perfect for teaching advanced jet
tactics and carrier landings. In its last decades the twin seat A-4 was used for
Fast FAC by the Marines and as an aggressor platform. It is this last task with
its myriad of interesting camouflage schemes that draws the greatest interest.
The Skyhawk is old enough to be considered an antique with the first plane
flying in June 1954. The first two seat version, theTA-4F, took to the air in
June of 1965. There are still a number of the later models still in service
throughout the world, though in the US, the last ones were retired in 2003.
There were generations of pilots who learned fast jet flying on the TA-4, an
aircraft that not only looks sweet but was perfect for teaching advanced jet
tactics and carrier landings. In its last decades the twin seat A-4 was used for
Fast FAC by the Marines and as an aggressor platform. It is this last task with
its myriad of interesting camouflage schemes that draws the greatest interest.
| THE KIT |
The
Classic Airframes kit is not the only two seat Skyhawk done in this scale.
Fujimi did the aircraft in 1/50, which was later marketed as 1/48. It is best
left alone as it is quite crude by even the standards of the day. Monogram later
did the OA-4M and many hoped for a TA-4F/J, but it was not to happen. Converting
the OA-4 into a TA-4 was possible, but the biggest problem was in the canopy
area as the OA-4 had a canopy and windscreen that were not the same as the TA
versions. Still, many did the cons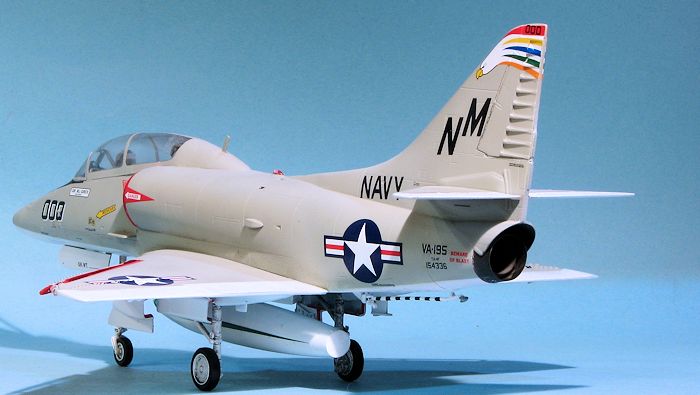 iderable work to bring it back to TA-4
standards.
iderable work to bring it back to TA-4
standards.
Many of parts used in this kit look very much like they were inspired if not directly copied from the Hasegawa kit. Of course, it may just be coincidence as there are only so many ways to mold an A-4. Regardless, the kit is very nicely molded by one of the Czech companies. As building was to discover, looking nice and building well are two different things. CA farms out all of its kit requirements, only producing the box and instructions in the US.
As it is a short run kit, it has some short run features. One are ejector towers inside the fuselage, intakes, wings, and the compressor intake section. Most will be easy to remove, though the depressed intake compressor section and curved intake interiors will require a bit more work. I also noticed that the sprue with the ACMI pod was slightly misaligned so care is needed not to have an oval pod. Typical of many short run kits, the sprue attachment points are rather thick. Several pieces broke away from these points during shipment, leaving gouges in some of the parts. I recommend using a micro saw to remove all of the injected plastic bits as these large sprue gates are also on the very nicely done clear bits as well. I also found sink areas on many of the thicker small parts such as the slat attachment arms. This is not unusual with these kits and all can easily be repaired.
The kit has few options, mainly what is carried under the wings. You have a pair of fuel tanks with fins and a sidewinder rail for the ACMI pod. A centerline fuel tank without the fin section is also included. Skyhawks often flew without pylons and just a centerline tank or even without anything under the fuselage if the mission was short. Another option is to have the canopy open, though there is no rear hinge mechanism.
There
is the usual bag of resin parts and these are superbly molded. They are what
could be considered 'old school' resin with the large pour stubs. The ESCAPAC
seats are especially nicely done with molded on harness and the 'head knocker'
in the down position as it
would be on
the ground. Equally nice are the main wheel wells with tons of detailing. The
cockpit is made up of several sections, one of which is the nose gea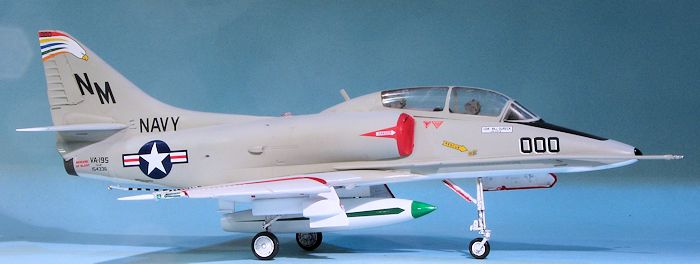 r well. One
of the resin bits is the exhaust cone, which on mine got ripped during shipping.
I should also mention that this kit was purchased from Squadron and arrived
rather crunched. The person resizing the box made it too small and when it was
closed and taped, it crushed the flimsy CA box rather badly. Fortunately, damage
to the kit was minimal, but it was not non-existent.
r well. One
of the resin bits is the exhaust cone, which on mine got ripped during shipping.
I should also mention that this kit was purchased from Squadron and arrived
rather crunched. The person resizing the box made it too small and when it was
closed and taped, it crushed the flimsy CA box rather badly. Fortunately, damage
to the kit was minimal, but it was not non-existent.
It is obvious from the generic TA-4J instructions that there will be many more boxings. The sprue has open areas for the guns when one does a TA-4F and I should point out that it was not uncommon to see TA-4Js also armed. However, none of the Aggressor aircraft were and that is what this boxing is all about. 16 well drawn construction steps are provided with generic color references for wheel wells, cockpit and so on. There are four decal options, all aggressors from the early/mid 1980s in various schemes. The separate markings guide does provide FS 595 paint references. First off is the box art plane from VA-127 in Dark Green, Grey and Light Brown. Next are two VF-126 aircraft. One is in Medium Blue Grey and Light Grey while the other is in Dark Green, Mediuim Green and Sand Brown with Light Grey wing undersides. Finally, from VC-8 is one in Dark Blue-Grey, Medium Glue-Gry and Light Blue-Grey. Decals are nicely printed by Cartograf in Italy. The decal numbers are missing from the sheet so an addendum sheet was added. As you can see from the image above, it was not uncommon to find aircraft with replacement slats and the paint was often retouched several times, making for interesting schemes.
| CONSTRUCTION |
 back on the shelf for
reasons now unknown. In the meanwhile, Hasegawa had finally decided to
release the TA-4 in their standard kit line and that pretty well made this
kit redundant and a lot less desirable. C.A. went out of business quite
shortly after the release of this kit and so no other boxings were done.
Since Hasegawa's kit release, MPM/SH saw the writing on the wall and have
never reissued it.
back on the shelf for
reasons now unknown. In the meanwhile, Hasegawa had finally decided to
release the TA-4 in their standard kit line and that pretty well made this
kit redundant and a lot less desirable. C.A. went out of business quite
shortly after the release of this kit and so no other boxings were done.
Since Hasegawa's kit release, MPM/SH saw the writing on the wall and have
never reissued it. 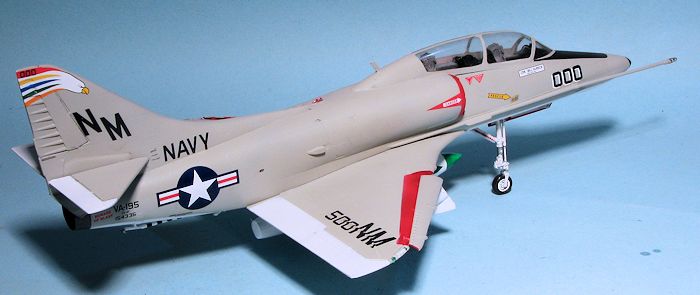 With all that in place, the wings were assembled and the gun plugs attached
and smoothed in place. Then I glued the wing to the lower fuselage. Aside
from the forward portion, the fit was pretty good. Before gluing the wings,
I looked for holes for the centerline rack mount. There aren't any. With the
wings in place, the tailplanes had the mounting holes opened and after some
cleanup of the tabs, these were glued on. Meanwhile, I glued the intake
halves together and attached those to the fuselage. On the underside the
fuel dump (at least I think that is what it is) was glued on. I then
attached all the slat rails to the forward wing and the blast shields. Even
though this plane has no guns, it still has the shields as TA-4s could be
armed.
With all that in place, the wings were assembled and the gun plugs attached
and smoothed in place. Then I glued the wing to the lower fuselage. Aside
from the forward portion, the fit was pretty good. Before gluing the wings,
I looked for holes for the centerline rack mount. There aren't any. With the
wings in place, the tailplanes had the mounting holes opened and after some
cleanup of the tabs, these were glued on. Meanwhile, I glued the intake
halves together and attached those to the fuselage. On the underside the
fuel dump (at least I think that is what it is) was glued on. I then
attached all the slat rails to the forward wing and the blast shields. Even
though this plane has no guns, it still has the shields as TA-4s could be
armed. | COLORS & MARKINGS |
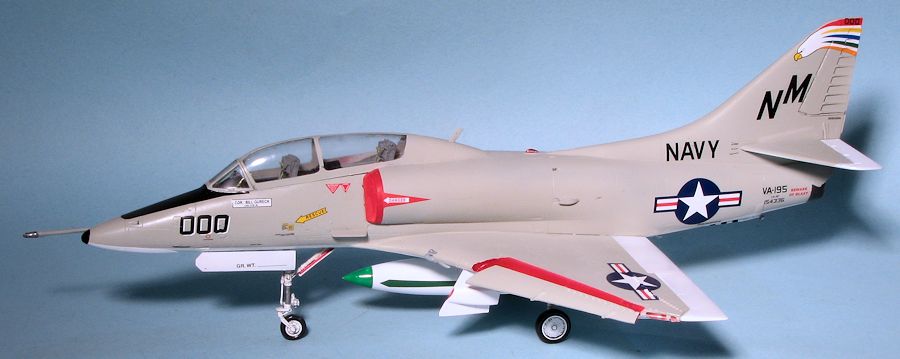
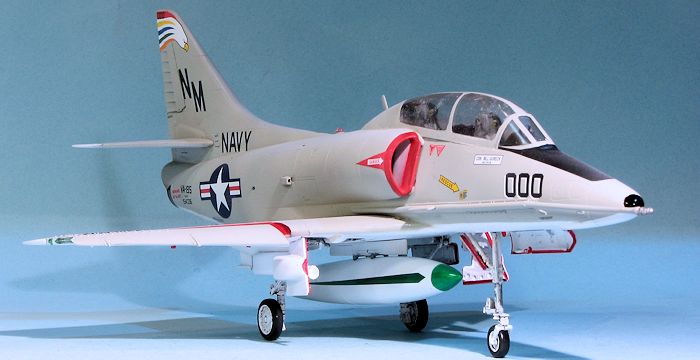
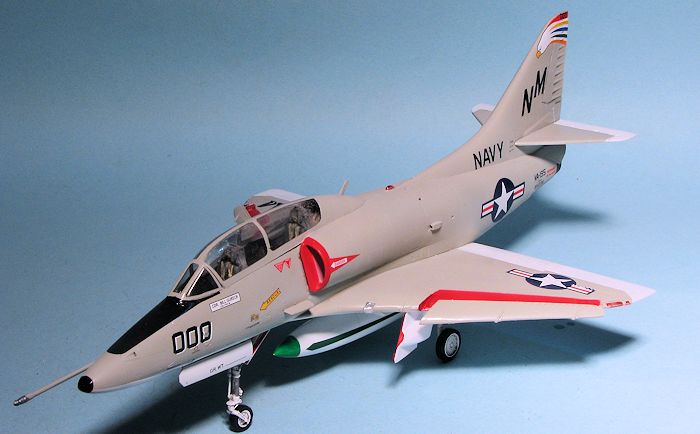
 Despite the nice options provided in the kit's sheet, I decided to save
those for another day and used Superscale sheet 48-1223 that included
markings for the VA-195 CAG (though the instructions call it VF-196). This aircraft is light gull grey over white. I
first painted the entire underside, the upper control surfaces save the
rudder and the area under the slats with white. These were masked off on the
upper side save the slats well which was painted red. This was then masked
and the upper surface painted light gull grey. I used Testors for the LGG
and Tamiya for the white. The gull grey area showed some areas that needed
more filler so those were taken care of and repainted. In the meanwhile I
added the upper radio antenna aft of the cockpit after drilling the mounting
hole. The refueling probe was also attached.
Despite the nice options provided in the kit's sheet, I decided to save
those for another day and used Superscale sheet 48-1223 that included
markings for the VA-195 CAG (though the instructions call it VF-196). This aircraft is light gull grey over white. I
first painted the entire underside, the upper control surfaces save the
rudder and the area under the slats with white. These were masked off on the
upper side save the slats well which was painted red. This was then masked
and the upper surface painted light gull grey. I used Testors for the LGG
and Tamiya for the white. The gull grey area showed some areas that needed
more filler so those were taken care of and repainted. In the meanwhile I
added the upper radio antenna aft of the cockpit after drilling the mounting
hole. The refueling probe was also attached. 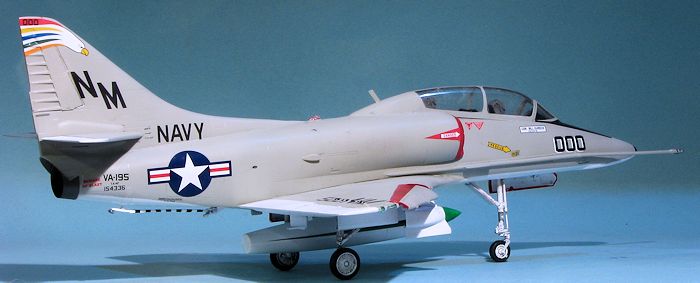 one
as masked around and painted steel. I then attached the gear doors. Note
that the large main gear doors need the attachment areas on the wing
enlarged considerably in order to get them to fit properly. I misted on some
clear matte as the light gull grey of the era was matte.
one
as masked around and painted steel. I then attached the gear doors. Note
that the large main gear doors need the attachment areas on the wing
enlarged considerably in order to get them to fit properly. I misted on some
clear matte as the light gull grey of the era was matte. | CONCLUSIONS |
This was one of those kits that turned into a real challenge from the get go. Even for limited run plastic this one had a lot of issues. Rumor had it that Classic Airframes kits were developed by the 'second team' at a well known Czech model company and I can believe it. In all the CA kits I have built over the years, none of them have really been well engineered and I've had to use a lot of work to finish them. In this case it was just stubbornness to get something started off the shelf of DOOM. If you see this kit, even at the cheap, you'd be advised to pass it by and spend the few dollars more for the Hasegawa offering.
August 2015
If you would like your product reviewed fairly and quickly, please contact me or see other details in the Note to Contributors.