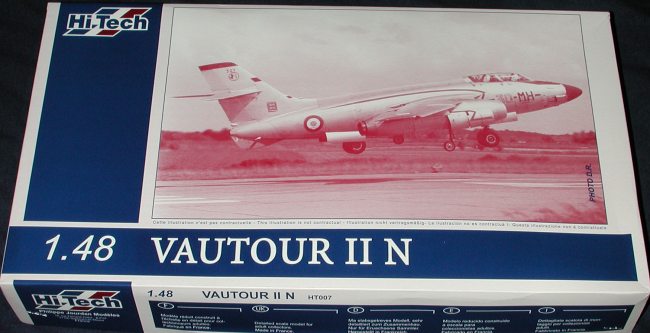
| KIT: | Hi-Tech 1/48 Vautour IIN |
| KIT # | 007 |
| PRICE: | $45.00 |
| DECALS: | One aircraft |
| REVIEW & | |
| NOTES: | Short run with resin/metal/vacuformed parts |
| HISTORY |
I know darn little about the Vautour, despite the fact that Ithink it is a neat looking plane. Vautour means 'Vulture', it was used quiteextensively by the Israeli Air Force during their wars of the 60's and 70's asan attack aircraft and the N is a two-seat fighter. That pretty well completesthings. I have several slides of Vautours with ECTT 2/30 as this unit was (Ibelieve) the last to fly the plane other than the test units and did so in therole of training bomber/navigators for the Mirage IV. Again, I'm not sure aboutall this so would appreciate any additional detail as my references on the planeare sparse indeed.
| THE KIT |
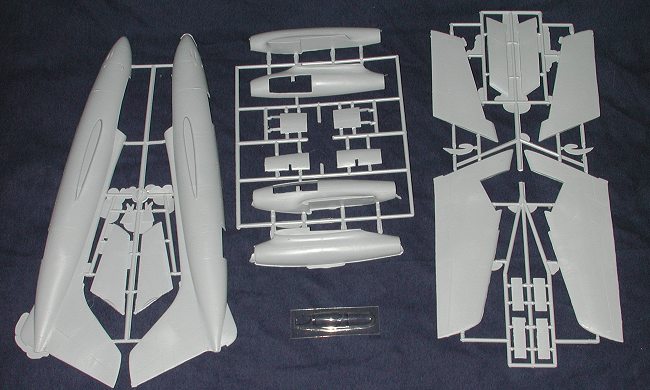
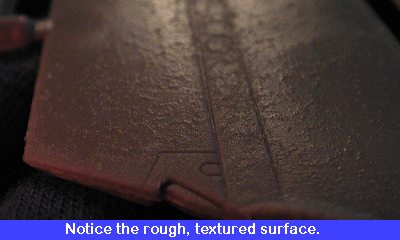 If you read myreview on Hi-Tech's Mystere IV, you know that I had alot of obstacles to overcome when building that particular kit. So my eyes werewide open as to what to expect from this kit. There are a few differencesbetween the two kits. One is that this one is MUCH larger and so has moreinjected plastic bits with it. These bits are the fuselage, wings, tailplanes,engine pods, wing fences (which would have been better if done in etched brass)and gear doors. These parts have quite a bit of flash and are also ratherroughly textured as if the mold was etched with rust or something. As you cansee from the rather dim image of one of the tailplanes to the right, this iswhat the surface looks like. It can be cured by sanding, which in my experienceyou will do quite a bit of!
The kit also includes one clear plastic canopy. I would reallywish that people who give us vac canopies would provide a spare. It cannot bethat much more expensive.
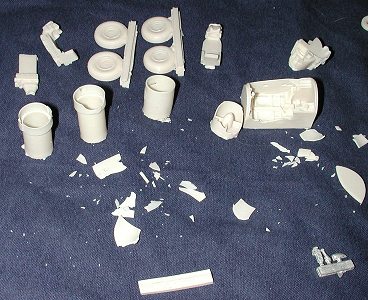 | 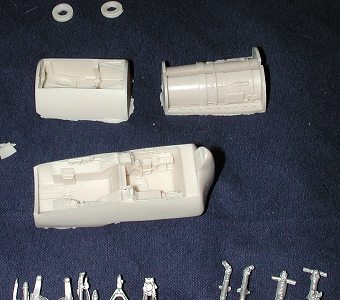 |
Shown above are the resin bits that come with the kit. Theyconsist of cockpit tub, wheel wells, engine sections, instrument panels, seats,wheels and intake/exhaust cones. Hi-Tech packages all the resin pieces, largeand small in one bag. As a result, the large pieces have made mincemeat of manyof the smaller ones.
If you look at the images, you can see the partsthat were broken. The forward section of the cockpit can easily be repaired, butthe rest cannot. This includes one of the wheel wells, one of the intakes andone of the exhausts as well as having a resin block that I have no idea whatfits on it. There is no parts listing in the instructions so I don't know whatis supposed to go there. More careful packaging such as placing the light andheavy bits in separate bags and perhaps wrapping them with a small piece ofbubble wrap will prevent this from happening. I'd be willing to pay the extra 5or 10 cents that this would cost. I have written to the manufacturer requestingreplacements and included the image to the left to show the damage. It will beinteresting to see if I get new ones as the kit is basically unbuildable withoutthem. (Later) Well, my e-mails to Hi-Tech went unanswered, however, Squadron,where I bought the kit, was kind enough to send me a complete new set of resinparts after I sent in a customer satisfaction card that came with the kit. Theydidn't have to do that as it wasn't their fault. It is customer service likethat which has kept me as a steady customer for over 20 years.
 There is a nice etched brass fret,made by Eduard, with things like wheel hubfaces, parts of the ejection seats, harnesses, instrument panels, wheel doorhinges and some other bits. The landing gear parts and a few antennas/intakesare in metal so should be strong enough to hold up the kit. The instructionsheet is really not that well done. There are some overly detailed images of theinterior where it is hard to see exactly where the parts fit. There are alsodetail images of the landing gear, but you must make part of the shocks fromstretched sprue as well as the landing lights. Personally, I'd use small metalrod for the shock parts as they are load bearing and will not hold up if done inplastic. The rest of the sheet shows a semi-exploded view of where the rest ofthe parts go. If you'd built this kit several times and were quite experiencedin short run kits, this would be good enough, but not for the rest of us. Wedon't see how the interior or wheel wells fit in the fuselage. We don't see howto attach the landing gear. You will have to make an attachment support for theoutriggers. The wheels of the outriggers are nothing but two thin etched brassdiscs on which you are supposed to fit the resin tires. Why not do both wheelsand tires as a single resin piece and tack the etched hubs on them as with themain gear?
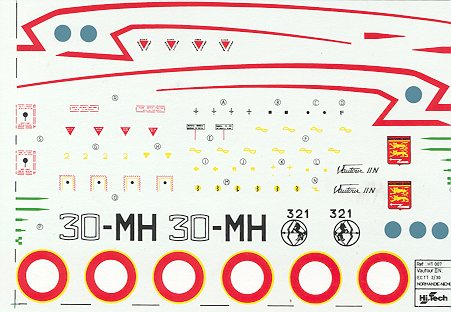 There are decals for a single aircraft from ECTT 2/30 'Normandie-Niemen'.The decals are well printed, in-register and semi-glossy. These seem to be verynice and while I would have liked additional options, if you have a Carpena 1/48sheet of French codes and insignia, you can do other units (though I haven't aclue as to who else flew the plane!). The painting for the aircraft if overallaluminum paint with a light grey spine and red wing tips.
Having gotten replacements for the broken resin parts, I'llbuild the kit, but you must be aware that the packaging is poor and that thesame can happen to you. Unless you really want to do a Vautour, I'd thinklong and hard on this one until the quality control, instructions, and packaging improves.
Review kit courtesy of me and my ever thinning wallet!
If you would like your product reviewed fairly and fairly quickly by asite that averages over 2,800 visits a day, please contactme or see other details in the