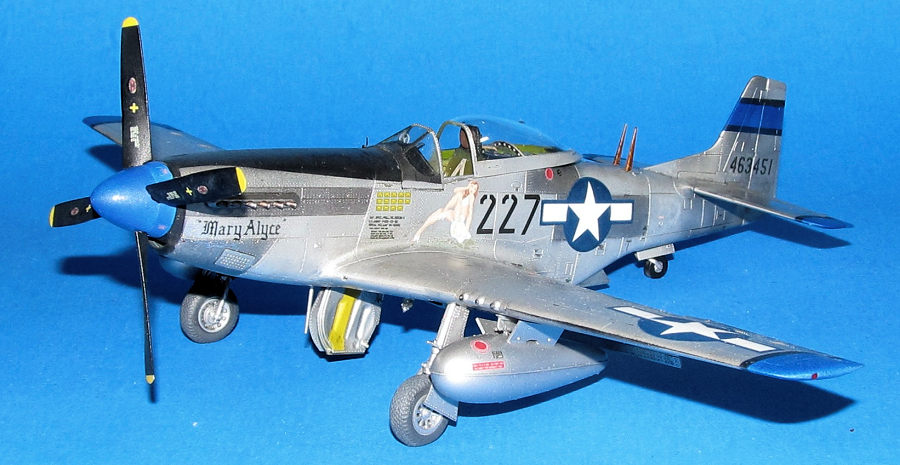
Eduard 1/48 P-51D "VLR: Tales of Iwo Jima"
| KIT #: | 11142 |
| PRICE: | $59.95 |
| DECALS: | Twelve options |
| REVIEWER: | Dan Lee |
| NOTES: |
| HISTORY |
The P-51D Mustang is more famous for combat in Europe, but was also used in the Pacific near the end of WW2. After the capture of Iwo Jima by the USMC, the US Army Air Force and USN Seabees worked on turning it into a giant fighter and bomber base. The main purpose of this base was to provide a very long range fighter escort for B-29 bomber streams heading to and from Japan as well as a landing strip for damaged bombers unable to make it back to Guam or Tinian.
 The 21st
Fighter Group was formed in 1943 after the 21st
Bombardment Group was disbanded. It was assigned to the 7th
Fighter Command along with the 15th
Fighter Group which was tasked to defend the Hawaiian islands from attack. They
and the 506th Fighter Group moved
from Hawaii to the Central Pacific and finally Iwo Jima. The fighter group's
first combat based on Iwo Jima turned out to be a night infantry defence against
desperate Japanese survivors where they suffered 16KIA and 50WIA (including
their commander.) The next four months, they conducted fighter sweeps and escort
missions for B-29 bomber streams. After the war, the 21st
Fighter Group was deactivated in 1946. Reactivated in 1952 as a Tactical Fighter
Group till it was inactivated in 1958. It was reactivated in 1991 to provide air
defence for Alaska for less than a year. The 21st
was reactivated in 1992 as the 21st
Space Wing to be part of the USAF Space Command. Their mission is to provide
early warning and battle management for space units. When Space Force was made a
separate service in 2020, the 21st
Space Wing was renamed Space Delta 2.
The 21st
Fighter Group was formed in 1943 after the 21st
Bombardment Group was disbanded. It was assigned to the 7th
Fighter Command along with the 15th
Fighter Group which was tasked to defend the Hawaiian islands from attack. They
and the 506th Fighter Group moved
from Hawaii to the Central Pacific and finally Iwo Jima. The fighter group's
first combat based on Iwo Jima turned out to be a night infantry defence against
desperate Japanese survivors where they suffered 16KIA and 50WIA (including
their commander.) The next four months, they conducted fighter sweeps and escort
missions for B-29 bomber streams. After the war, the 21st
Fighter Group was deactivated in 1946. Reactivated in 1952 as a Tactical Fighter
Group till it was inactivated in 1958. It was reactivated in 1991 to provide air
defence for Alaska for less than a year. The 21st
was reactivated in 1992 as the 21st
Space Wing to be part of the USAF Space Command. Their mission is to provide
early warning and battle management for space units. When Space Force was made a
separate service in 2020, the 21st
Space Wing was renamed Space Delta 2.
| THE KIT |
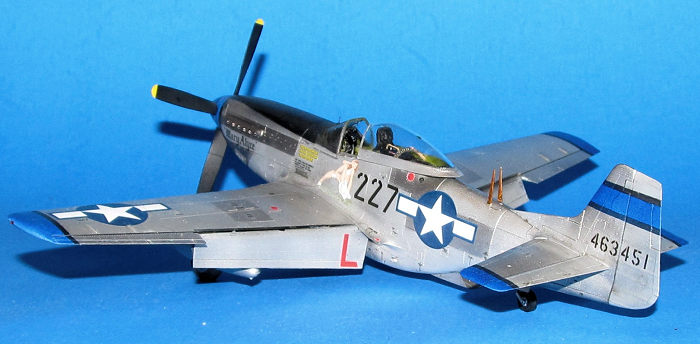
Eduard provides their Profipak kit of the later marks of the P-51D with VLR fuel tanks. See Da Boss's preview of the early Mustang.
The main difference is that this special offering comes with the larger fuel tanks including P-38 style fuel tanks used on VLR missions, the different antenna used and 12 different markings used by Iwo Jima P-51Ds as well as the D-20/25 fuselage with the later fin fillet.
| CONSTRUCTION |
 It all
began with the wheel well. I cleaned up each interior wheel well part to
remove the sprue nubs the best I could. Each part was painted as per
instructions (I used a 50/50 mix of Tamiya Yellow Green and Flat Yellow for
the Chromate Yellow.) The wheel well parts were then glued together and
added to the bottom wing piece. The upper wings were glued on with CA glue
along the outer seams and Tamiya extra thin along the interior. Next I added
the gun sections of both wings. The edges of the wings were sanded smooth
using 220/400/600 wet/dry sandpaper till they were relatively smooth and the
seam was solid. I polished them further with 1800/3200/3600/4000 grit
polishing cloths to remove most of the big scratches. Next I did the same
(CA glue for the exterior seams, sanding, polishing) for the ailerons.
It all
began with the wheel well. I cleaned up each interior wheel well part to
remove the sprue nubs the best I could. Each part was painted as per
instructions (I used a 50/50 mix of Tamiya Yellow Green and Flat Yellow for
the Chromate Yellow.) The wheel well parts were then glued together and
added to the bottom wing piece. The upper wings were glued on with CA glue
along the outer seams and Tamiya extra thin along the interior. Next I added
the gun sections of both wings. The edges of the wings were sanded smooth
using 220/400/600 wet/dry sandpaper till they were relatively smooth and the
seam was solid. I polished them further with 1800/3200/3600/4000 grit
polishing cloths to remove most of the big scratches. Next I did the same
(CA glue for the exterior seams, sanding, polishing) for the ailerons.
The interior parts were painted using Mission Model US interior green while the seat was painted dark green. I selected the blank IP panel and used the Photo-etched IP and details. Next I took what PE parts I figured would be seen and left off many of the levers as I didn't have the patience to add them in areas I could barely see. Only the exposed ones I added. The PE belts were added to the seat.
I painted the remaining interior parts
including the radio compartment, tail wheel well and the radiator/oil cooler
as per instructions. Once the paint was dry I added the fuselage halves
together (CA glue on the exterior seams, Tamiya extra thin cement on the
interior connections.) I sanded the seams away and mad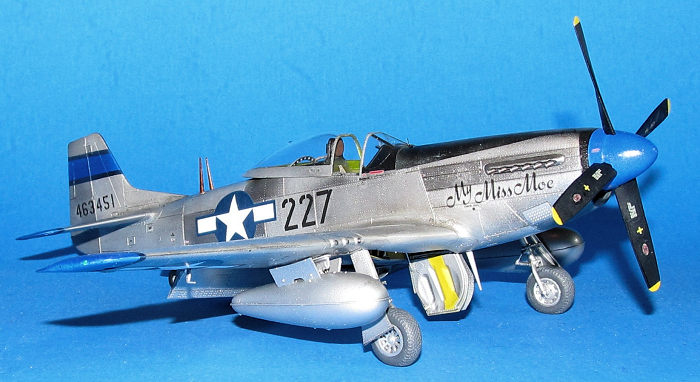 e
sure not to destroy as much of the fine detail as possible. I ended up
replacing the top rivets using a ponce wheel. I had to go over the holes
twice so that they would be deep enough. The panel lines were rescribed
using a small thin razor saw.
e
sure not to destroy as much of the fine detail as possible. I ended up
replacing the top rivets using a ponce wheel. I had to go over the holes
twice so that they would be deep enough. The panel lines were rescribed
using a small thin razor saw.
The wings, intake and fuselage were glued together using Tamiya Extra thin cement except where the wings joined the fuselage (CA glue was used instead to eliminate any possible phantom seam.) The seam was quickly eliminated with some fine grit sandpaper and various grits of polishing cloths.
The resin wheels were masked and painted using the kit supplied masking aluminum hubs and german grey Tamiya XF-63 for the rubber. The rest of the landing gear was assembled and painted including the oleo scissors and doors.
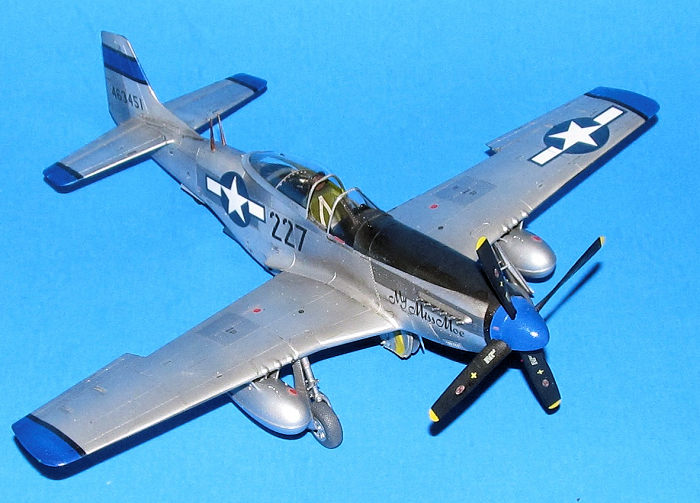
Next I cleaned up, assembled and painted the prop with black Badger Stynylrez primer and the tips were masked off and painted flat white then flat yellow for the warning tips. After a quick inspection and repair of the seams, the plane and major parts were ready for painting.
| COLORS & MARKINGS |
The P-51Ds near the end of the war were bare metal. I masked off the cockpit with low tack tape and stuffed packing sponges Eduard used for some of their resin items into the wheel wells, intakes and exhausts. Once everything was secure, I sprayed on one coat of Badger Black Stynylrez primer. I would usually find those seams which weren't sanded and polished completely smooth. Once I polished away the oopsies and smoothed down the rough patches of the 1st primer coat then I sprayed down the 2nd primer coat. I would polish this down to about 4000/6000 grit using sanding/polishing cloths in preparation for the metallic paints.
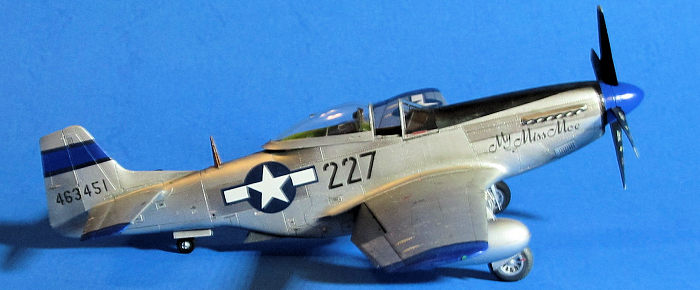
 Next
I masked off the wingtips and rudder areas where the bright blue paint was
going to go and sprayed down a coat of flat white. When the white paint was
dry I then sprayed on the Gunze Bright Blue paint in two light coats. When
it was dry I masked off the blue areas and then the black stripes on the
edges of the bright blue areas as well as the anti-glare panel and a small
section of the nose. The wing and aileron stripes didn't look so good so I
masked the black sections off and sprayed on Gunze Gloss Black to make the
black stripes darker.
Next
I masked off the wingtips and rudder areas where the bright blue paint was
going to go and sprayed down a coat of flat white. When the white paint was
dry I then sprayed on the Gunze Bright Blue paint in two light coats. When
it was dry I masked off the blue areas and then the black stripes on the
edges of the bright blue areas as well as the anti-glare panel and a small
section of the nose. The wing and aileron stripes didn't look so good so I
masked the black sections off and sprayed on Gunze Gloss Black to make the
black stripes darker.
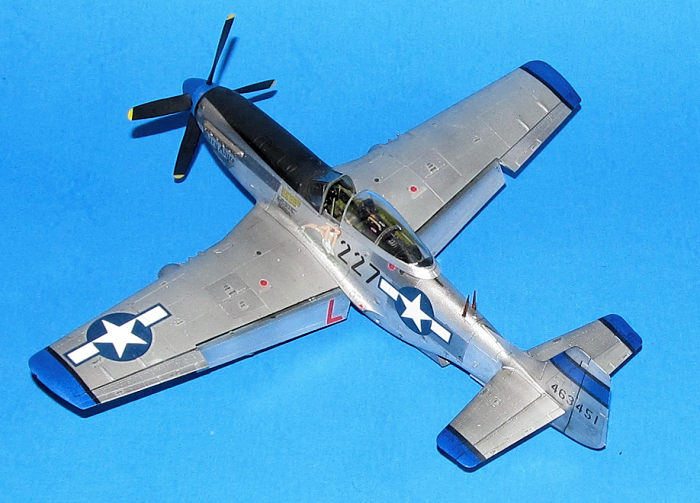
I sprayed on Vallejo Metal Color (VMC) Aluminum for fuselage. I avoided spraying on thick which always causes paint runs. I kept on spraying light coats till the paint builds up to the metallic shade I want. When it was dry, I masked off the fuselage and sprayed VMC Dull Aluminum for the wings to represent the lacquered wings (however, I opted not to fill in most of the wing panel lines because I was lazy and didn't want to do even more work.) When this was dry, I removed the fuselage masking and then masked off various fuselage panels plus the gun bays on the wings and sprayed on VMC Dark Aluminum (around the engine compartment) and VMC Duraluminum for the darker areas of the rear fuselage and the gun bay access doors. I sprayed on Vallejo Air Steel for the rudder. Finally I sprayed on Vallejo Metallic Gloss in preparation for the decals.
The decals were put on without too much trouble. I didn't peel off the decal clear material as I didn't think it was worth the trouble. Most of the clear decal film disappears under a light application of decal solution.
I used a combo of Tamiya Panel line wash and watercolors for weathering. The watercolors unfortunately ran a bit when I sprayed on Vallejo Acrylic Gloss so I had to do some touchups and then I sprayed on a final coat of Vallejo Acrylic Gloss.
| FINAL CONSTRUCTION |
A number of small clear pieces were added to the model. I like the idea of the small lights being represented by actually small clear pieces, but the execution took much longer due to the small lights flying out of my tweezers. The clear pieces were secured with a drop of Tamiya extra thin cement then painted the appropriate clear color.
 I added
the painted ailerons, exhaust ramp, landing gear and landing gear doors as
per the instructions and trying to get the correct angle on the landing
gear. The painted prop was assembled and glued together. I used a drop of
white glue to secure the prop to the shaft.
I added
the painted ailerons, exhaust ramp, landing gear and landing gear doors as
per the instructions and trying to get the correct angle on the landing
gear. The painted prop was assembled and glued together. I used a drop of
white glue to secure the prop to the shaft.
Next the painted canopy parts were added to the canopy hood. Next the entire assembly added to the model, but in the right position. The same for the gunsight parts and windscreen.
I sprayed the twin antennas with Tamiya Desert Yellow. After it dried, I dry brushed Model Master Acryl Burnt Sienna for the “wood pattern”. Next I sprayed on Tamiya clear orange for the final gloss as the final step to make the antennas look like wood (a bit out of scale to be honest.)
I used the Mark I eyeball to locate where to drill and position the antennas on the centerline spine. I was careful to avoid damaging the paint job (fortunately) when marking and drilling out the holes. Lastly, the tail wheel was glued in place and I finished my first Eduard P-51D build.
| CONCLUSIONS |
The Eduard P-51D lives up to its hype. Not as easy to build as the Airfix P-51D due to its fiddly nature and numerous tiny parts, but it is more accurate. I recommend the Eduard P-51D for those modelers of intermediate skill and above due to the number of tiny parts and assembly steps. Regardless, this kit was a fun build and my first ever Pacific Mustang.
12 March 2024
Copyright ModelingMadness.com. All rights reserved. No reproduction in part or in whole without express permission.
If you would like your product reviewed fairly and fairly quickly, please contact the editor or see other details in the Note to Contributors.