Airfix 1/72 Do-17Z
| KIT #: | A05010A |
| PRICE: | $ |
| DECALS: | Two options |
| REVIEWER: | Francisco Santoro |
| NOTES: | Some parts were really fiddly to build |
| HISTORY |
 The Dornier 17 began its life as every other
pre-war Luftwaffe bomber, a civilian aircraft capable of flying faster than any
other airliner in the 30s. It was an aircraft capable of transporting either
mail or a small amount of passengers inside its narrow fuselage. The fuselage
was so narrow that it was named “Flying Pencil.” It was also a fast aircraft,
matching the Luftwaffe’s requirement for a plane that could outrun enemy
fighters and thus, carry little defensive armament. The previous versions to the
Z saw action in the initial stages of WW2, while the Z-2 saw action during the
Battle of France and Britain, where it was shot down in numbers by the RAF
Hurricanes and Spitfires, proving the invincibility of the Luftwaffe bombers was
just a dream. The Do 17Z saw further action in the Eastern Front, and was used
as a nightfighter. Further development of the aircraft led to the Dornier 215s
and 217, the latter being used as a more potent nightfighter and and
anti-shipping bomber with the HS293 missiles.
The Dornier 17 began its life as every other
pre-war Luftwaffe bomber, a civilian aircraft capable of flying faster than any
other airliner in the 30s. It was an aircraft capable of transporting either
mail or a small amount of passengers inside its narrow fuselage. The fuselage
was so narrow that it was named “Flying Pencil.” It was also a fast aircraft,
matching the Luftwaffe’s requirement for a plane that could outrun enemy
fighters and thus, carry little defensive armament. The previous versions to the
Z saw action in the initial stages of WW2, while the Z-2 saw action during the
Battle of France and Britain, where it was shot down in numbers by the RAF
Hurricanes and Spitfires, proving the invincibility of the Luftwaffe bombers was
just a dream. The Do 17Z saw further action in the Eastern Front, and was used
as a nightfighter. Further development of the aircraft led to the Dornier 215s
and 217, the latter being used as a more potent nightfighter and and
anti-shipping bomber with the HS293 missiles.
Of the more than 1100 Do 17s built, only one was recovered from the depths of the English Channel in 2013, and now awaits restoration by the Royal Air Force Museum.
| THE KIT |
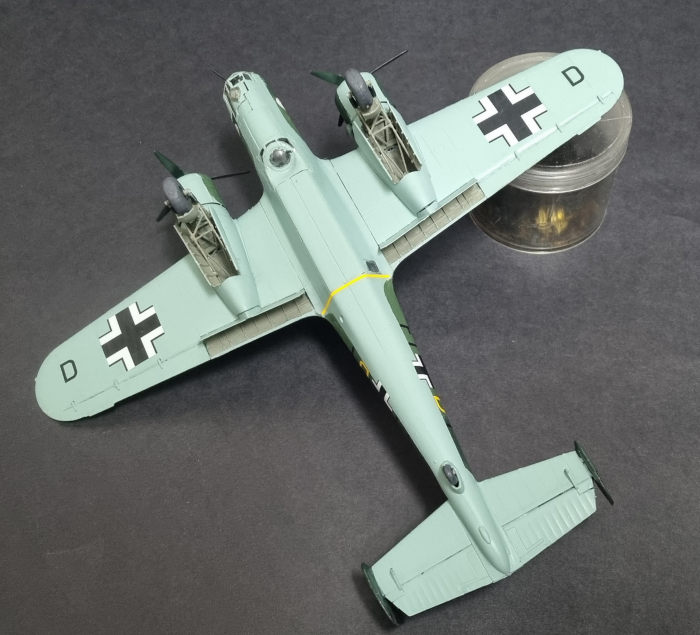
Typical from the new Airfix, the kit comes inside their bright red, top opening box. All the parts are inside a single bag, making them prone to damage/becoming loose inside the bag. Parts are molded in a soft light grey plastic, with very thick sprue gates. Decals are provided for two aircraft, one for the Battle of Britain, and the other for the Invasion of Greece. Colours are provided for Humbrol shades, but RLM desginations are offered for the external camouflage in the painting instructions.
Options for the kit include extended/retracted flaps, weighted tyres, opened or closed bomb bay, two types of bombs, fuel tanks and retracted or extended landing gear.
| CONSTRUCTION |
 I began by painting as many parts as possible
in their respective colours on the sprues. Cockpit sides and other parts were
painted in RLM 02 (Revell 45 Light Olive Grey) with a matt black instrument
panel and other small boxes. Gluing the seats and the side panels proved to be
diffucult, even more so when I was recording the assembly at the same time for
Youtube. The radio operator and bomber seat were particularly hard to add, one
because they didn’t fit properly, two because I broke the seat back of one seat.
I spent some minutes off camera cursing and trying to glue the parts back
together. Once I had everything painted, I glued the parts to one fuselage side
and left them to dry. Before closing the fuselage, you must add the window on
the left fuselage half. I then started to build the wings.
I began by painting as many parts as possible
in their respective colours on the sprues. Cockpit sides and other parts were
painted in RLM 02 (Revell 45 Light Olive Grey) with a matt black instrument
panel and other small boxes. Gluing the seats and the side panels proved to be
diffucult, even more so when I was recording the assembly at the same time for
Youtube. The radio operator and bomber seat were particularly hard to add, one
because they didn’t fit properly, two because I broke the seat back of one seat.
I spent some minutes off camera cursing and trying to glue the parts back
together. Once I had everything painted, I glued the parts to one fuselage side
and left them to dry. Before closing the fuselage, you must add the window on
the left fuselage half. I then started to build the wings.
Instructions tell you to glue the top part of the wings to the fuselage first, but I deviated from them and built the wing assembly separately. All the wing and landing gear wells were painted RLM 02. Once that was done, I glued the rear bulkheads for the gear’s retraction arms, and then added the landing gear bays and forward bulkheads. It was after this step that I glued the wings to the fuselage. The nacelles were then added, not without a brief fight (these were the worst fitting parts of the kit).
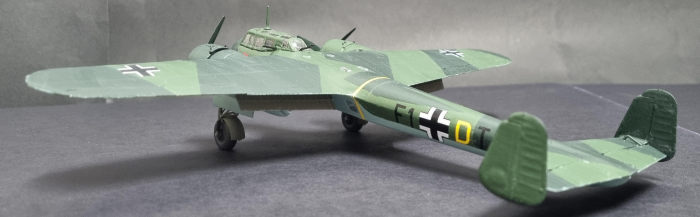
Assembly continued with the empennage. You have the option of placing the forward part of the horizontal stabilizer 15° down or neutral. The elevators can be positioned up or down, I just glued them neutral. The vertical stabilizers where also glued.
It was at this time I thought on gluing the flaps, ailerons and bomb bay doors. I glued the flaps in the down position and the bomb bar doors closed. Ailerons were set neutral.
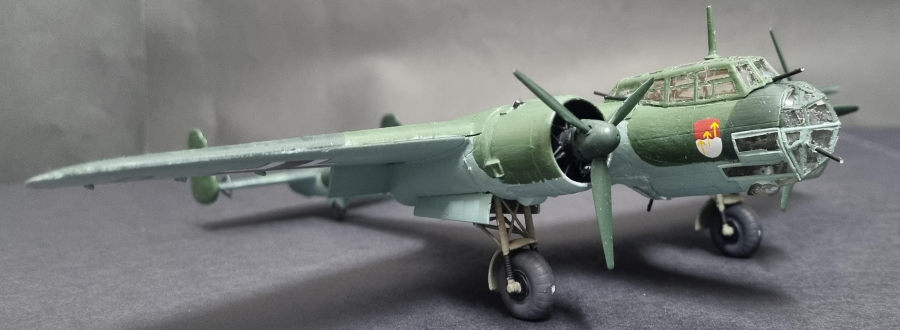
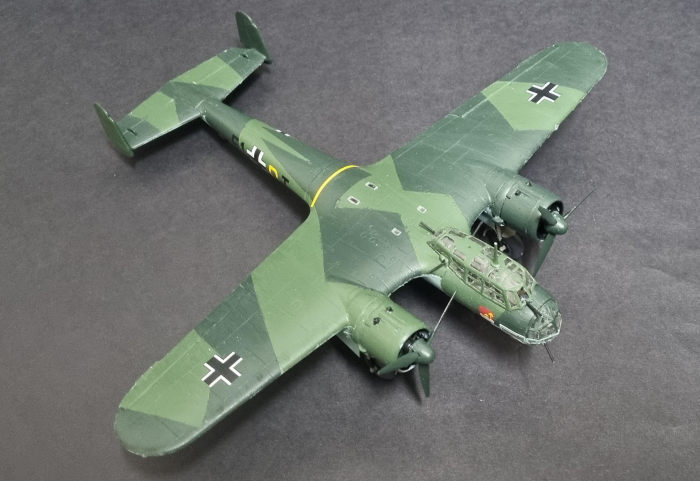
| COLORS & MARKINGS |
 I painted first the RLM 71 (Revell 39 Dark
Green) and then the RLM 70 (Revell 40 Black Green). The upper surfaces were
masked and the undersides were painted RLM 65 (Revell 49 Light Blue). The model
was glossed with Revell 01 Gloss and the decals were applied. These were then
brushed over with some Microsol. Then I brushed Revell’s 02 Matt Varnish.
I painted first the RLM 71 (Revell 39 Dark
Green) and then the RLM 70 (Revell 40 Black Green). The upper surfaces were
masked and the undersides were painted RLM 65 (Revell 49 Light Blue). The model
was glossed with Revell 01 Gloss and the decals were applied. These were then
brushed over with some Microsol. Then I brushed Revell’s 02 Matt Varnish.
I glued the landing gear struts which were marred with thick sprue gates, which needed special care when removing them. Wheels were painted with RLM 66 (Revell 78 Tank Grey) tyres and matt black hubs. Clear parts were painted, defensive armament was glued to them, and then they were glued with white glue to the cockpit. Some smaller details later, and the kit was finished.
| CONCLUSIONS |
Prior to the Airfix kit, we had the old Frog mold from the 60s and the slightly newer Monogram kit, which is nice to see now replaced by this very nice offering. Except from the thick sprue gates, everything fitted quite nicely.
5 February 2024
Copyright ModelingMadness.com. All rights reserved. No reproduction in part or in whole without express permission.
If you would like your product reviewed fairly and fairly quickly, please contact the editor or see other details in the Note to Contributors.