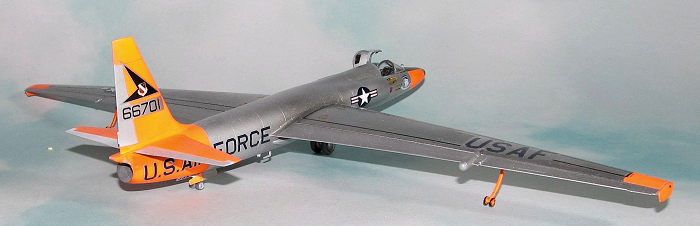
Hobby Boss 1/72 U-2A Dragon Lady
| KIT #: | 87270 |
| PRICE: | $47.99 |
| DECALS: | Three options |
| REVIEWER: | Dan Lee |
| NOTES: |
Eduard PE set and Caracal Decals |
| HISTORY |
The U-2 spy plane was originally based on a USAF spec for a high altitude strategic photo recon plane to photograph the USSR and to provide some sort of early warning to prevent them from doing a nuclear “Pearl Harbor.”
Kelly Johnson designed proposal CL-282 on the XF-104 fuselage, the J73 engine, sailplane wings and had no internal landing gear. It was designed to take off from a trolley and land on skids. General Curtis LeMay apparently walked out of the presentation grumbling that “he was not interested in a plane without wheels or guns” and preferred an upgraded version of the Canberra bomber instead which became the RB-57. However, the RB-57 still lacked the range and the altitude to fly over the USSR. At the time, the US assumed (incorrectly) that the Soviets couldn't track anything higher than 70000 feet based on the radar equipment they gave to them during the war not realizing that the Soviets were even more afraid of a nuclear surprise attack from the West (US) and put a lot of resources into upgrading their defences such as radar systems.
The CIA Intelligence
Systems Panel took an interest in the design and recommended that the CIA
operate the CL-282 because it had the necessary performance and endurance for
overflights of the Soviet Union. Mea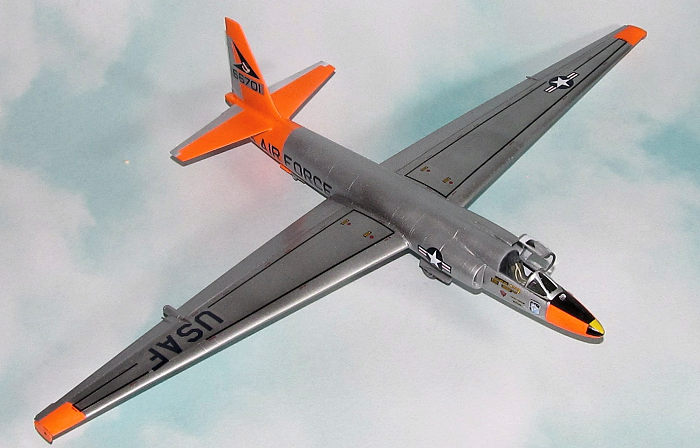 nwhile
the USAF reluctantly became involved again with the CL-282 project despite their
top brass hating it. One of the most important changes they requested was to
re-engine the CL-282 with the J57 engine which turned out to be a good idea.
nwhile
the USAF reluctantly became involved again with the CL-282 project despite their
top brass hating it. One of the most important changes they requested was to
re-engine the CL-282 with the J57 engine which turned out to be a good idea.
The CIA funded the project now known as the U-2 for Utility rather than R for Reconnaissance in an attempt to confuse the Soviets as to the real purpose of the plane. Meanwhile the USAF would provide support as well as the sheep dipped (“retired” USAF pilots assigned to the CIA) crew to fly them.
As the U-2 began testing, the USAF loved the performance of the U-2 and purchased 31 of them under Project Dragon Lady (hence the origin of the nickname for the U-2.)
In 1956 the U-2 began it's dangerous game of overflying USSR territory. At first, the Soviets could do nothing but watch with impotent rage as the U-2 could fly over their territory at will. Among the things, the U-2 discovered during 1956- 1960 was that there was no such thing as a bomber gap, the beginnings of the Israeli nuclear weapons program, but could not disprove a missile gap (later disproved by intelligence from GRU Colonel Oleg Penkovsky during the Cuban Missile Crisis.)
The U-2 overflights forced the Soviets to develop the S-75 Dvina (aka NATO Codename SA-2 Guideline) as a high altitude SAM to shoot down high flying aircraft and were waiting for a chance to shoot one down. They got their chance in May 1960 when the U-2 came into range of an SA-2 launch site and was damaged by a SAM. The damage was bad enough to force the U-2 down and resulted in the capture of its pilot, Gary Powers setting off what would be known as “The U-2 Incident.”
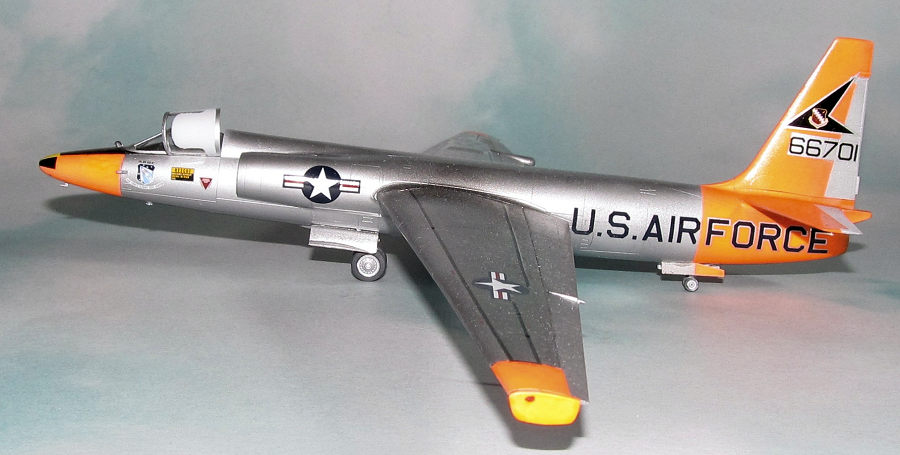
The U-2A is the original model of the U-2 with narrow intakes and small camera bay.
| THE KIT |
 The Hobby
Boss kit was released in 2021. It comes in a very small box relative to a model
of this size. There are several sprues of grey plastic and one small one of
clear for a total of 73 parts as well as the decal sheet which I didn't use. The
parts are well molded and have fine detail as one would expect from Hobby Boss.
There are some accuracy issues (again as one would expect from Hobby Boss) so
make sure that you check your sources.
The Hobby
Boss kit was released in 2021. It comes in a very small box relative to a model
of this size. There are several sprues of grey plastic and one small one of
clear for a total of 73 parts as well as the decal sheet which I didn't use. The
parts are well molded and have fine detail as one would expect from Hobby Boss.
There are some accuracy issues (again as one would expect from Hobby Boss) so
make sure that you check your sources.
The instruction booklet is in the typical Trumpeter/Hobby Boss layout with showing how to build the various subassemblies and some mystery part placement.
| CONSTRUCTION |
I started off assembling the wings and rudder/tail. These were pretty straight forward. I used CA glue to attach the outer seams and Tamiya extra thin cement for the inner attachment points.
Next I worked on the fuselage. I didn't extend the airbrakes so I cut the attachment pins off, cleaned up the part and glued them closed, but they didn't full cover the interior so the small gaps were filled in with Vallejo plastic putty. The intakes were added and the gaps filled in with Vallejo plastic putty.
 The exhaust
tube was glued together and then sanded smooth. I didn't have an easy time doing
this because of the tiny opening and it took much longer than I had hoped. The
interior of the tube was then primed with grey Stynylrez primer and painted
burnt metal.
The exhaust
tube was glued together and then sanded smooth. I didn't have an easy time doing
this because of the tiny opening and it took much longer than I had hoped. The
interior of the tube was then primed with grey Stynylrez primer and painted
burnt metal.
I worked on the cockpit next first off by removing the detail off the parts that was going to be replaced with Photo Etch panels from the Eduard PE set. It went well as I left off the tiny levers because no one can see them unless you're two inches away. I painted the interior Dark Gull Grey and then added the PE parts. Most of the metal parts were glued on using a drop of white glue or a drop of CA glue if they need some extra grip. I left out the ejection seat till the end as per my usual habit.
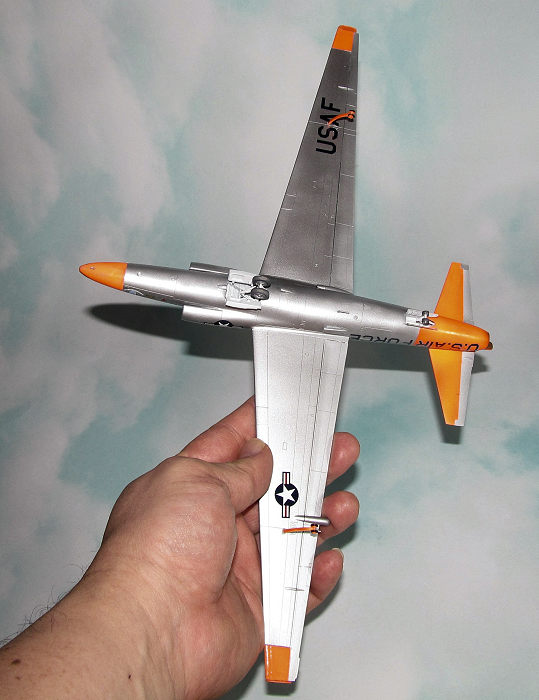
Next, I painted the wheel wells flat white and glued them into the fuselage. After they were cemented into place I then closed up the fuselage using the CA glue for the outer seams and Tamiya extra thin cement for the interior connections.
The seams required a fair amount of sanding and I had to be careful with all the centerline antennas and probes. Since this was going to be a NMF plane, I had to polish down to about 4000 grit to make sure the surface would be smooth.
Next I added the wings. There was a bit of a gap so I used Vallejo plastic putty to fill it and wiped the excess clean. I left off the rudder/tail and glued it once painting was done, but before the decals were added.
| COLORS & MARKINGS |
I first primed with Stynylrez Grey primer. Once it was dry I had to smooth the surface down again with various grits of polishing cloth (3200-6000 grit) to prepare for the NMF.
 I masked off
the nose, wing tips and tail portion in preparation for the dayglo orange paint.
I sprayed on a thin coat of white before spraying on the Vallejo Air dayglo
paint. Dayglo paint is thin and doesn't cover worth a damn so it requires lot of
thin coats. I used about 7-9 very thin coats of dayglo paint to get the color
coverage I wanted. Even though the paint I used was air brush thinned, I still
had to thin it down by about 50% to get it to flow well through my airbrush.
I masked off
the nose, wing tips and tail portion in preparation for the dayglo orange paint.
I sprayed on a thin coat of white before spraying on the Vallejo Air dayglo
paint. Dayglo paint is thin and doesn't cover worth a damn so it requires lot of
thin coats. I used about 7-9 very thin coats of dayglo paint to get the color
coverage I wanted. Even though the paint I used was air brush thinned, I still
had to thin it down by about 50% to get it to flow well through my airbrush.
I found out that Vallejo Metal Color doesn't grip well on Vallejo Air metallic paints. A year or two ago I had made an earlier model and sprayed on VMC first and then used Vallejo Air which worked so if you use both make sure you use the VMC (black bottle) metal shades first.
Vallejo Air Aluminum RLM01 and Chrome were the main metallic shades used. I used Chrome for most of the plane and aluminum for the mid sections of the wings and the metallic portions of the tail. I sprayed in light coats to prevent paint runs and various other airbrush booboos that show up so well with metallic paints.
One area that gave me fits because I assumed was the metallic portion of the dayglo tail. I didn't get the metallic area sized correctly and was forced to check the decal sheet instructions(!) to get it right. I ended up ruining the starboard tail decal by painting over a couple of the numbers with Vallejo chrome. Fortunately this Caracal Decal Sheet has ID codes for multiple U-2As and I cobbled the ID number together from cutting up the codes.
The nose required a lot of masking to get the shapes right for the yellow and black nose. I managed to get it done without any major mistakes. Lastly I put down a nice gloss coat using Vallejo Metal Color gloss and let it dry for several months (due to a family crisis that was outside my power to stop but was forced to resolve) before I put down the decals.
I prefer to use Carcal decals as Hobbyboss/Trumpeter decals don't have the best rep or accuracy. Even though this decal set was made for the Airfix kit, these decals fit the Hobby Boss kit for the most part. I find that decals stick to Vallejo gloss coat so I use a drop of water to reduce the friction and allow me to adjust the decal into the correction position. Once it was in place I would zap it with some MicroSet.
I didn't do any weathering on this NMF plane. I just wiped off the decal solution and sprayed on the Vallejo Metal Color gloss coat for the final coat.
| FINAL CONSTRUCTION |
 One thing I
don't like about 1/72 aircraft is 1/72 sized pitot tubes, sensors and lights
especially when I have to get on my hands and knees in a frantic search for
those pieces that fly from my tweezers. It took two frustrating hours to find
and actually glue the pieces into place.
One thing I
don't like about 1/72 aircraft is 1/72 sized pitot tubes, sensors and lights
especially when I have to get on my hands and knees in a frantic search for
those pieces that fly from my tweezers. It took two frustrating hours to find
and actually glue the pieces into place.
I painted the landing gear flat white, added various PE bits to them and glued them in place. The outrigger wheels were painted several layers of dayglo paint and the wheels were painted dark grey. Next I painted the wheels and added them to the landing gear (I had the model upside down till the wheels could stay in place.) The various previously painted landing gear doors were added (I used two PE ones instead of the way too thick doors.
Finally, I added the painted ejection seat with PE seatbelts and windscreen/canopy. I think Hobby Boss made the shade part too big on the canopy (they made the mistake that other companies did and acted as if the sunshade was actually part of the canopy glass), but I wasn't going to grind it down for accuracy.
| CONCLUSIONS |
It was a simple kit to assemble and build, but the scheme I picked was difficult. I liked how it turned out and recommend it for anyone who wants to build an early U-2A (the Caracal Decal sheet includes the markings for CIA U-2s as well as other notable U-2s.) I think 1/72 is an ideal size for the U-2 considering that the U-2 is a pretty big aircraft in 1/48 scale which is the reason why I purchased and built this kit instead of the 1/48 AFV one (and it has the correct narrow intakes.)
27 February 2024 Copyright ModelingMadness.com. All rights reserved. No
reproduction in part or in whole without express permission. If you would like your product reviewed fairly and fairly quickly, please
contact the editor or see other details in the
Note to
Contributors.