CCLee 1/144 F-15C Eagle
| KIT #: | 02205 |
| PRICE: | ~$5.00 |
| DECALS: | One option |
| REVIEWER: | Spiros Pendedekas |
| NOTES: | Techmod 4 color lozenge and rib tapes |
| HISTORY |
 In the
mid-60s, while the TFX (F-111) project was running full steam ahead in order to
provide both the USAF and the USN their future medium/long range tactical
aircraft, the Air Force considered a new shorter range tactical fighter to
replace several existing types. Though the A-4, A-7 and F-5 could partially fill
to various degrees the latter requirement, it was felt that a new, more capable
platform had to be developed. The submitted designs that followed USAF’s
official requirements document for what was described as an “air superiority”
fighter, more or less headed towards a plane that approached the F-111 in size
and weight.
In the
mid-60s, while the TFX (F-111) project was running full steam ahead in order to
provide both the USAF and the USN their future medium/long range tactical
aircraft, the Air Force considered a new shorter range tactical fighter to
replace several existing types. Though the A-4, A-7 and F-5 could partially fill
to various degrees the latter requirement, it was felt that a new, more capable
platform had to be developed. The submitted designs that followed USAF’s
official requirements document for what was described as an “air superiority”
fighter, more or less headed towards a plane that approached the F-111 in size
and weight.
By that time, the new doctrine that emerged after early Vietnam War results
analysis, favored maneuverability over absolute speed, dictating good
performance within visual engagement rules, an area where contemporary U.S.
planes were not so good at. This new doctrine, which was highly influenced by
Col. Boyd’s 1964 Energy–Maneuverability Theory, practically asked for lower wing
stressing (meaning larger wings) and higher thrust to weight ratio, to the
region of 1:1. The ability for high speed interception (up to Mach 2.5) was also
added to the basic requirements the new air superiority fighter had to fulfill,
after the USSR revealed the very fast MiG-25 in 1967.
The subsequent request for proposals issued in September 1968, called for a twin
engine, single-seat fighter with a maximum take-off weight of 40,000 pounds for
the air-to-air role, a maximum speed of Mach 2.5 and a thrust-to-weight ratio of
1:1 at mission weight. Of the three companies that were awarded contracts for
technical proposals, the Air Force announced the selection of McDonnell Douglas
on 23 December 1969 to build the F-15 Eagle, which resembled the F-14, but with
fixed wings. The rest is history.
| THE KIT |
This is the CC Lee 1/144 F-15C, a direct copy of the 1974 Otaki mold, the latter being reboxed or copied a surprising number of times by many companies through the years. By all means an elderly, simplistic kit with acceptable general shape but with detail at key areas varying from toy-ish (landing gear) to nonexistent (cockpit). For a look at its contents you may read its preview found at the ever growing MM archives.
| CONSTRUCTION |
 I started by
joining the two rear section halves, which contain the wings and tail planes.
The 2-piece front section was also assembled and then attached to the rear
section, followed by the vertical stabilizers. Due to the toy-ish landing gear
looks, I decided to build it as a wheels-up stand model, so I attached all doors
at closed position, where I discovered that the model was not designed for a
wheels-up position, as the doors did not fit well, needing judicious trimming.
I started by
joining the two rear section halves, which contain the wings and tail planes.
The 2-piece front section was also assembled and then attached to the rear
section, followed by the vertical stabilizers. Due to the toy-ish landing gear
looks, I decided to build it as a wheels-up stand model, so I attached all doors
at closed position, where I discovered that the model was not designed for a
wheels-up position, as the doors did not fit well, needing judicious trimming.
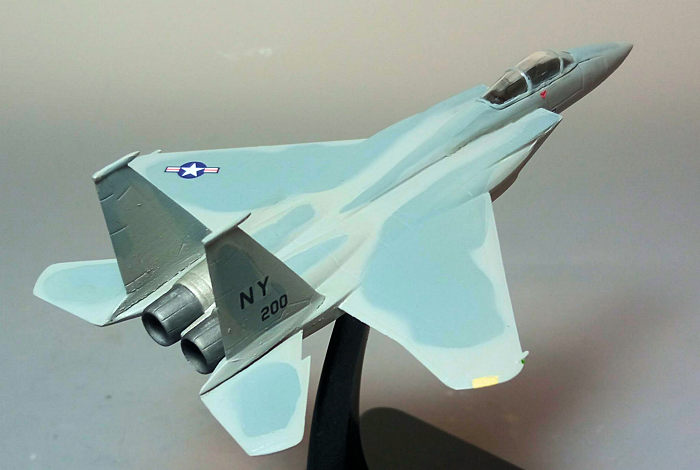
The two molded aerodynamic filets running to fuselage the top were not observed
in reality, so they were shaved off. The cockpit area was not-existent,
featuring only a totally uninspiring cutout. Since I was opting for a simplistic
stand model, the only thing I did was to cover the cutout with a piece of
styrene sheet.
Apart from the doors, overall fit was acceptable. After a filling and sanding
round, I took the petite model to the paint shop!
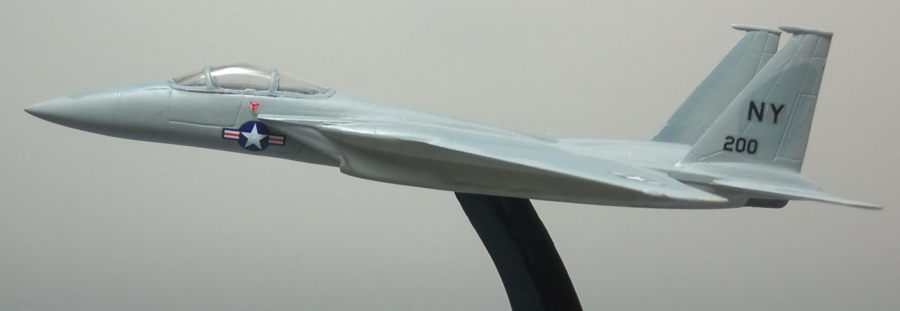
| COLORS & MARKINGS |
I first gave the topsides a coat of Hu128 US
Compass Gray. For masking since the model was petite, I only applied pieces of
tak which were formulated by hand to resemble the camo pattern, then gave the
remaining a coat of Hu127 US Ghost Gray. Upon drying, the aft fuselage areas
close to the afterburners were masked and painted Testors 1789 Steel. The
uninspiring cockpit cutout and ditto plain flat intakes were painted Tamiya XF-1
Black, to at least add a sense of depth, with a coat of Future preparing the
bird for decals.
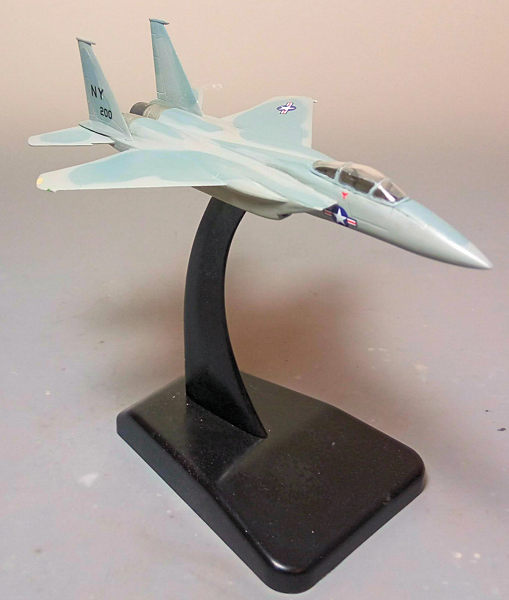
 I decided to
use the not that sharply printed kit decals, in order to represent the 18 TFS,
12 TFW machine depicted on the box art. To my dismay, the decals not only
refused to adhere, but also flipped over to themselves and finally crumbled.
Since this was a fun build, I resorted to my decal dungeon and found insignia
and codes and added them on, so the scheme is totally fictitious. A coat of
Future sealed the decals, followed by a satin coat to give the bird its final
hue.
I decided to
use the not that sharply printed kit decals, in order to represent the 18 TFS,
12 TFW machine depicted on the box art. To my dismay, the decals not only
refused to adhere, but also flipped over to themselves and finally crumbled.
Since this was a fun build, I resorted to my decal dungeon and found insignia
and codes and added them on, so the scheme is totally fictitious. A coat of
Future sealed the decals, followed by a satin coat to give the bird its final
hue.
The exhaust nozzles were painted Testors Burned Metal and attached in position.
The canopy had its well defined frames hand painted and attached, as well, with
fit being so-so and the gaps faired with white glue. The wing tip forward ECM
antennas had their radomes pinned with some white paint, the nearby formation
lights were painted linen and tiny blobs of red and green clear paint
represented the adjacent navigation lights. The petite Eagle was placed on a
leftover base, before calling it done!
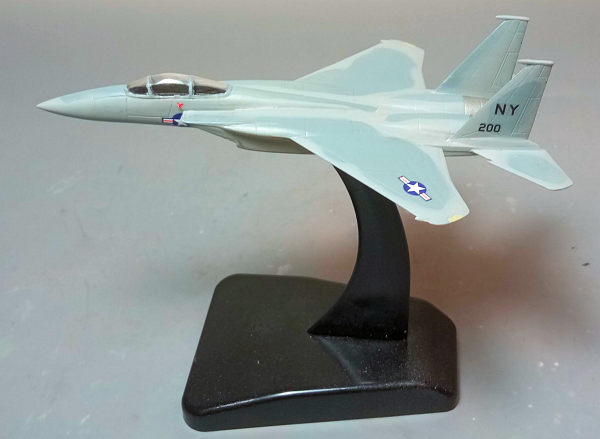
| CONCLUSIONS |
This is a simplistic kit of the iconic Eagle: while
the general shape looks good, there’s not much detail to look at, let alone some
over-simplified (towards toy-ish) areas, like the landing gear, the depthless
intakes and the nonexistent cockpit. The decals were also not good, possibly
due to aging.
That said, there is nothing wrong in building this very cheap, small kit, just
for the joy of it, with the ease of construction deeming it suitable even for a
youngster, who will find himself playing with the assembled model the same
afternoon he started building it.
Happy Modeling!
Spiros Pendedekas
26 February 2024
Copyright ModelingMadness.com. All rights reserved. No reproduction in part or in whole without express permission.
If you would like your product reviewed fairly and fairly quickly, please contact the editor or see other details in the Note to Contributors.