Academy 1/48 F-111E
| KIT #: | 1689 |
| PRICE: | $50.00 or so |
| DECALS: | One option |
| REVIEWER: | Spiros Pendedekas |
| NOTES: |
| HISTORY |
The origins of the F-111 can be traced back to the early 60s, when both the USAF and USN were seeking their new supersonic, heavily armed, twin seat, twin engine aircraft, where Robert McNamara, then Secretary of Defense, formally directed the services to study the development of a single aircraft that would satisfy both requirements.
 ution)
wanted a 6g rated high altitude interceptor with speed at the neighborhood of
Mach 0.9 and Mach 2 at sea level and altitude respectively. While the USAF had
no significant restraints to specify a length of 70ft, the Navy would not allow
more than 56ft (so the plane could fit at the existing carrier elevators). The
Navy would also require a wide cross section nose, capable of hosting a 48 in
diameter radar dish.
ution)
wanted a 6g rated high altitude interceptor with speed at the neighborhood of
Mach 0.9 and Mach 2 at sea level and altitude respectively. While the USAF had
no significant restraints to specify a length of 70ft, the Navy would not allow
more than 56ft (so the plane could fit at the existing carrier elevators). The
Navy would also require a wide cross section nose, capable of hosting a 48 in
diameter radar dish.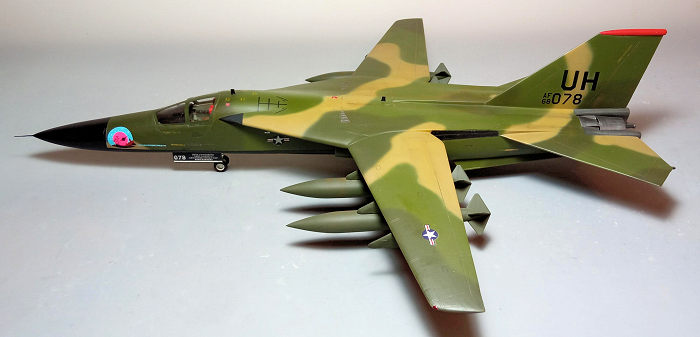 Meanwhile,
despite the significant amount of work and, to a degree, the encouraging results
the Grumman / General Dynamics joint effort yielded, the Naval F-111B (a plane
that, truth be told, the Navy did not want from the start) was finally canceled
in 1968 on account of weight and performance issues together with revised
tactical requirements (including, among others, dog fighting doctrine, something
that the F-111 was not designed to perform).
Meanwhile,
despite the significant amount of work and, to a degree, the encouraging results
the Grumman / General Dynamics joint effort yielded, the Naval F-111B (a plane
that, truth be told, the Navy did not want from the start) was finally canceled
in 1968 on account of weight and performance issues together with revised
tactical requirements (including, among others, dog fighting doctrine, something
that the F-111 was not designed to perform).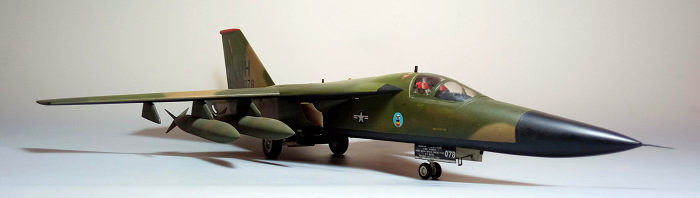 Officially
named Aardvark (which was its unofficial name when in service) after its USAF
retirement, the F-111 rose a lot of controversy, especially during its early
days (with factors including, but not restrained to, its capability to fulfill
both the Air Force and Navy requirements, its complexity, the elevated costs for
both development and production, let alone the money spent for the ultimately
canceled Navy version and its high operational costs).
Officially
named Aardvark (which was its unofficial name when in service) after its USAF
retirement, the F-111 rose a lot of controversy, especially during its early
days (with factors including, but not restrained to, its capability to fulfill
both the Air Force and Navy requirements, its complexity, the elevated costs for
both development and production, let alone the money spent for the ultimately
canceled Navy version and its high operational costs).
Tailored towards USAF’s requirements, the plane effectively solved its teething problems to a good degree and quickly matured to a potent attack/bomber. With its complexity partly attributed to its role (the available technology of the era was pushed to its limits, in order to fulfill the aggressive requirements) and partly to some questionable design choices (the impressive in paper but too complex in practice escape capsule springs into mind), the iconic F-111 (and I am sure Yours Truly is the only one considering the plane an icon of the past) was present when needed and mission-effective.
| THE KIT |
This is the 1997 reboxing of the venerable 1987 Academy mold. Definitely not intending to challenge the vastly modern 2010 Hobby Boss offering, it is a decent kit that can still hold its own today. The specific kit was bought in 2004 from one - then usual, now, sadly, closed - Athens hobby shop at a not exactly low price and for a look at its contents you might check its preview found at the ever growing MM archives
| CONSTRUCTION |
I started by putting together the 10-piece cockpit which, together with
the 2-piece nose bay, were trapped between the fuselage halves. As quoted in the
instructions, a remarkable 2 oz. of weight was also secured within the nose (not
sure if the model needed so much, if at all, but better safe than sorry). Basic
cockpit color was Dark Gull Gray, with the stick grips, dashboard, instrument
panel and console faces painted black, the latter two then dry brushed with
silver, followed by “pinning” some white, red and yellow paint to simulate
variou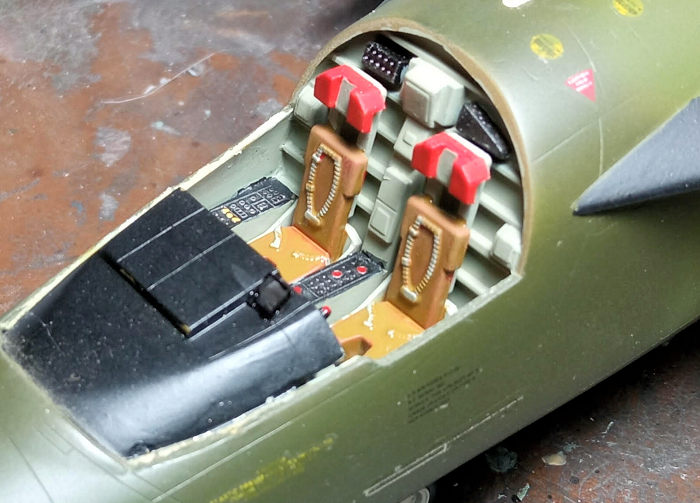 s
knobs on them. Seats had Dark Gull Gray frames, red head cushions, OD lower ones
and light gray seat belts. As foreseen, the cockpit, while not overly detailed,
looked acceptable under the closed canopy I would go for.
s
knobs on them. Seats had Dark Gull Gray frames, red head cushions, OD lower ones
and light gray seat belts. As foreseen, the cockpit, while not overly detailed,
looked acceptable under the closed canopy I would go for.
Opting for simplicity of construction and avoiding slacks and sagging over time,
I decided to permanently glue the wings in “extended” position. This meant that
I would skip the complex pylon rotating linkages. The wings were thus easily
assembled and then trapped, together with the compressor faces, between the
upper and lower rear fuselage halves. The dual compressor plate had the
compressors painted steel and the surrounding matt black.
To assure structural integrity, I reinforced the above subassembly’s innards
with various styrene rods. My job at the lower wing-to-fuselage joints was not
that good, ending to permanently glue the wings to the fuselage inserts there,
hoping that the black undersides will somehow blank the offending area. My less
than perfect job was also clearly evident at the slight, but noticeable anhedral
the wings presented, (they should be straight). In order to represent the
distinctive fabric wing seals, I blanked their openings with styrene sheets and
sanded the area smooth, then added suitably cut pieces of masking tape, which I
painted a tar color.
Time to put all subassemblies together, where the front and rear fuselage were
joined, followed by the 2-piece “Triple Plow” intakes (intake innards were
painted white), the dorsal fins, the stabilator base filets and 2-piece
stabilators themselves, the 2-piece fin and 3-piece tailpipe dividing fairing. I
decided to go for a six wing pylons configuration, so all six pylons were
assembled and attached in position. .
This concluded basic assembly, which, truth be told, was easier than initially
envisaged, with the decision to build the wing fixed in fully extended position
simplifying things a lot. Overall fit varied from good to challenging, the most
awkward area being the front/rear fuselage joint and, surely, a number of
misfits were self-inflicted (the lower wing-to-fuselage insert joints spring
into mind…). Gaps were first treated with liquefied styrene, followed by
“normal” filler. After a couple of filling and sanding rounds, I blanked the
cockpit with wet tissue, masked the intake innards and took the big bird to the
paint shop!
| COLORS & MARKINGS |
 I first gave
the nose cone area, the leading edge flush ECM antennas and all undersides,
including doors, a coat of Hu85 black, then masked it off. The topside camo was
next free handed, using Hu116, 117 and 118 for the dark green, medium green and
tan respectively. After painting the fin top red, a coat of Future prepared the
bird for decaling.
I first gave
the nose cone area, the leading edge flush ECM antennas and all undersides,
including doors, a coat of Hu85 black, then masked it off. The topside camo was
next free handed, using Hu116, 117 and 118 for the dark green, medium green and
tan respectively. After painting the fin top red, a coat of Future prepared the
bird for decaling.
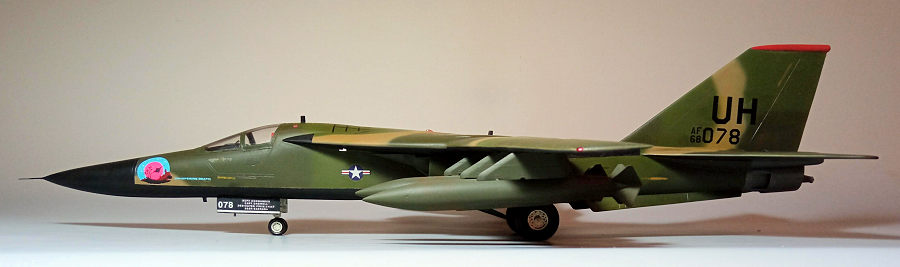
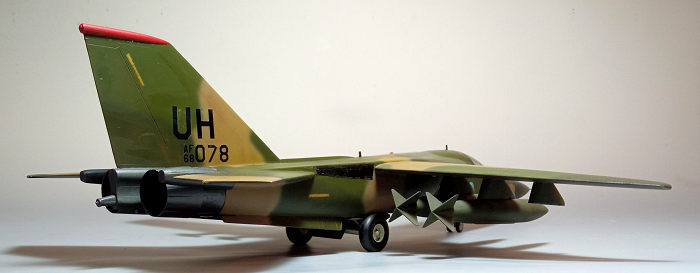
I used the kit decals to represent the sole scheme offered, that of the box art,
depicting 77 TFS, 20 TFW #68-0078 bird in SEA camouflage, as it stood in RAF
Upper Heyford 1991. It carries a very cool nose art portraying a black
silhouette of an F-111 on a surreal landscape and reading “Whispering Death”. If
memory serves, I recall reading a net discussion upon not only the nose art
shades, but also the overall existence of that nose art itself, let alone on the
specific bird. Whatever the case, it does look absolutely cool, totally
believable, so I decided to go for it! Decals, though thin, behaved generally
well, my only complaint being the slight translucency of the yellow areas, which
is evident on the ones representing the formation lights. A coat of Future
sealed the decals.
| FINAL BITS |
The main and nose
landing gear legs were assembled and attached in position, followed by the
wheels and doors, with the bird proudly standing on her feet. All landing gear
parts, including wheel rims, bays and door innards were painted white, tires
were black and oleos were highlighted with a fine tip silver pen. The wheels
were tad filed to look weighted.
I was about to fit the ordnance, when I noticed something odd-looking at the
main landing gear. By consulting net pics, I came to the conclusion that Academy
instructions have the main rear door wrongly depicted: it should be
perpendicular instead of horizontal. As a remedy, I removed the door, cut off a
portion from its one end and fitted it vertically aft of the main legs on a
trial and error basis, in order to obtain the looks witnessed in reality.
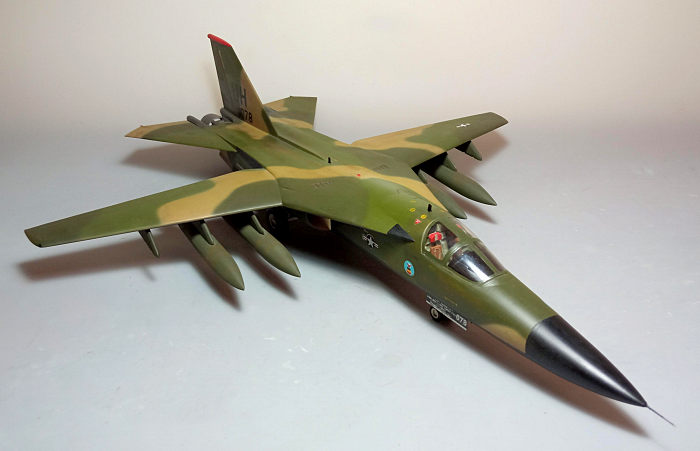
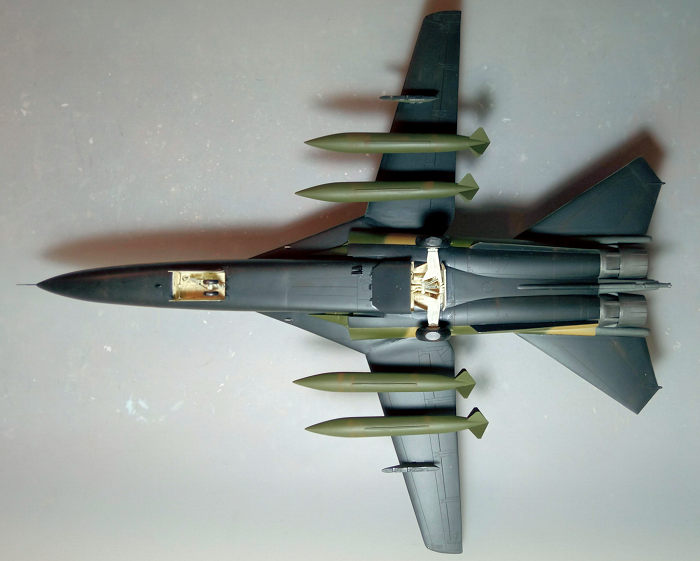 All six
pylons were assembled and attached in position. Regarding the stores, as I
usually prefer to add pylons and external tanks but otherwise don’t go for armed
birds (go figure, this is my modeler’s OCD speaking...), I decided to assemble
and attach the four wing tanks to the inner pairs of pylons, leaving the
external pylons “clean”, kind of a "ferry flight" configuration. All pylons and
wing tanks were painted dark green (black pylons have also been witnessed in net
pics).
All six
pylons were assembled and attached in position. Regarding the stores, as I
usually prefer to add pylons and external tanks but otherwise don’t go for armed
birds (go figure, this is my modeler’s OCD speaking...), I decided to assemble
and attach the four wing tanks to the inner pairs of pylons, leaving the
external pylons “clean”, kind of a "ferry flight" configuration. All pylons and
wing tanks were painted dark green (black pylons have also been witnessed in net
pics).
The exhaust nozzles were assembled and attached in position, They were painted
Testors Burned Metal, together with the central divider and the pair of
tailplane root fairings.
Those birds were usually seen to be in generally good to near pristine
condition, so I was not too intense in weathering (meaning I could not hide my
build's shortfalls that effectively...). I first gave a quite heavy black wash
at all landing gear areas, followed by a lighter one at the topsides, where the
engraved detail was accentuated and hinge lines exhibited a somewhat “oily”
look. I continued by applying dark colored pastels at all areas where dirt,
grime or even soot would reside. Some gray pastels were also applied to the
black undersides, to break-off the monotonous look, with a matt coat giving the
bird its final hue.
After attaching the port side HUD glass, I hand painted the canopy’s well
defined frames and attached it in position, with fit being acceptable and the
gaps faired with white glue. The two side mounted pitots were attached, followed
by the three UHF/IFF aerials (net reference shows a variety of antennas mounted
at those birds, so better check them for more accurate depiction of “the
specific plane at the specific time”). The nose pitot was at some point lost,
never to be found again, being replaced by a suitably cut needle piece. The top
beacon was represented by an oval shaped transparency from spares, while blobs
of red and green clear paint represented the wingtip lights, before calling the
iconic bomber done!
| CONCLUSIONS |
Hobby Boss came in 2009
with their quarter scale F-111 line. Modern, detailed and sensibly priced, these
very good kits by all means represent the latest and greatest, superseding the
Academy offering in everything but complexity of build. If you want the best
1/48 F-111, you should look no further than the Hobby Boss.
Now in second place, the elderly Academy mold is by no means an obsolete kit.
General shape is correct, molding is crisp, panel lines are nicely engraved,
overall details are still adequate, transparencies are well done and
instructions are clear. Though it wouldn't hurt to have more than one scheme
offered and less translucent decals, you can always go aftermarket.
Speaking of aftermarket
stuff, you will not be disappointed, as, apart from decals, a variety of goodies
is available in order to boost the kit's looks or correct some of its
shortfalls, with the decision of investing on aftermarket or going for the
overly superior Hobby Boss kit left to the individual.
The build itself was not too complex, but fit needed its attention in places.
That said, I would recommend this kit to an average modeler (but definitely not
to an absolute beginner) for a satisfying, even out of the box build. Of course,
the experienced modeler can work his way out and come up with masterpieces such
as the EF-111A by
C. Wayne Sharp and the F-111C by
Grenville Davies, found at the ever growing MM archives.
If you have one or find one at an interesting price, go on and give the
venerable Academy kit a go: a really attractive Aardvark will emerge!
Happy Modeling!
26 March 2024
Copyright ModelingMadness.com. All rights reserved. No reproduction in part or in whole without express permission.
If you would like your product reviewed fairly and fairly quickly, please contact the editor or see other details in the Note to Contributors.