Special Hobby 1/72 Bf-109E-3
| KIT #: | SH 72443 |
| PRICE: | @$20.00 |
| DECALS: | Five options |
| REVIEWER: | Scott Van Aken |
| NOTES: |
| HISTORY |
 The initial offerings of the Bf-109 were powered by the Jumo 210 engine,
but it was obvious that the development of that engine was near its end and so
Messerschmitt turned to the then-new Daimler Benz DB.600 engine. This was tested
in several airframes and it was decided that the next variant would be powered
by a Daimler Benz engine.
The initial offerings of the Bf-109 were powered by the Jumo 210 engine,
but it was obvious that the development of that engine was near its end and so
Messerschmitt turned to the then-new Daimler Benz DB.600 engine. This was tested
in several airframes and it was decided that the next variant would be powered
by a Daimler Benz engine.
They settled on the DB.601 as it had a lot of growth in it and provided quite a bit of additional performance to what was basically the same airframe as the earlier Jumo powered versions. The initial Bf-109E models were built as both an E-1 with four machine guns and an E-3 version that had canon in the wings. They were produced side by side at a ratio of 6:4 with six canon armed planes for every four all machine gun aircraft. While the machine guns worked well at first, it was discovered that the canon were more effective and many E-1 airframes were upgraded to E-3 variants.
These aircraft are the ones that fought in the last months of the Spanish Civil War and the first year of WWII in Europe.
| THE KIT |
While hobbyists have never had a lack of E model 109s, most of those have been of the E-3/4/7 version. The only other dedicated 109E-3 that comes to mind is the Tamiya kit, which is widely available and fairly nice as expected from Tamiya. However, Special Hobby has a slightly different idea of what is expected in a kit, and that is a lot of detail. This kit comes with an engine. This means a number of separate fuselage panels so the builder needs to take care in construction if building it without all the nose panels open. One thing is that they have developed separate sprues for the different variants. In this case as well as the E-1 boxing, the sprue dedicated to the wings is different to take into account the differences.
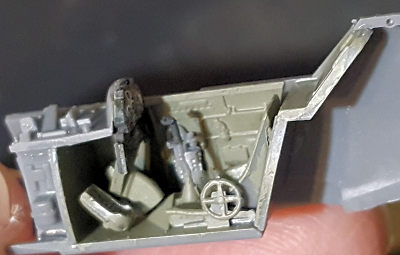
The cockpit is nicely done with the usual number of tiny pieces we have come to expect from Special Hobby. Decals are provided for a seat harness and for the instrument panel. All E models had their interiors painted RLM 02. You do need to install the engine to have a place to mount the prop. Also provided are more detailed machine guns for the 'everything open' option and a set that are just the barrels.
 Rudder is a separate item though the tailplanes have molded in elevators. On
the wing there are separate ailerons, flaps, and coolant doors, but they are
shown molded in the neutral position. Those who want to lower the flaps, could
fairly easily do so. The kit also provides separate slats and are designed to be
modeled open.
Rudder is a separate item though the tailplanes have molded in elevators. On
the wing there are separate ailerons, flaps, and coolant doors, but they are
shown molded in the neutral position. Those who want to lower the flaps, could
fairly easily do so. The kit also provides separate slats and are designed to be
modeled open.
The prop is one piece with a separate forward and aft cowling. One is also provided with a three piece windscreen/canopy/rear quarter so you can pose the canopy open. Landing gear are nicely done with the oleo scissors molded in place.
Instruction booklet is well done and in color. Most of the markings options are in RLM 71/02/65 with some having fuselage mottling and others without it. There are five options with the first being the box art plane with the fuselage sides in RLM 02 as flown by Werner Molders in France during 1940. Next, with an all white nose, rudder, wing and stab tips, is Uffz Karl Wolff's plane from August 1940, also in France. With an all yellow nose and rudder is Oblt 'Pips' Priller's plane from July-Oct 1940 in France. Like the first option, it has a non-standard upper wing pattern. The first of the 'clean' fuselage planes is that of Ofw Anton Hackl in Norway during mid-late 1940 This plane has a yellow rudder and yellow segment to the spinner. Finally we have Heinz Bar's plane during the summer of 1940. This aircraft has the upper scheme in RLM 70/71 with no additional color on the airframe. Special Hobby provides a variety of resin bits via the parent company, CMK and canopy masks as well. The decal sheet is nicely done and provides a full stencil suite.
| CONSTRUCTION |
 other
109Es that I've built, with raised sections in the aft half. I used Mr.Color
RLM02 to paint all the interior bits and the gear wells as that was the
standard shade of the early war. The fit is quite tight. Eventually, I got
everything in place and glue it into one fuselage halve. At this time you
have to glue in the tail gear as well. I envision a broken strut coming out
of this so we'll see.
other
109Es that I've built, with raised sections in the aft half. I used Mr.Color
RLM02 to paint all the interior bits and the gear wells as that was the
standard shade of the early war. The fit is quite tight. Eventually, I got
everything in place and glue it into one fuselage halve. At this time you
have to glue in the tail gear as well. I envision a broken strut coming out
of this so we'll see. 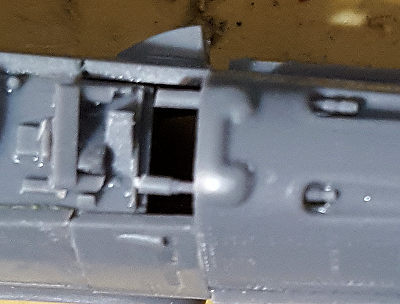 You are provided full nose
machine guns for the open option and a set of paired barrels for the closed.
These latter items are far too short to fit as they should. I cut the aft
portion and glued the barrels to the underside of the upper cowl piece. The
image I've provided sorta sucks but you can see why I had to cut them. I had
a somewhat dark foreboding that the piece over the gun areas might not fit
so as to have a properly fitting canopy. I then installed the standard
supercharger intake piece which did not fit well and needed trimming.
You are provided full nose
machine guns for the open option and a set of paired barrels for the closed.
These latter items are far too short to fit as they should. I cut the aft
portion and glued the barrels to the underside of the upper cowl piece. The
image I've provided sorta sucks but you can see why I had to cut them. I had
a somewhat dark foreboding that the piece over the gun areas might not fit
so as to have a properly fitting canopy. I then installed the standard
supercharger intake piece which did not fit well and needed trimming. 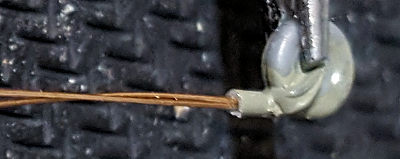 I then moved onto the wings. I
thought that if I installed the lower wing piece first that I'd get a good
fit. Big mistake. While one upper wing fit well enough, the other did not
and required much trimming followed by much filler. During all that work,
the tail wheel broke off as I thought it would. I used a #77 drill to make a
hole in both the part left in the airframe and in the piece broken off. Into
this hole I placed two pieces of .008 wire, which was then trimmed off to
fit.
I then moved onto the wings. I
thought that if I installed the lower wing piece first that I'd get a good
fit. Big mistake. While one upper wing fit well enough, the other did not
and required much trimming followed by much filler. During all that work,
the tail wheel broke off as I thought it would. I used a #77 drill to make a
hole in both the part left in the airframe and in the piece broken off. Into
this hole I placed two pieces of .008 wire, which was then trimmed off to
fit. | COLORS & MARKINGS |
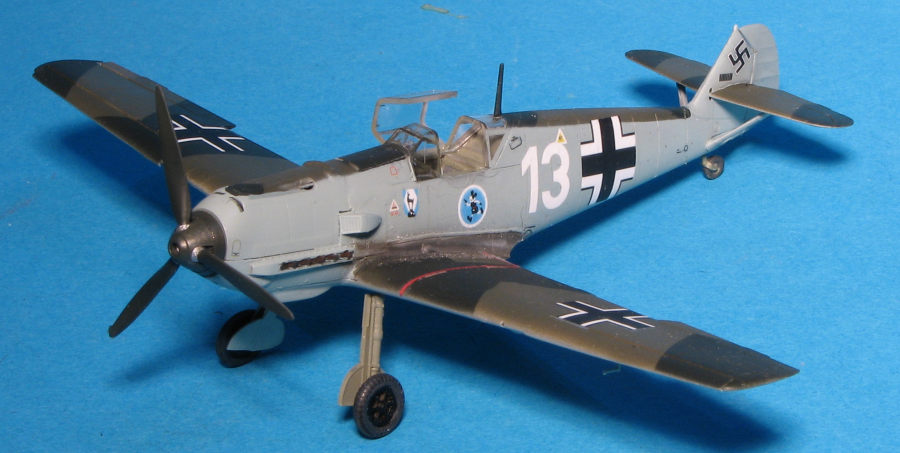
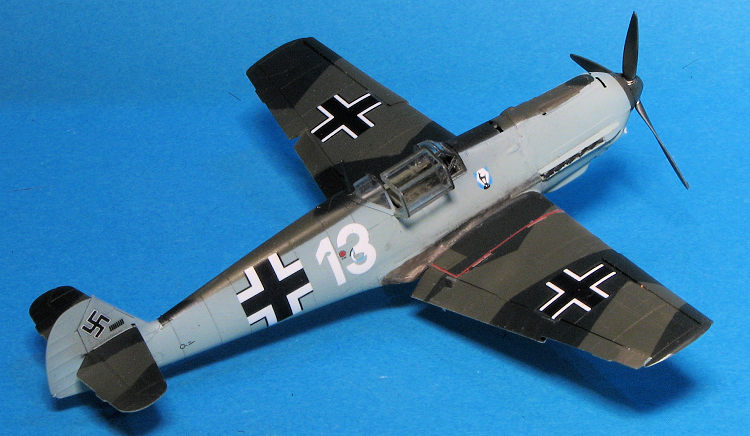
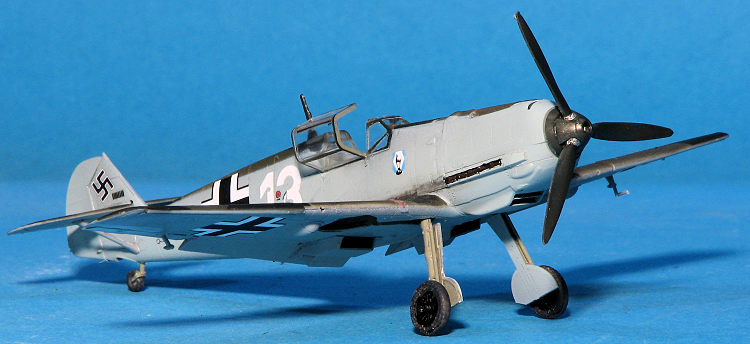
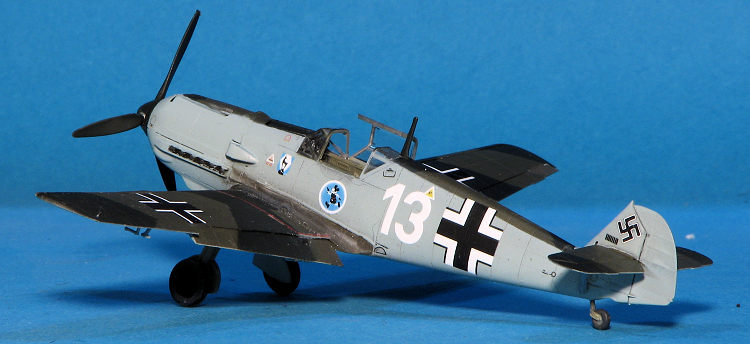 Since the kit offers so many nice options, I went with one of those. This
one is in a modified early splinter pattern of RLM 70/71/65.
I used Mr.Color lacquer paints for all of the shades and as usual, they went
on beautifully. I also used LF Models' camouflage masks and have to say that
I wasn't totally pleased with them. While there wasn't much bleed-under,
they did not conform very well to curved surfaces and had fairly low stick.
They were also difficult to remove from the backing, almost as if they were
not cut deep enough. For decals I chose one of the many kit options, in this
case Heinz Bar's plane from France in 1940. Despite the high upper/lower
camouflage line, this plane had no side mottling. The majority of the kit's
decals went on well and snuggled into panel lines with no setting solution.
Since the kit offers so many nice options, I went with one of those. This
one is in a modified early splinter pattern of RLM 70/71/65.
I used Mr.Color lacquer paints for all of the shades and as usual, they went
on beautifully. I also used LF Models' camouflage masks and have to say that
I wasn't totally pleased with them. While there wasn't much bleed-under,
they did not conform very well to curved surfaces and had fairly low stick.
They were also difficult to remove from the backing, almost as if they were
not cut deep enough. For decals I chose one of the many kit options, in this
case Heinz Bar's plane from France in 1940. Despite the high upper/lower
camouflage line, this plane had no side mottling. The majority of the kit's
decals went on well and snuggled into panel lines with no setting solution.
| CONCLUSIONS |
 Those wanting a simple kit will have to look to the
Tamiya or some other kit for this. Not only was this kit not simple, but some of the parts
were quite small. Fit was fairly good, though not as good as some other, less
expensive kits. Overall, it makes into a nice model and the kit offers some
great markings options, but you will work for it.
Those wanting a simple kit will have to look to the
Tamiya or some other kit for this. Not only was this kit not simple, but some of the parts
were quite small. Fit was fairly good, though not as good as some other, less
expensive kits. Overall, it makes into a nice model and the kit offers some
great markings options, but you will work for it.
8 December 2023
Copyright ModelingMadness.com. All rights reserved. No reproduction in part or in whole without express permission from the editor.
8 December 2023 If you would like your product reviewed fairly and fairly quickly, please contact the editor or see other details in the
Note to
Contributors.