Hasegawa 1/48 F-86F-40 Sabre
| KIT #: | 07514 (Pt14) |
| PRICE: | $10.00 'used |
| DECALS: | See review |
| REVIEWER: | Scott Van Aken |
| NOTES: |
2001 initial release |
| HISTORY |
 The F-86 is one of those planes that just seemed to have gotten most
everything right, all rolled up into one package. It was well armed, handled
fairly well and for the time, it was fast. It was also able to be upgraded and
served in the air arms of dozens of nations. One of those nations, and one of
the two who license built them, was Japan. Japan chose the F-86F-40 version that
had longer wings and reverted back to the slats for lower speed handling. The
longer wings added to the aircraft's lift which benefitted turning and provided,
along with the slats, a lower landing speed. While the 20mm cannon was becoming
the 'go to' armament, the .50 calibre Browning was still potent enough in most
cases.
The F-86 is one of those planes that just seemed to have gotten most
everything right, all rolled up into one package. It was well armed, handled
fairly well and for the time, it was fast. It was also able to be upgraded and
served in the air arms of dozens of nations. One of those nations, and one of
the two who license built them, was Japan. Japan chose the F-86F-40 version that
had longer wings and reverted back to the slats for lower speed handling. The
longer wings added to the aircraft's lift which benefitted turning and provided,
along with the slats, a lower landing speed. While the 20mm cannon was becoming
the 'go to' armament, the .50 calibre Browning was still potent enough in most
cases.
Japan's Mitsubishi-built -40s were also wired for Sidewinder missiles, though the early Sidewinders were not very reliable. Such was the popularity of the aircraft that they remained in service for many years in the trainer and hack roles. They also served with the Blue Impulse years after they were gone from regular service. The quickest way to tell a Mitsubishi built F-86F-40 from a North American built aircraft is that the Japanese version has a UHF antenna on the upper nose. Many of these planes were later recycled for drones and other auxiliary services, or ended up in civilian hands for those wealthy enough to afford a jet warbird.
| THE KIT |
It is probably not surprising that the first of their Sabre family that was released by Hasegawa was the Japanese F-86-40. This aircraft differs from most 1/48 Sabre kits by offering the longer -40 wing. The Japanese Sabre also had an additional scoop on the right side of the fuselage not on the US versions. This version also was able to carry Sidewinder missiles on the inner pylons. Japanese fuel tanks did not have any fins on them, something else that is different. All that is covered in this boxing. Now, if you have every built any of the other boxings, you' will find the kit to otherwise be the same.
 Hasegawa provides a nicely done cockpit with a decent
ejection seat an instrument panel that uses decals and raised detail on the side
consoles. A resin set will give you more detail, but this is perfectly adequate
for most. A pilot figure is also included. You get a full intake trunk that ends
in the first compressor stage. The nose gear well attaches to the underside of
this and the cockpit to the upper side. This is all placed into a fuselage half
along with the built up exhaust section. 5 grams of weight is needed to prevent
tail sitting and there is plenty of space for it.
Hasegawa provides a nicely done cockpit with a decent
ejection seat an instrument panel that uses decals and raised detail on the side
consoles. A resin set will give you more detail, but this is perfectly adequate
for most. A pilot figure is also included. You get a full intake trunk that ends
in the first compressor stage. The nose gear well attaches to the underside of
this and the cockpit to the upper side. This is all placed into a fuselage half
along with the built up exhaust section. 5 grams of weight is needed to prevent
tail sitting and there is plenty of space for it.
I like that the intake piece is separate and if you don't like filling seams on the intake trunk, a cap for the intake and exhaust are provided. The wing is a full lower section with the main gear wells built into place with separate upper halves. Be sure to open the holes for the fuel tanks and the missiles. Unlike many Hasegawa kits, this one does include the missiles.
 Landing gear are very nicely done with the main
wheels being in two halves. The wheels for JASDF Sabres seems to be a different
design than for US aircraft and some even had a solid disc for the front wheel.
The fuel tank pylons include anti-sway braces and the fuel line runs into the
pylon. Sidewinders have two separate fins. You have a separate windscreen
and canopy and can pose the canopy open if you so desire. Speed brakes can also
be posed open if you wish, but you'll have to trim them to get them to 'hang'
properly if modeling them open; they do not deploy straight out. Instructions are great and provide Gunze paint
references. Other than the very earliest planes, all Japanese Sabres were
painted aluminum.
Landing gear are very nicely done with the main
wheels being in two halves. The wheels for JASDF Sabres seems to be a different
design than for US aircraft and some even had a solid disc for the front wheel.
The fuel tank pylons include anti-sway braces and the fuel line runs into the
pylon. Sidewinders have two separate fins. You have a separate windscreen
and canopy and can pose the canopy open if you so desire. Speed brakes can also
be posed open if you wish, but you'll have to trim them to get them to 'hang'
properly if modeling them open; they do not deploy straight out. Instructions are great and provide Gunze paint
references. Other than the very earliest planes, all Japanese Sabres were
painted aluminum.
This particular kit was bought in a bag at a club swap meet. According to the instructions, it was one of the Korean war MiG killer boxings. However, when I opened the bags to start building, I discovered it was the Japanese F-40 variant. Whoever bought the F-40 kit from the guy will probably get the Korean war version. Despite not having kit decals for this version, I do have aftermarket so will be using those.
| CONSTRUCTION |
 Next, the cockpit, intake and exhaust trunks were glued to one side of the
fuselage. The other side was temporarily attached with tape to ensure things
were properly aligned. I then rolled up some lead and installed it above the
intake trunking just to be sure it wouldn't tail sit. Then the other
fuselage half was glued in place. This was a fairly fussy process to ensure
things fit tightly. Once the halves were glued together, I set about
removing the large scoop on the right side as this was a feature on Japanese
Sabres and not something you'd seen on US built planes. I also filled
the hole in the lower rear fuselage. The nose intake piece was too large so
it was sanded down to fit. I later discovered that were I smart, I'd have
installed the landing light piece at the same time as the fuselage halves.
It would have dealt with the width issue as I had to sand it down a bit to
get it to fit. There is also an upper fuselage insert that has to be added.
Next, the cockpit, intake and exhaust trunks were glued to one side of the
fuselage. The other side was temporarily attached with tape to ensure things
were properly aligned. I then rolled up some lead and installed it above the
intake trunking just to be sure it wouldn't tail sit. Then the other
fuselage half was glued in place. This was a fairly fussy process to ensure
things fit tightly. Once the halves were glued together, I set about
removing the large scoop on the right side as this was a feature on Japanese
Sabres and not something you'd seen on US built planes. I also filled
the hole in the lower rear fuselage. The nose intake piece was too large so
it was sanded down to fit. I later discovered that were I smart, I'd have
installed the landing light piece at the same time as the fuselage halves.
It would have dealt with the width issue as I had to sand it down a bit to
get it to fit. There is also an upper fuselage insert that has to be added.
| COLORS & MARKINGS |
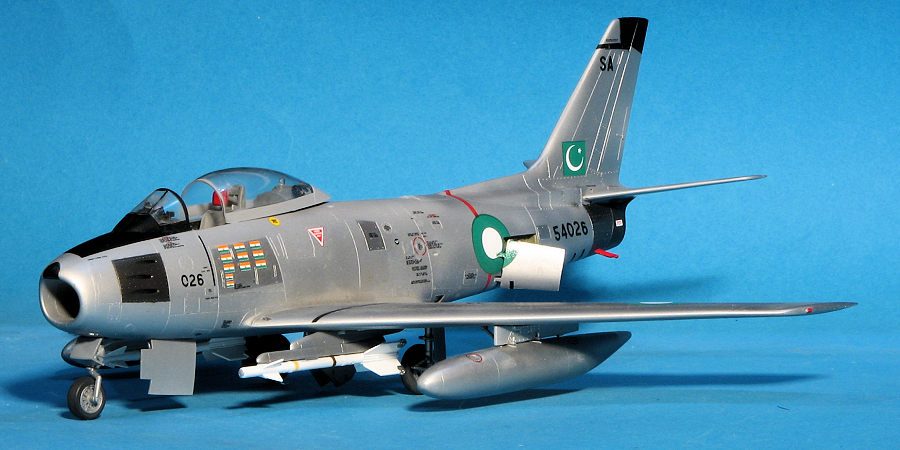
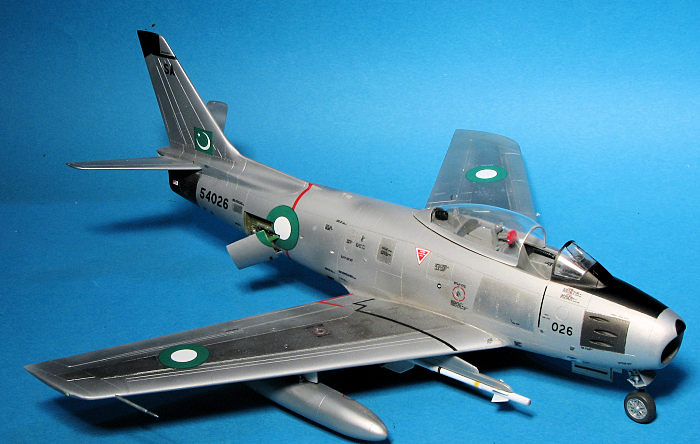
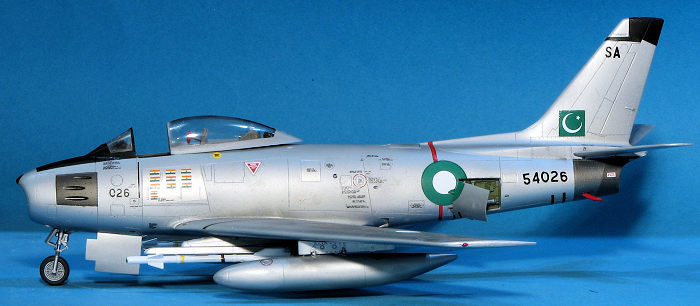
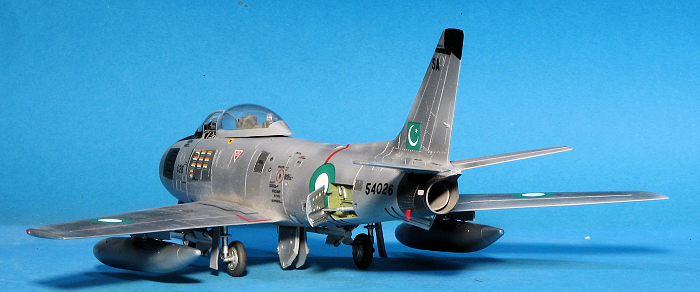
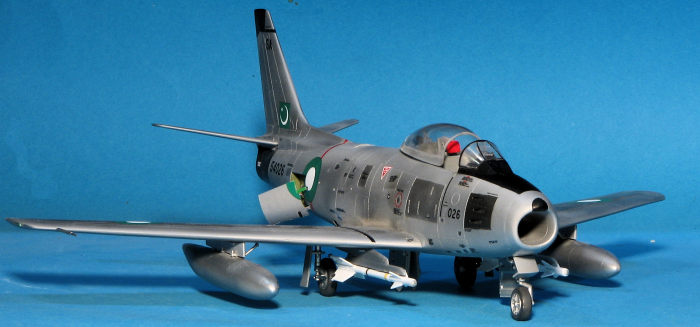
I have a Cutting Edge sheet that includes a Pakistani Sabre flown by their top ace of the 1965 war, Muhammad Mahmood Alam, who was credited with 11 victories including five in less than a minute. All of his victories were with guns, though the PAF also had Sidewinders. His aircraft is overall unpainted metal with a black anti-glare panel and fin tip. After priming the airframe with Tamiya grey primer, I sprayed on Alclad II aluminum. The slightly rough surface of the primer gives the aluminum a weathered look. Other panels were painted with dark aluminum, steel, and stainless steel.
 After this,
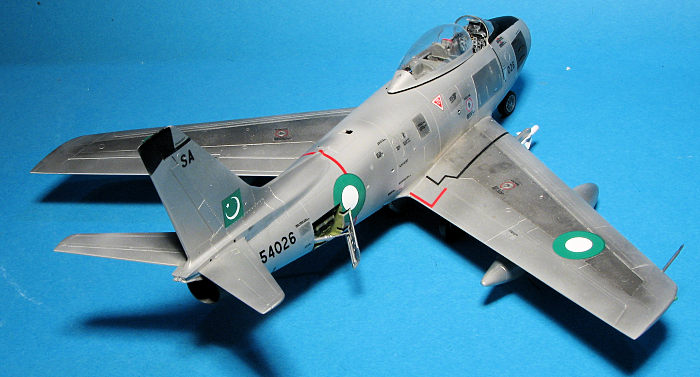
painted the gear wells and speed brake well with Mission Models chromate green.
The inside of the speed brake and gear doors were left unpainted metal . I then
installed the landing gear, wheels, and the gear doors.
After this,
painted the gear wells and speed brake well with Mission Models chromate green.
The inside of the speed brake and gear doors were left unpainted metal . I then
installed the landing gear, wheels, and the gear doors.
When it came to decals, I first had to apply the myriad of stencils that were carried by these aircraft. This took well over a week to do. The Cutting Edge decals gave little trouble despite being over 25 years old.
With all that done, the final clear bits were added along with the fuel dump and pitot tube. I cut the lower 'arm' of the speed brakes so that they would hang down rather than stick straight out as I have done in the past and see being done even today. I had painted the intake and exhaust covers, but decided not to use them. The fuel tanks and the Sidewinders were then added, the masking removed and the canopy positioned open.
| CONCLUSIONS |
It is nice to have finally used a scheme from this sheet after all these years and I'm pleased with the result. I know the Hasegawa kit is not the easiest to locate, but if you can find one on the cheap, pick it up. I know you'll enjoy the build.
1 March 2024
If you would like your product reviewed fairly and fairly quickly, please contact the editor or see other details in the Note to Contributors.
Back to the Main Page Back to the Review Index Page Back to the Previews Index Page