
Border 1/35 IJA 28cm Howitzer
| KIT #: | BT-030 |
| PRICE: | $28.90 delivered. |
| DECALS: | None |
| REVIEWER: | Scott Van Aken |
| NOTES: | Ordered from China. Took only 10 days to arrive. |
| HISTORY |
 The 28 cm Howitzer L/10 was designed in 1884 by the
British Armstrong company. Armstrong had an Italian subsidiary which produced
guns for the Italian Navy and Major Pompeo Grillo, a heavy artillery specialist
was hired in April 1884 to help the construction of artillery at a new plant in
Osaka. The description from Brassey's Naval Annual of 1892 reads "The howitzer
was a 28-cm rifled breech-loader of cast iron, 9 calibres long made at Osaka,
from the designs of guns made for the Italians by Sir W.G. Armstrong". The
Italians produced the design in a number of different lengths and they were
designated by their diameter and length in calibers 280/9, 280/10, 280/11,
and 280/16. Some 220 pieces were manufactured by the Osaka Artillery Arsenal for
Japanese coastal defence. It was mounted on a turntable which was fixed to a
steel firing platform. It required two to four days to emplace for firing. An
ammunition crane was fixed to the carriage for ease of loading. The howitzer
entered service in 1892 and was installed in shore batteries in forts
overlooking Tokyo Bay and Osaka Bay, and had been intended for anti-ship
operations. However it saw use as a siege gun during the Russo-Japanese War due
to a lack of heavy siege guns.
The 28 cm Howitzer L/10 was designed in 1884 by the
British Armstrong company. Armstrong had an Italian subsidiary which produced
guns for the Italian Navy and Major Pompeo Grillo, a heavy artillery specialist
was hired in April 1884 to help the construction of artillery at a new plant in
Osaka. The description from Brassey's Naval Annual of 1892 reads "The howitzer
was a 28-cm rifled breech-loader of cast iron, 9 calibres long made at Osaka,
from the designs of guns made for the Italians by Sir W.G. Armstrong". The
Italians produced the design in a number of different lengths and they were
designated by their diameter and length in calibers 280/9, 280/10, 280/11,
and 280/16. Some 220 pieces were manufactured by the Osaka Artillery Arsenal for
Japanese coastal defence. It was mounted on a turntable which was fixed to a
steel firing platform. It required two to four days to emplace for firing. An
ammunition crane was fixed to the carriage for ease of loading. The howitzer
entered service in 1892 and was installed in shore batteries in forts
overlooking Tokyo Bay and Osaka Bay, and had been intended for anti-ship
operations. However it saw use as a siege gun during the Russo-Japanese War due
to a lack of heavy siege guns.
| THE KIT |
 This
recently released kit consists of three sprues. While there are a fair number of
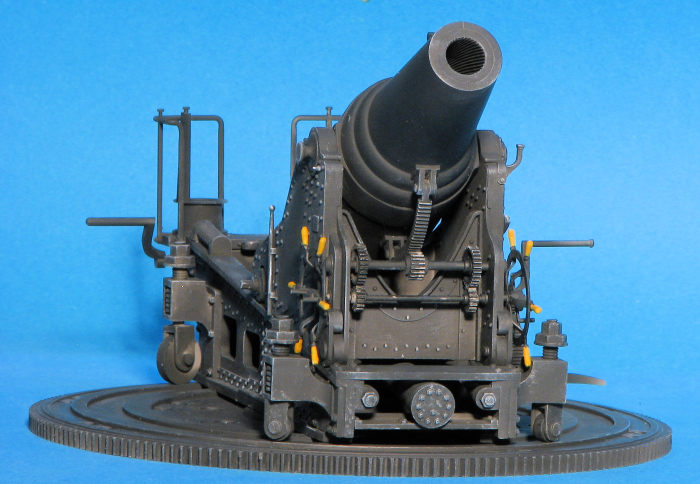
parts, the kit is actually fairly simple. The largest piece is the turntable on
which the finished kit will be set. The most complex construct will be the
gun mount itself. It contains part of the gearwork that allows the gun to be
moved in azimuth.
This
recently released kit consists of three sprues. While there are a fair number of
parts, the kit is actually fairly simple. The largest piece is the turntable on
which the finished kit will be set. The most complex construct will be the
gun mount itself. It contains part of the gearwork that allows the gun to be
moved in azimuth.
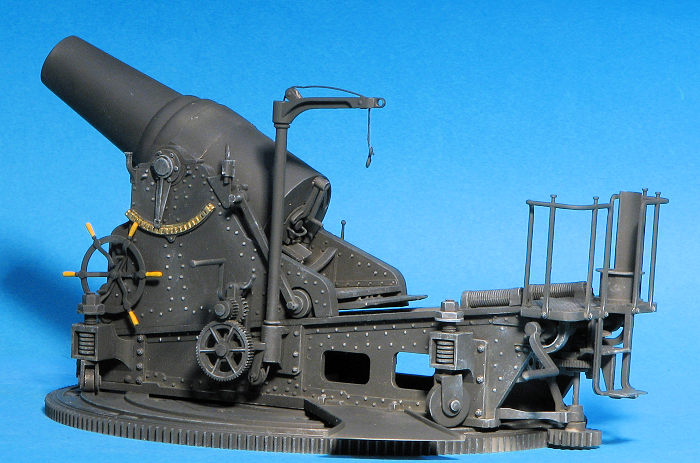
Once the barrel assembly is done, it is attached to the upper mount and again, there is gearing to be installed to allow the barrel to be moved in elevation. On the large mount there is a large table on which one then attaches the mechanism that is used to hoist then load the shells. You are provided several shells along with the small trailers that are used to move them to the gun.
Instructions are very well done. Painting this will be easy as the guns and turntable were painted black. Most of us will use a very dark grey instead. No decals are provided as the real deal didn't have any painted on markings.
| CONSTRUCTION |
 Getting into the build was quite easy. The parts generally fit
very well. Most of these parts simply require one to be fastidious about
cleaning up the removed bits of the sprue attachment points. Speaking of these
attachment points, some parts have a lot of them and most of them are fairly
large. Make sure that you have plenty of good sanding sticks handy for clean-up.
Getting into the build was quite easy. The parts generally fit
very well. Most of these parts simply require one to be fastidious about
cleaning up the removed bits of the sprue attachment points. Speaking of these
attachment points, some parts have a lot of them and most of them are fairly
large. Make sure that you have plenty of good sanding sticks handy for clean-up.
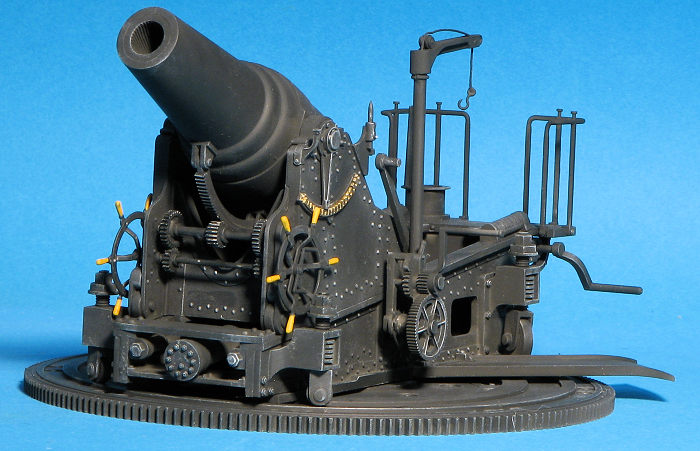
Another part of the kit is that there are gears that are supposed to mesh together. For this the parts need to be quite clean. It is important for the builder to think ahead during this kit as there are several parts where the instructions can lead you to have difficulty with installation. One of these areas is the section at the back where there are gears and shafts that are part of the mechanism to turn the entire gun. There are two gear/shaft assemblies that have to be installed quite early in the build before the entire side frames are in place. Otherwise you'll have the devil's time getting them in place.
The rest goes pretty quickly. I needed filler on the gun barrel and some other cannister shaped pieces. I also found that the steel braided wire they provided for the crane was a real pain to use. I'd replace it with thread as the wire is simply too stiff.
| COLORS & MARKINGS |
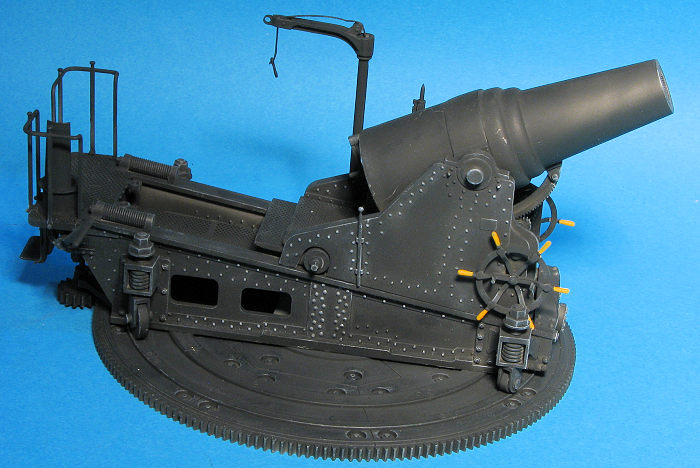
 Painting this beast is actually pretty simple. The instructions call
for black so I decided to use a near black, specifically Tamiya NATO black.
It took a while to make sure I had good coverage, but eventually it was all
nice and monochrome. Next a bit of detail painting was done as not
everything was black. The color view in the instructions was helpful in this
regard. I dry brushed much of the kit with white to break up the solid
color. There were no decals so that pretty much completed the build. As a
last note on the subject, it is fairly difficult to ensure you get paint
everywhere when you spray the completed kit. I found this out when I put it
under a strong light to photograph it.
Painting this beast is actually pretty simple. The instructions call
for black so I decided to use a near black, specifically Tamiya NATO black.
It took a while to make sure I had good coverage, but eventually it was all
nice and monochrome. Next a bit of detail painting was done as not
everything was black. The color view in the instructions was helpful in this
regard. I dry brushed much of the kit with white to break up the solid
color. There were no decals so that pretty much completed the build. As a
last note on the subject, it is fairly difficult to ensure you get paint
everywhere when you spray the completed kit. I found this out when I put it
under a strong light to photograph it.
| CONCLUSIONS |
This is a very nice kit. The instructions need to be a bit less vague, but reading ahead helps to make sure all the pieces went where they should. I had the model built in about a week. The rest of the time was painting it and doing the drybrushing. As mentioned, don't use the steel wire provided and use thread instead as it conforms a lot better. In all, it was a very nice break from the somewhat fiddly aircraft kits I've been doing lately.
| REFERENCES |
https://en.wikipedia.org/wiki/28_cm_howitzer_L/10
December 2023 Copyright ModelingMadness.com. All rights reserved. No
reproduction in part or in whole without express permission from the editor. If you would like your product reviewed fairly and fairly quickly, please
contact
the editor or see other details in the
Note to
Contributors.